

Use 90 ml (about 6 tablespoons) of milk and froth it with 10 to 15 ml (2 to 3 teaspoons) of cold air, by whisking, blending, or frothing until you see fine bubbles and a creamy cap. Cold foam works best when you start with well-chilled milk, then froth gently so the foam forms micro-bubbles instead of large bubbles.
Make cold foam by chilling milk, then frothing it until it thickens and looks like “wet paint” with small, uniform bubbles. For a coffee-friendly serving, aim for enough foam volume to top your drink, typically around a 2X increase versus the milk you started with. Spoon it directly onto iced coffee right after frothing for best stability.
Direct Cold-foam Recipe For Coffee

You can make cold foam for coffee with a small, repeatable milk-and-air routine: use 90 ml of milk, then add about 15 ml of cold air by frothing until you see fine bubbles and a creamy, surface-thick cap.
What Texture To Look For (Microfoam Vs Light Foam)
Microfoam-like cold foam looks smooth and dense, with fine bubbles you cannot easily “see” as distinct pockets. Light foam has larger bubbles and often separates, leaving watery milk underneath. For coffee topping, you want the dense look so it holds its shape on the surface longer.
Equipment You Will Need
At minimum, use a small container (cup or pitcher) and one frothing tool. Hand whisk works, handheld frother works fastest, and blender or shaker can produce volume, but you must stop early and check texture. Use a spoon to test consistency, the foam should cling rather than run.
How Cold Foam Forms: The Science Of Foam Stability
Cold foam is milk that has air dispersed into tiny gas bubbles, then stabilized by milk components so the bubbles do not merge and collapse quickly. When you froth milk, you are building foam structure (bubble size and density), and you are also deciding how long that structure will survive on top of cold coffee.
Foam stability is also a time-and-motion problem: even if the foam forms well, shaking the cup, pouring too aggressively, or waiting too long increases shear forces and bubble contact, which accelerates collapse. If you want the foam to survive the spoon-and-pour window on iced coffee, you need structure (fine bubbles) and a stabilizing film (from milk composition and proper frothing).
In practice, the fastest way to improve stability is to target fine bubbles and avoid over-agitation after foaming. If your foam turns from creamy to foamy with visible big bubbles, or it thins quickly, you have evidence that bubble size increased or the stabilizing film could not keep up.
Variables Shaping Foam Quality With Numbers
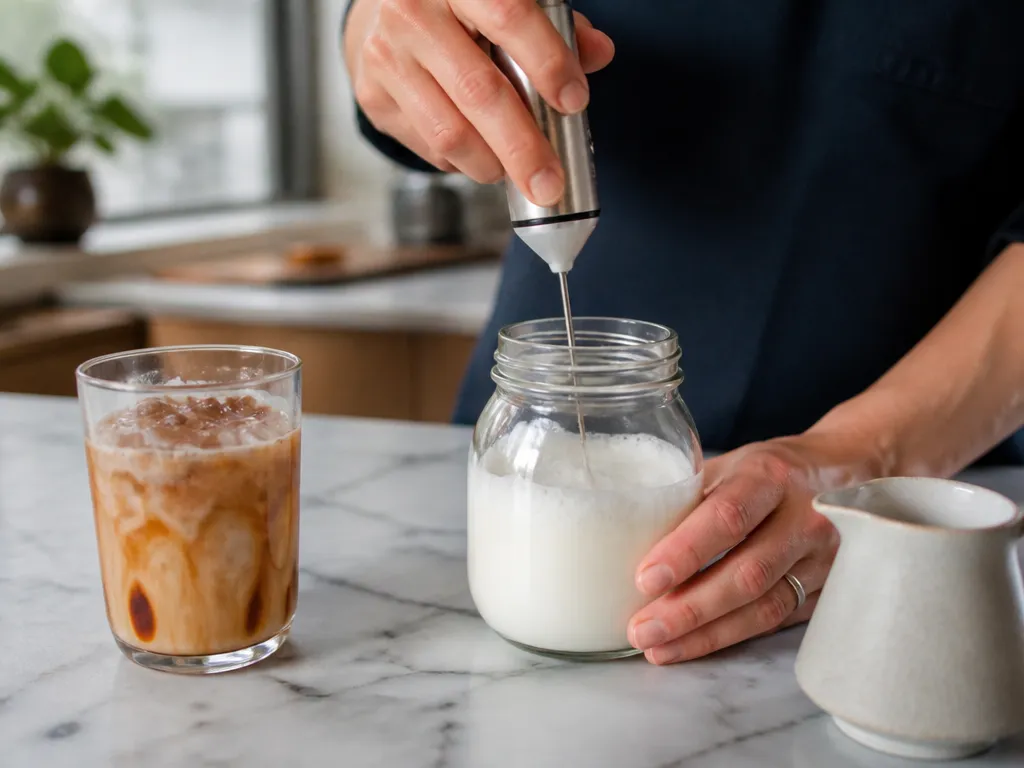
Foam quality is a math problem you can feel: bubble size, bubble density, and how long the cap survives depend on a few controllable variables (milk composition, temperature, and how aggressively you froth). If your foam looks foamy but collapses fast, you have a stability problem. If it looks airy but lacks a creamy cap, you have a micro-bubble problem.
| Variable | What to aim for (practical numeric ranges) | What it changes |
|---|---|---|
| Milk fat (dairy) | ~3% to ~4% fat (whole milk) | Faster, richer structure for a thicker cap |
| Milk protein (dairy) | ~3% to ~4% protein (typical dairy baseline) | Better stabilization so bubbles resist merging |
| Non-dairy milk (general) | Choose one that froths (often higher protein or added stabilizers) | Stability varies widely by brand and formulation |
| Starting temperature | Use well-chilled milk, then frost quickly | Colder milk helps hold foam longer before structure breaks |
| Frothing “air” target (from your base recipe) | ~90 ml milk and add about 10 to 15 ml (2 to 3 teaspoons) of cold air | Controls bubble density and cap thickness |
Temperature governs how long your bubble structure lasts. Use well-chilled milk so the foam has less time to destabilize before you spoon or pour it. Keep frothing brisk enough to reach a creamy cap quickly, then serve immediately.
Frothing time and intensity determine whether you get fine bubbles or big ones. Use the same air target each batch, then stop as soon as you see a surface-thick, creamy cap rather than continuing until it looks “whiter.” Over-frothing tends to drive larger, weaker bubbles that collapse sooner.
Milk choice is the biggest variable you cannot fully standardize, especially for non-dairy. Dairy is more predictable because fat and protein generally support foam stability. With non-dairy, the practical move is to pick a brand that froths well, then standardize everything else around it (same 90 ml milk base and the same air target).
Choosing A Frothing Method For Your Setup
Pick the tool by the texture you want, not by what happens to be in the drawer. A cap that holds a defined edge on top of iced coffee needs enough shear to break air into small bubbles; a handheld frother or a blender pulses at moderate speed gets you there. A looser, drinkable cap that blends into the coffee as you sip needs far less: a lidded jar or a whisk is sufficient.
A handheld milk frother is the right default for one or two drinks. Use a tall, narrow glass or a deep mug rather than a wide bowl, so the head stays submerged instead of flinging milk sideways. Run it for roughly 20 to 30 seconds, tipping the shaft up and down slowly to draw air in at the surface. Stop while the foam still looks glossy; the moment it turns matte and stiff you have gone past microfoam.
Batch work changes the answer. A blender handles two to four servings: pour in the cold milk and pulse in short bursts of about 5 to 10 seconds each, two or three pulses total, checking between them. Continuous blending over-aerates, and the foam collapses into a dense mousse that separates within minutes. A stand mixer on medium-high takes a few minutes and produces the most uniform, stiffest result of the countertop options, which suits making several drinks at once but is overkill for one.
No powered gear means a jar or a French press. A 500 ml jar filled with roughly 150 ml of milk, shaken hard for about a minute and then rested for 30 seconds to let the coarse bubbles rise, gives a serviceable cap. A French press gets you there faster with 15 to 20 firm plunges.
Automatic electric frothers are the one category where you must check the spec sheet before buying: many units only heat. A model with an explicit cold program runs a fixed cycle and shuts off, which removes the guesswork but also the control. An espresso steam wand is not an option at all, since it delivers hot steam.
| Tool | Best for | Approximate run | Texture |
|---|---|---|---|
| Handheld frother | 1 to 2 drinks | 20 to 30 seconds | Microfoam, spoonable |
| Blender | 2 to 4 drinks | 2 to 3 pulses, 5 to 10 seconds each | Thick, watch for over-blend |
| Stand mixer | Batches | A few minutes | Stiffest, most uniform |
| Jar, lidded | No gear | Shake 1 minute, rest 30 seconds | Light foam, softer cap |
| French press | No gear | 15 to 20 plunges | Light-to-medium foam |
Those timings are practical starting points, not fixed settings; tune them to your milk, since higher-fat and higher-protein milks reach a given thickness sooner. If you buy one thing, buy the handheld frother. It is the cheapest of the powered options and the only one that lets you watch texture form instead of guessing behind a lid.
Common Foam Failures, Costs, And Fixes
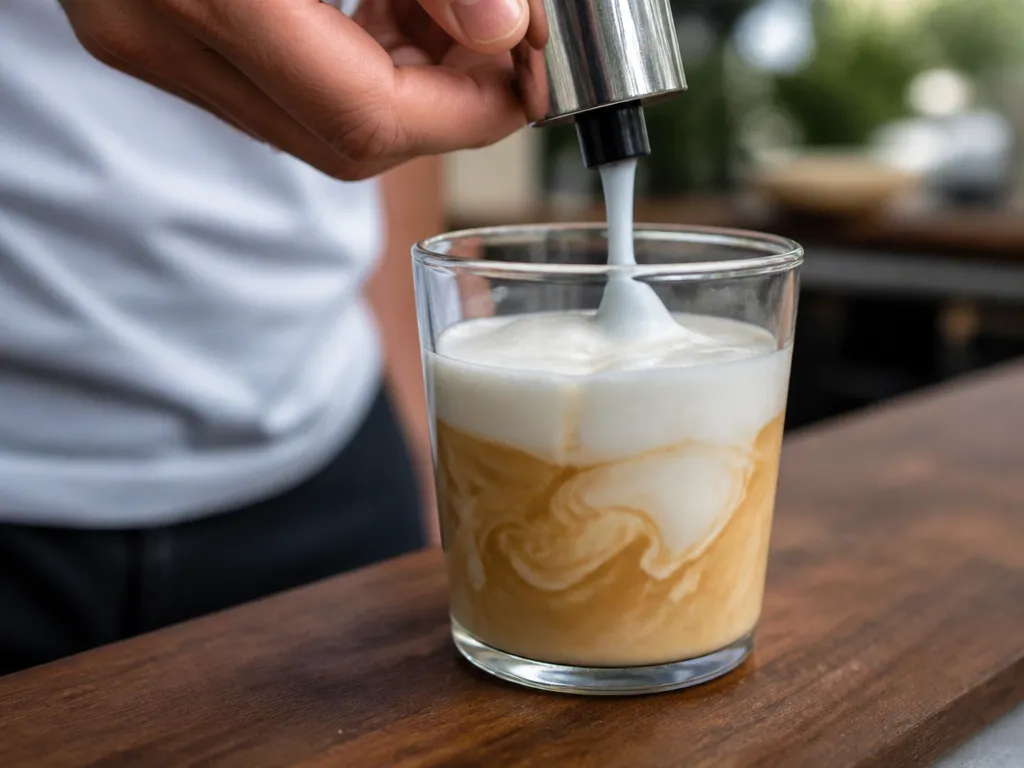
Almost every cold foam failure traces to one of four causes: milk that is not cold enough, milk without enough protein or fat to hold bubbles, too little shear to break air into fine bubbles, or too much milk for the air you added. Read the bubble size and the speed of collapse before you blame the equipment.
| Failure | Likely cause | Fix | Cost impact |
|---|---|---|---|
| Thin, watery foam that never caps | Warm milk, skimmed or low-protein milk, brief frothing | Chill the milk hard, move to whole dairy or a barista-style oat, froth until volume stops growing | Zero if it is technique; one carton if you switch milk |
| Cap forms, then drains in under a minute | Bubbles too large to hold; too little fat or protein at the bubble wall | More shear, plus a splash of higher-fat milk, and serve immediately | Zero to low |
| Big visible bubbles, soapy surface | Air pulled in too fast; frother head held at the surface | Submerge the head, pulse in short bursts, then tap and swirl the cup | Zero |
| Thin foam layer over clear milk | Blender jar overfilled, or a blend too short to aerate the whole volume | Fill the jar no more than about a third and pulse instead of one long run | Zero |
| Flat, dull, faintly bitter taste | Cold temperature mutes sweetness; too little sweetener | Sweeten before frothing, starting around 5 to 10 ml of syrup per 90 ml of milk (approximate) | Cost of the syrup |
| Gritty texture, weak cap | Granular sugar or cocoa powder that will not dissolve in cold milk | Use syrup, or dissolve the powder in a spoon of hot water first | Zero |
The pattern is that the failures cost nothing to fix and the fixes are physical, not financial. Thin foam means more cold and more shear. Collapsing foam means smaller bubbles and faster serving. Flat taste is a dosing problem, and powder in cold milk is a dissolving problem, not a recipe problem.
Gear Cost Versus Ingredient Cost
Split your spending into one-time gear and recurring ingredients, then weight the recurring line, because it is the one you pay every week. A jar and lid, a whisk, or a blender you already own sit at the bottom tier. A handheld battery frother is the cheapest purpose-built option. A countertop automatic frother is the most expensive, and it buys convenience rather than better foam, since a frother that shears air finely produces the same structure by hand.
On the ingredient side, barista-style non-dairy milk usually costs more per carton than standard, and syrups add another recurring line. If you make foam daily, one carton of the right milk beats upgrading hardware. Check current prices locally rather than trusting any figure quoted online, since carton and device pricing moves with region and season.
Edge Cases: When The Obvious Answer Doesn’t Fit
Some “cold foam” results change fast when your milk composition, environment, or batch size strays from the default behavior, so you need to adjust the air-to-milk ratio and the way you froth.
High-fat Or Ultra-skim Dairy Adjustments
If you use higher-fat dairy, foam can feel thicker and hold longer, but it can also get slower to aerate. Start by aiming for the same volume outcome you want on top of your coffee, then reduce how aggressively you froth if you see big bubbles instead of fine bubbles. With ultra-skim milk, the foam can turn thin because there is less body to stabilize bubbles; the fix is more shear (faster, more decisive frothing) while keeping the amount of cold air consistent with your base routine.
High Altitude Or Very Cold Environments
Altitude and extreme cold affect gas expansion and how quickly milk components behave during frothing. In very cold kitchens, your milk may start so cold that it foams unevenly (some bubbles form, then the structure struggles to knit). Use well-chilled milk, but give it a short window to even out temperature before you begin, and watch for fine bubbles and a creamy, surface-thick cap rather than relying on a fixed timing alone.
Allergies Or Alternative Ingredients
Non-dairy foams can be trickier because many plant milks are formulated for taste and stability in drinks, not for fine-bubble microfoam. Soy tends to behave more reliably than almond for foam structure, but the practical test is the same: aim for fine bubbles and a cohesive cap after you add roughly the same cold air amount as your baseline. If the foam tastes watery or separates quickly, switch to a plant milk labeled for barista use, then adjust by reducing aeration intensity until the texture stays creamy instead of foamy and loose.
Very Small Batches Or Scaled-down Recipes
Scaling down makes the air addition harder to measure by eye, so you can get foam that looks plentiful but collapses fast. For tight batches, keep the method identical and preserve your air-to-milk thinking (the routine you trust uses 90 ml milk and about 15 ml cold air) so texture stays consistent. If you must go smaller than that, scale both milk and air together, then froth only until you see the first creamy cap forming, since over-frothing small volumes increases bubble size and reduces stability.
Storage And Re-frothing: Lifespan And Tips
Cold foam is best treated as a “fresh build,” because the fine-bubble cap gradually collapses once you stop frothing. If you need to hold it, control temperature and minimize time between frothing and serving, then re-froth only if it still looks like a creamy cap rather than a puddle.
Practical rule: if it no longer looks like a creamy cap, treat it as liquid milk and restart. Cold foam is a timing game, the texture you’re aiming for is easiest to get when frothing and serving are close together.
Quick Summary
Make cold foam for coffee by frothing 90 ml of well-chilled milk while you add roughly 10 to 15 ml of cold air, stopping when you see fine bubbles and a creamy, surface-thick cap.
Next action: Do one controlled test now with 90 ml milk, aim for 10 to 15 ml air by frothing until you get a fine-bubble cap, then pour/spoon onto your iced coffee right away.
Frequently Asked Questions
How Long Does It Take From Start To Foam-ready, And What Affects That Timing?
Timing is mostly driven by how you add air and how fine the bubbles get. With a blender or frother-style method, you can usually finish in about 1 minute, because the shear is high and the foam structure forms quickly.
If your foam is taking longer, the usual reason is insufficient shear (the tool is not cutting air into small bubbles) or milk that is not cold enough to thicken into a stable cap. The practical move is to stop, check bubble size (fine bubbles and a creamy cap), then adjust the method rather than forcing it longer.
What Will Cold Foam Cost Compared With Buying An Espresso-based Drink?
The cost depends on what you already own. If you have a milk frothing tool, your ongoing cost is mostly milk (and any syrup or sweetener you add), while the “tool cost” is already sunk.
Because the evidence you provided does not include prices, I cannot give a trustworthy number for your area or your equipment. To estimate, add the per-batch milk cost (use your local price and your batch size) and compare it to the ready-made drink price you usually pay.
What Happens If I Do Nothing After Frothing, And I Just Let The Foam Sit?
Cold foam is best treated as a fresh build, because the fine-bubble cap will gradually collapse once you stop frothing. If it sits too long, you will lose the thick “cap” texture and it will blend into the drink instead of sitting on top.
The best practice is to keep the time between finishing the foam and assembling the coffee as short as your routine allows. If you must pause, control temperature and re-check whether the foam still has a surface-thick cap before using it.
Can I Use Cold Foam On Coffee That Is Not Iced, Like Hot Coffee Or Room-temperature Coffee?
Cold foam is designed for cold or iced builds because it needs to stay thick long enough to land on the drink. When the base is warm, foam structure breaks down faster, and you will get faster collapse and less of the “cap” look.
If you try it anyway, build quickly and watch texture. If the foam quickly turns thin or stops holding a defined surface, switch back to iced coffee for the expected result.
What Are My “Verification Checks” So I Know The Foam Is Correct (Not Just Foamy)?
Use two checks: bubble size and cap behavior. You want fine bubbles and a creamy, surface-thick cap that holds its shape rather than big, airy bubbles that look bubbly but unstable.
Stop the moment you see those signals, then assemble immediately. If your foam looks foamy but quickly spreads into the coffee, it is failing the stability check and the next batch should reduce the gap between frothing and serving, or adjust the frothing method.
When Should I Stop Troubleshooting And Get Help Or Switch Approach?
Switch approach quickly if your foam consistently fails the same step: for example, you keep getting large bubbles, or the cap collapses immediately even when milk is cold. At that point the problem is usually the tool and technique (shear level, how air is introduced), not “more time.”
Get help if your equipment is malfunctioning or you cannot achieve consistent shear and texture despite correct milk handling. Otherwise, the fastest path is to change to a different frothing method for your kitchen setup and target the same verification checks (fine bubbles, creamy cap).

- Espresso Bar Wedding: Ideas, Setup, Costs, and Tips for a Memorable Coffee Experience - November 11, 2026
- How Many Grams of Espresso Beans for a Double Shot? A Complete Brewing Guide - November 11, 2026
- Brasilia Espresso Machine: Features, Performance, Models, and Buying Guide - November 11, 2026
7 thoughts on “Practical How Do You Make Cold Foam For Coffee? Step-by-step”