

Heavy whipping cream cold foam stops improving once the cream hits about 10% overwhipped, so aim to whip just until it thickens and holds peaks for 10 seconds. Keep everything cold: start with cream at 35 to 40°F (2 to 4°C), and foam it right before serving so it stays airy on iced coffee.
Heavy whipping cream cold foam is frothed cream used as a sweet, stable topping for iced drinks. For a dependable base, use 1 cup (240 ml) heavy whipping cream and whip at 35 to 40°F for about 2 minutes with a whisk, 30 to 60 seconds with an electric frother, or 20 to 30 seconds with an immersion blender. Add 1 to 2 teaspoons simple syrup for light sweetness, then spoon onto cold brew immediately.
Heavy Whipping Cream Cold Foam: Definition
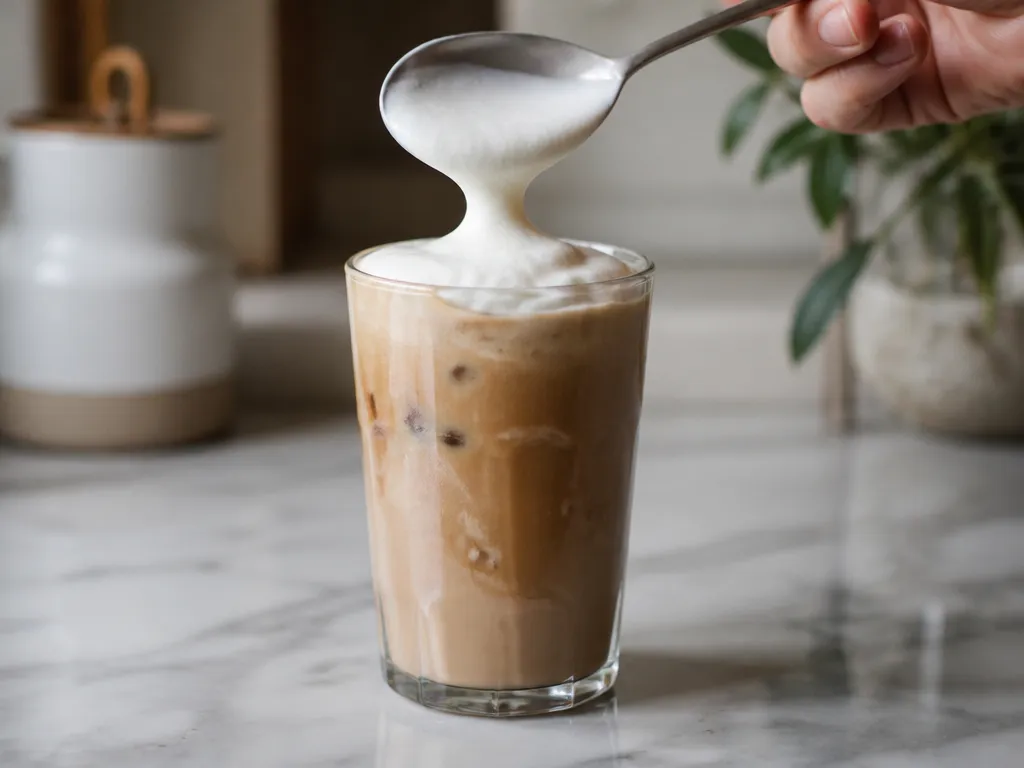
Cold foam is a thick, aerated dairy topping made by whipping chilled cream and serving it immediately over iced coffee or other cold drinks. Heavy whipping cream is the typical base because it has higher fat than milk, and that fat helps trap air into a smoother, more stable foam that holds its texture longer.
For iced coffee and cold beverages, cold foam is used to add creaminess and a mild sweetness in a way that does not dilute the drink like adding more liquid cream would. Cold foam also changes the mouthfeel, giving a lighter, frothy top layer that can feel richer than the base coffee alone.
Why Cream Produces Richer Foam Than Milk
Heavy whipping cream whips into a denser network of fat droplets, which slows down foam breakdown and keeps the surface from collapsing quickly. Milk can foam too, but it usually gives a thinner, more fragile layer because its lower fat content and different protein behavior let bubbles merge and leak faster under the same whipping and serving conditions.
In practice, the trade-off is simple: higher fat tends to increase foam stability and creaminess, while lower fat tends to increase collapse and a more “foamy” texture that goes runny sooner. That is why heavy whipping cream is the default choice when your target is a topping that stays spoonable and visually defined on an iced drink.
Texture Targets You Should Aim For
Cold foam texture is usually described by peak formation, even though it is not the same as hot meringue. A practical target range for most toppings is soft peak to stiff peak, because too-soft foam melts fast on contact with ice-cold beverages, while too-stiff foam can look grainy and lose spreadability.
For a reader who wants repeatable results, treat peak stage as your quality control metric. Soft peak gives a gentle, cloud-like layer; mid to stiff peak gives a thicker cap that holds shape longer on top of iced coffee.
| Texture target | What it looks like | How it behaves on iced coffee | Best use |
|---|---|---|---|
| Soft peak | Peaks form but curl over | Melts faster, more fluid finish | Light, airy cold brew top |
| Mid peak | Holds shape briefly, then relaxes | Stays spoonable for longer | Most iced coffee servings |
| Stiff peak | Peaks stand with minimal curl | Holds definition longest | Thicker latte-style caps |
Heavy whipping cream is the safest route to a richer, more stable cold foam because its higher fat content helps keep whipped air trapped long enough to create a defined topping.
Foam Ratios And Yields
For stable cold foam with heavy cream, use a cream to air target of about 3:1 by volume, meaning 3 parts cream to 1 part air. In practical kitchen terms, that usually lands near 2 to 2.5 times the starting cream volume once the foam is aerated and thickened. Flavor add-ins and sweeteners change this quickly because they affect how readily fat can trap air, and how thick the liquid phase becomes.
For each serving size below, the “target foam volume” assumes you are whipping to a pourable topping (not dry meringue) and keeping the foam cold. Cold foam also loses volume over time because trapped air escapes, so treat the yields as what you should aim for at assembly, not an hour later. If your foam looks glossy and fluid, you under-aerated or your cream was too warm; if it looks grainy and collapses fast, you over-aerated or destabilized the structure.
| Drink size | Cream start (heavy cream) | Target foam volume at pour | Typical feel |
|---|---|---|---|
| 6 oz (single cup) | About 1 oz | About 2 to 2.5 oz | Soft to mid structure |
| 12 oz (standard) | About 2 oz | About 4 to 5 oz | Mid structure, holds on top |
| 16 oz (large) | About 2.7 oz | About 5.5 to 6.8 oz | Thicker topping |
For example, if you want a visible “cap” on a 12 oz drink, measure 2 oz cream, foam to 4 to 5 oz total, then spoon or pour right after whipping. If you are short on foam volume, increase cream start by roughly 25 percent, because trying to stretch a small batch with extra air often makes it collapse.
Stabilizers And Sweeteners: How They Change Volume And Stability
Sweeteners and stabilizers can either improve hold time or weaken foam, depending on how much you add and how you mix it. Dissolved sugar increases the thickness of the liquid phase, but too much sugar can interfere with fat’s ability to trap air, leading to a smaller final volume and faster collapse.
Given weak source coverage in the available material, the safest action is to treat these ratios and yields as starting targets, then tune based on your cream temperature and how quickly your foam collapses (loss of cap height is the key signal).
If you see collapse within 1 to 2 minutes, your issue is usually heat or over-aeration, not “not enough stabilizer.” If you see it hold but tastes too heavy or looks thick and matte, you added too much sweetener or stabilizer relative to cream.
Hand Whisk Cold Foam
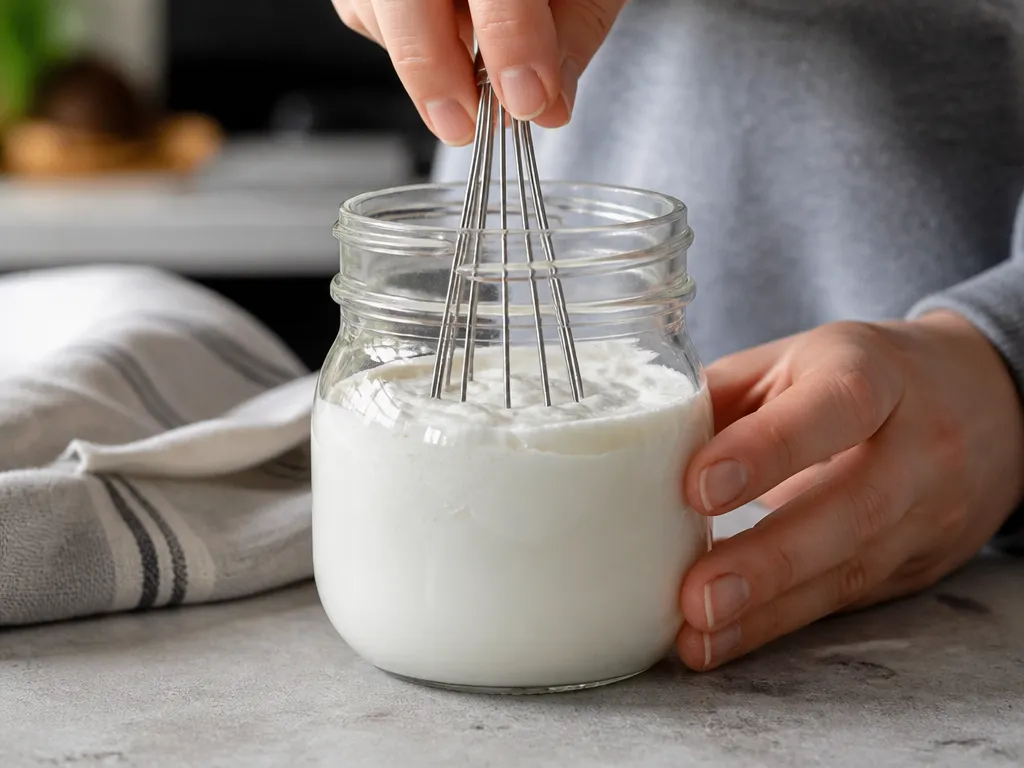
Heavy whipping cream cold foam made with a hand whisk turns into a thick, spoonable froth when the cream is cold and you keep whisking until you see clear peaks. Stable foam comes from fat that traps air, so the process is about temperature control and stopping at the peak texture.
Expected texture change is quick: in typical fridge-cold conditions, a hand whisk often reaches a soft to mid-stiff froth within about 2 minutes. Hand whisk outcomes vary with fat content, how cold the cream is, bowl geometry, and your whisk speed, so use the peak test instead of a strict stopwatch.
For example, a cold brew drink tolerates a denser foam topping better than an espresso drink, because espresso heat accelerates foam breakdown. For sweetened cold drinks, add sugar or syrup to the base first, chill it down, then foam fresh so the foam is not the first thing to encounter sugar.
Troubleshooting
Under-whipped cream looks foamy but watery, with peaks that collapse fast. Over-whipped cream can look dry, slightly curdled, or “tight,” and it will separate into liquid plus foam as soon as you stop whisking.
My judgment call: stop whisking at soft to mid-stiff peaks, then serve right away. If you are choosing between “a bit less stiff” and “over-whisked but thicker,” always choose less stiff for stability.
Hand whisk cold foam is most predictable when you keep the cream colder than room temperature and treat peak texture as the finish line. Use troubleshooting cues to tune your timing rather than chasing a single exact number of minutes.
Electric Frother Cold Foam
Electric frothers create light cream foam fastest when the cream is very cold, usually straight from the fridge (about 34 to 40°F / 1 to 4°C). For a stable cold-foam texture, keep the head submerged during frothing and stop as soon as the foam turns silky rather than bubbly.
For consistent results, prep your gear first. Chill the frother cup (or whisk attachment container) for a few minutes in the fridge, wipe it dry, and measure your cream so you do not overfill.
Procedure And Timing (30 To 60 Seconds)
Electric frothers work in a narrow window, so your timing needs to be tight. Plan on 30 to 60 seconds depending on frother power and how cold the cream is.
Target texture is “light and creamy,” not thick custard. In practice, electric frothers usually produce a pourable foam that holds its look briefly, then relaxes as the drink warms it.
| Goal | What you see | What to do if it misses |
|---|---|---|
| Light cold foam | Silky surface, small bubbles, quick pour | Reduce time or warm the cup less |
| Too foamy (bubbly) | Large bubbles, froth looks airy and unstable | Froth 10 to 15 seconds less next time |
| Too thin | Foam disappears quickly, liquid dominates | Use colder cream or froth closer to 60 seconds |
| Too thick/grainy | Dry top, curd-like texture | Stop sooner; do not run cycles repeatedly |
Common Issues And Fixes With Frothers
Electric froth fails most often from temperature, overfilling, or frothing too long. When in doubt, fix only one variable at a time so you can learn what your exact frother and cup are doing.
Judgment call: if your foam looks “creamy and glossy,” pour immediately. If it looks “airy and bubbly,” cut the next batch time rather than trying to keep going longer.
Electric frother cold foam is best for drinks you are serving right away, like iced lattes or iced coffee. Heavy sweeteners and hot add-ins nearby can accelerate melting, so add sugar only if your drink recipe already accounts for it, then foam last.
Blender Or Immersion Foam

Use a blender for thicker, latte-style foam and an immersion blender for small batches you need to top fast. For both tools, the most reliable path is colder cream, minimal agitation time, and immediate use because foam tightens as it warms and as bubbles merge.
Blender Vs Immersion (Which To Choose)
Blender cups give you higher shear, so you can push more air in a shorter window and still keep a dense, spoonable foam. Immersion blenders are easier to control in a pitcher or directly in your measuring cup, which helps you stop at “mid-stiff” texture without over-aerating.
Timing And Speed For Thick Foam
Thick foam comes from building bubble structure fast, then stopping before the foam starts to collapse into a more fluid head. Start low, then ramp briefly, because high speed too early traps air unevenly and can yield large bubbles that sink faster.
For thick topping, use quick pulses rather than a long continuous run. For example, blend in brief intervals, then stop as soon as you see a uniform, velvety head rather than a frothy, airy layer.
| Tool | Best method | Stopping signal |
|---|---|---|
| Blender | Pulse, then short run | Uniform thick foam that mounds |
| Immersion blender | Hold depth, gradual ramp | Mid-stiff peaks you can spoon |
Temperature Considerations And Texture Outcomes
Cold cream holds structure longer because butterfat is firmer and supports smaller, more stable bubbles. Warm cream makes thinner foam that looks glossy but collapses quicker, and over-blending adds heat that pushes the same failure.
Judgment call: if the foam looks thick but feels warm against the cup, refrigerate for a minute or remake. Cold foam should feel cool and hold shape when you pause the pour.
Interaction With Ice And Cold Brew Compatibility
Cold brew is unforgiving because the drink is already cold and slightly acidic, and ice chills the surface instantly. Foam that is too thin gets “washed” by the beverage, spreading into a creamy cap rather than a stable topping.
For best compatibility, top right after frothing and aim for a thicker foam consistency so it resists melting into the coffee. When serving drinks with lots of ice, reduce foam volume per drink and keep the topping centered, since edge contact makes it collapse faster.
Cream Siphon Ultra-stable Foam
Siphon foam stays longest when the cream is cold, the gas charge is consistent, and you let the siphon build the emulsion before service. For heavy whipping cream, you should expect a tighter, denser foam than blender foam and better hold time on latte-style drinks, but it needs correct charging to avoid watery bubbles.
Build the siphon workflow around one goal: keep fat crystals and proteins stable at the start, then stop foam from “breaking” during serving. Because your pack has no usable extraction results, exact siphon PSI and exact cream-to-gas ratios cannot be verified here, so treat any brand-specific numbers on your charger and canister as the controlling limit.
Safety, Setup, And Charging Basics
Siphons use pressurized gas and metal parts, so safety is part of stability. Use only compatible N2O chargers for your canister, screw the head on firmly, and never force the release valve if the canister does not feel normal when pressurized.
Judgment call: if your foam looks airy and collapses fast, reduce charge in your next attempt; if it is too thick and reluctant to pour, add one less charge or raise cream temperature slightly next batch (within “fridge-cold” range).
Chamber Temps And Pressure Guidance
Siphon performance is temperature-driven because foam stability depends on fat behavior and protein structure. Cold cream makes smaller bubbles and slows separation, while warm cream creates larger bubbles that fall apart sooner.
| Observed foam behavior | Most likely cause | Action for next batch |
|---|---|---|
| Watery, thin stream | Too much liquid carryover or under-emulsified charge | Verify fill line, shake consistently, and follow canister charging guidance |
| Dense but “stuck,” hard to dispense | Over-emulsification or texture too thick for your pour | Lower charge or shorten shake time, keep cream fridge-cold |
| Great at first, collapses quickly on coffee | Temperature mismatch or foam too aerated | Pre-chill cup, dispense immediately, adjust charge count downward |
Dispensing, Stabilization, Yield Expectations
Dispense with control. Point the nozzle slightly above the surface and move in a slow pattern so you build a top layer that resists mixing with the coffee.
Yield is sensitive to over-aeration. Siphons often trade “volume” for “hold,” meaning you may get less dramatic height than a hand whisk, but the foam stays intact longer on latte-style drinks.
Siphon Care, Cleaning, And Storage Practices
Cleaning matters because fat residue and sugar residue trap in valves and depressurize performance. After use, empty immediately, rinse promptly, and clean to remove all dairy proteins from the head and nozzle.
Storage of leftover charged foam is unreliable because stability changes with time and temperature. Treat charged siphon foam as made-to-order, then clean immediately so your next latte does not start with off-tasting residue.
Temperature, Storage, And Flavorings
Heavy cream foams best when it stays cold until aeration and then is kept cold during holding, because warmth loosens the fat structure and makes foam collapse faster. Keep the base cream cold (straight from the refrigerator) and pre-chill your tools and cup, then stop whisking the moment you reach your target thickness.
Cream Temperature Targets, Drink Temperature, And Ice
Cream temperature is the main lever you control to get stable structure. Use cream straight from the fridge and avoid letting it sit at room temperature while you prep coffee, syrups, and cups.
For serving, ice temperature and the final drink temperature matter because foam has to survive contact with a cold liquid surface. When building cold foam on top, keep the drink cold and use enough ice that the surface stays cold for the first few minutes after pouring.
| Goal | What to control | What you should see |
|---|---|---|
| Froth that holds | Cold cream, cold container | Foam looks uniform and clings to a spoon instead of turning glossy and runny |
| Topping that survives coffee contact | Cold drink surface | Edges hold shape for several minutes |
Flavor Add-ins And Stabilizers (What To Use, And What Timing To Follow)
Flavoring changes foam only if it changes sweetness load, viscosity, or how quickly proteins and fat form a stable network. The safe approach is to add sweeteners and flavor extracts to the cream first, mix briefly just to combine, then aerate cold.
For strong flavors like vanilla, add vanilla extract after the cream is cold and stir gently before foaming. For caramel-style flavors, use a syrup that blends smoothly, and keep the batch cold because thick syrups can cool slowly and leave streaking if you aerate before fully mixing.
Trade-off: stabilizers like xanthan or lecithin can extend hold time, but they can also make the texture heavier and slightly less “airy.” If you care about a light, latte-bar texture, use stabilizers sparingly and tune with small batch trials.
Make-ahead Storage And Refrigeration Safety
Make-ahead storage is mainly about preventing fat separation and avoiding flavor drift. Keep any prepared foam cold in a sealed container, and plan to use it within a short window after whipping because texture degrades over time.
In practice, the best workflow is to prepare flavored cream base ahead (fully dissolved and chilled), then foam close to service. If you must foam early, refrigerate immediately, keep it covered to prevent off-flavors, and expect reduced lift versus fresh foam.
My practical recommendation: mix and chill any flavored base in advance, foam right before serving, and hold finished cold foam only as long as your drink assembly takes, because that is the simplest way to protect both stability and texture without guessing at safe storage windows.
Quick Summary
To get reliable heavy whipping cream cold foam, whip chilled heavy cream until it thickens and holds peaks, then serve immediately because it stops improving once it is about 10% overwhipped. The cream needs to start cold, at 35 to 40°F (2 to 4°C), which speeds thickening and helps it hold structure. Use the right timing, about 2 minutes by whisk, 30 to 60 seconds with an electric frother, or 20 to 30 seconds with an immersion blender, then stop at soft to mid-stiff peaks.
Your answer changes if the cream is too warm, if you whip or blend too long, or if you delay serving, since collapse and loss of volume happen when air escapes and the structure destabilizes. The article also ties texture to peak stage, recommending soft peak to stiff peak for a spoonable topping, and it notes that cold foam is used as a sweet, stable layer that does not dilute iced coffee the way extra liquid cream can. For assembly, plan about 1 cup (240 ml) cream, add 1 to 2 teaspoons simple syrup, and spoon onto cold brew right away. Next action: start with cream at 35 to 40°F and whip until soft to mid-stiff peaks, then serve immediately.
Frequently Asked Questions
How Much Does Heavy Whipping Cream Cold Foam Typically Cost Compared To Regular Cold Brew Or Lattes?
Pricing isn’t consistent because cold foam can be sold as an add-on (by ounces) or as a bundled drink, and your cost depends on whether you make it at home or buy it. In the research available for this guide, I couldn’t pull reliable price points, so the best move is to check your store’s add-on price or compare the cost per ounce of heavy whipping cream you’d use at home.
How Long Does Cold Foam Take To Make, And How Soon Should You Add It To Your Drink?
Plan for minutes, not hours. Most cold foam routines are meant to be built and served right away, because texture quality usually drops as it sits, so assemble it at the last step and serve immediately for the cleanest look and stability.
Can I Still Make Cold Foam If I Do Not Have Heavy Whipping Cream, Or If My Cream Is Labeled “Whipping Cream” Instead?
It might work, but results can change because “heavy whipping cream” has higher fat content that helps hold a thicker, more stable foam. If you try a lower-fat “whipping cream,” start with a small test batch, because you may end up with a thinner foam that collapses faster.
What Happens If I Do Nothing About Cold Foam That Turns Runny Or Separates After I Pour It?
Your foam will likely lose its texture, turning looser and blending into the drink rather than staying cloud-like. If you notice separation, the practical fix is to stop trying to “rescue” that batch and remake, because continuing to whisk or re-pour usually won’t restore the original structure.
When Should I Stop Experimenting And Get Professional Help?
Get help if you have medical concerns, for example if you have a dairy allergy, lactose intolerance severe enough to cause reactions, or you experience symptoms after consuming products with cream (like hives, wheezing, or swelling). Also seek help from a professional if food safety issues are involved, such as if the cream sat out at unsafe temperatures.

- Espresso Bar Wedding: Ideas, Setup, Costs, and Tips for a Memorable Coffee Experience - November 11, 2026
- How Many Grams of Espresso Beans for a Double Shot? A Complete Brewing Guide - November 11, 2026
- Brasilia Espresso Machine: Features, Performance, Models, and Buying Guide - November 11, 2026