
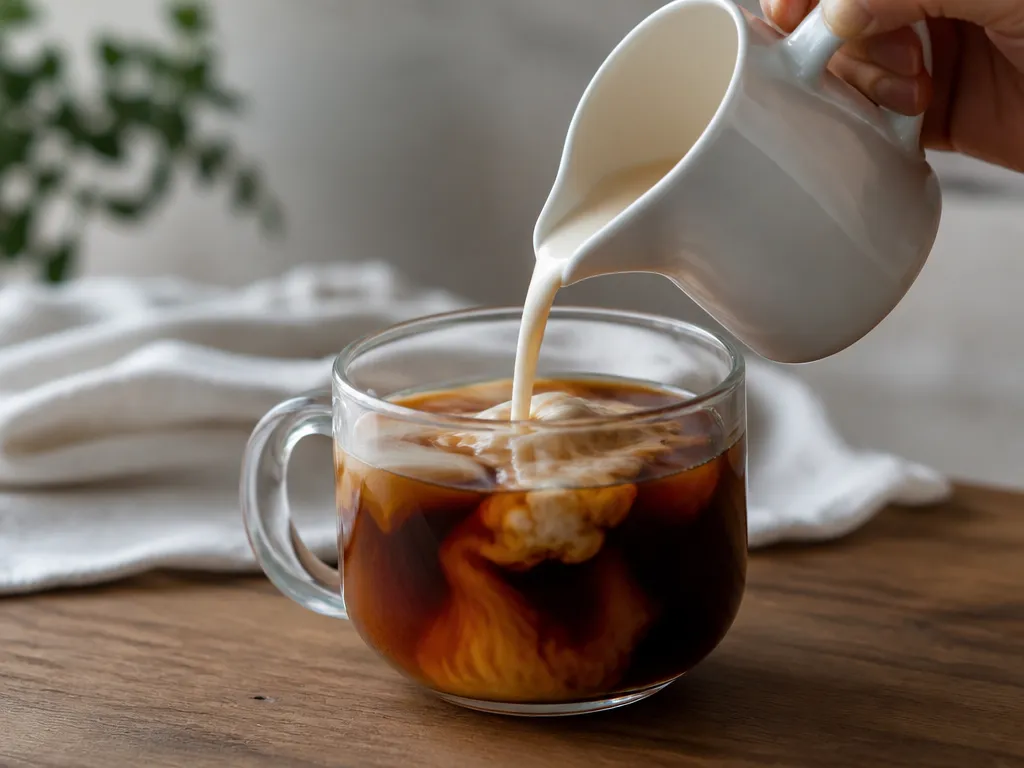
Whip heavy cream until it reaches soft peaks, when the tip bends over and the mound relaxes slowly. Stop there. Stiff peaks can turn grainy and are less forgiving on hot coffee.
For a standard batch, use heavy cream with a modest amount of sugar and optional vanilla. For more holding power, use gelatin according to its package directions. For a dairy-free version, use chilled full-fat coconut cream. For a foam cap, steam milk until it is glossy and finely bubbled. Keep the bowl, cream, and tools cold whenever the kitchen is warm.
Direct Answer: Four Cream Toppers For Coffee

Choose a topper according to the drink temperature, the texture you want, and how long the coffee must wait before serving. Whipped cream gives a spoonable cap, while microfoam gives a pourable layer.
Four Topping Methods At A Glance
| Method | Best for | What you get in the cup |
|---|---|---|
| Classic whipped cream | Hot coffee served promptly | Soft, cloud-like topping that holds briefly |
| Stabilized whipped cream (gelatin) | Hot or iced coffee that must wait | More body and less collapse |
| Dairy-free coconut cream whip | Iced drinks and dairy-free preferences | Rich, spoonable topping when well chilled |
| Milk foam microfoam | Cappuccino-style and latte-style drinks | Glossy, pourable foam rather than a dollop |
When To Use Each Method (Hot Vs Iced, Cappuccino Vs Latte)
For hot coffee, classic whipped cream is quick but time-sensitive. Use stabilized cream when the drink will sit, or when you want a thicker cap. For iced coffee, stabilized cream and coconut cream usually keep their shape more easily because the drink is cold.
For cappuccino, microfoam matches the drink’s airy, integrated texture. For a latte, use microfoam for a smooth cap or stabilized whipped cream for a distinct spoonable layer.
How Whipped Cream Forms A Stable Coffee Top
Whipped cream holds air inside a network of partially structured fat. Sugar can improve the texture, while heat softens the fat and makes the topping relax more quickly on hot coffee.
The best coffee topper is airy but cohesive, with a smooth surface and no watery ring. Match the method to the drink temperature and serve as soon as the topping reaches the right texture.
Classic Whipped Cream: Ingredients And Steps

Classic whipped cream is the simplest spoonable topping. Use cold heavy cream, add a measured amount of sugar, and stop at soft peaks so the cream stays glossy.
Ingredients And Exact Quantities, Required Equipment
For a standard batch, use a cup-sized portion of heavy cream, a small amount of sugar adjusted to taste, and optional vanilla. If you need a firmer topping for iced coffee, use the upper end of the sugar range recommended by your chosen recipe.
Use a chilled bowl and cold beaters. A hand whisk or electric mixer works, along with a rubber spatula. A thermometer is optional and is not needed for the classic method.
Step-by-step Method And Timings, Visual Cues
The mixing time depends on cream temperature, batch size, and mixer power. Use the visual cue rather than the clock. Soft peaks should look shiny and creamy. If the surface looks dry or grainy, the cream is over-whipped.
Stabilized Whipped Cream: Gelatin Method
Gelatin-stabilized whipped cream holds its body longer than classic whipped cream. Use it when the drink will sit or when you want a firmer topping. Follow the gelatin package directions for the correct proportion and handling instructions, since products vary.
Ingredients And Ratios (Cream, Gelatin, Water)
Begin with a standard batch of heavy cream. Add a small, measured amount of gelatin bloomed in cold water, then dissolve it with warm water if the package instructions call for that method. Sweeten with sugar and flavor with vanilla if desired. Verify the gelatin-to-liquid ratio on the package before preparing the batch.
| Ingredient | Amount for a standard batch | Role |
|---|---|---|
| Heavy cream | One standard batch | Fat network that traps air |
| Gelatin | Use the package-recommended amount | Sets structure as it cools |
| Cold water | Use the package-recommended amount | Blooms gelatin |
| Warm water | Use the package-recommended amount if required | Dissolves gelatin |
| Sugar | Optional, to taste | Sweetens and supports texture |
| Vanilla | Optional, to taste | Flavor |
Dissolving Gelatin And Cooling, Then Whipping And Stabilization
Bloom the gelatin in cold water according to the package directions. Once hydrated, dissolve it fully without boiling. Let it cool until warm rather than hot. Hot gelatin can loosen or partially melt the cream when added.
Whip the cream to soft peaks. With the mixer on low, add the dissolved gelatin in a thin stream, then continue only until the cream is smooth and pipeable. Stop at soft peaks. Over-whipping can make the finished topping grainy or rubbery.
Texture And Stability Targets
Look for glossy folds that hold a gentle curl at the tip. If the cream looks curdled or stringy, the gelatin may have been too hot or incompletely dissolved. If it is loose, chill the bowl briefly and whip only until the cream regains body.
Dairy-free Coconut Cream Topping

Coconut cream makes a dairy-free, spoonable topping when the coconut fat is well chilled. Use full-fat coconut cream rather than a thin coconut milk beverage, and verify the product’s fat content and consistency if the can does not separate clearly.
Flavor and serving options that work with coconut: Add a little sifted cocoa, cinnamon, or another dry flavoring after the cream has thickened. Iced coffee usually gives coconut topping more time to hold its shape than a hot drink.
Timing rule: Keep whipped coconut cream cool while you portion drinks. If it loosens, re-whisk gently until it regains shape, stopping before it becomes grainy.
Milk Foam Microfoam For Coffee Drinks
Microfoam is steamed or frothed milk with small, evenly distributed bubbles. It pours smoothly and looks velvety rather than dry or bubbly. Keep the milk moving and stop heating before the foam becomes stiff.
Dairy And Non-dairy Options
Whole milk generally gives rich, smooth foam. Barista-style oat and soy products are often designed to handle steaming more consistently than some standard non-dairy drinks. Product performance varies, so use the product’s steaming guidance and keep the brand consistent when you want repeatable results.
Equipment And Temperatures
You need a steam wand or handheld frother. A thermometer helps you repeat the result. For milk, use the temperature range recommended by your equipment and milk manufacturer. A common café target is a warm, drinkable range around sixty degrees Celsius, but the ideal setting varies by milk, equipment, and taste. If you use a thermometer, verify its accuracy.
| Use case | Milk amount | Target texture | Temperature target |
|---|---|---|---|
| Latte (hot) | Use the amount required by your cup | Glossy, pourable microfoam with small bubbles | A warm, drinkable steaming range; verify with your milk and equipment guidance |
| Flat white (hot) | Use less milk than for a latte | Very fine foam with a high milk-to-foam integration | A warm, drinkable steaming range; avoid scorching |
| Iced latte (cold microfoam) | Use enough milk for the drink and foam layer | Thicker foam for spooning or immediate pouring | Steam according to the product guidance, then chill |
Whipping Or Steaming Steps, Texture Targets, Timing
Swirl the pitcher, then place the steam tip just below the milk’s surface to introduce air. Listen for a soft tearing sound rather than a loud roar. As the volume expands, lower the tip slightly and keep the milk circulating. Stop, wipe and purge the wand, then tap and swirl the pitcher to break larger bubbles.
The finished milk should look smooth and shiny, with fine bubbles that do not separate into watery streaks. Steaming time depends on the wand, milk volume, and starting temperature, so use texture and temperature rather than a fixed timer. Pour immediately.
For iced drinks, cool the foam promptly. Hot microfoam can thin quickly when poured over a heavily iced drink, so pour it at once or spoon it on last.
Flavoring, Finishing, And Serving Tips
Add flavor without loosening the topping. Dry or thick ingredients are easier to control than watery additions. Add dissolved sugar early enough to blend, then stop mixing as soon as the cream reaches the desired peak stage.
Flavor Enhancers And Add-ins
Use one main flavor per drink. Vanilla works in classic and stabilized cream. Sift cocoa before adding it, or mix it with a little sugar to prevent clumps. Use thick caramel or chocolate sauces sparingly because extra liquid can soften peaks.
Dry cinnamon, nutmeg, or a small amount of citrus zest can be folded in gently. A tiny pinch of salt can sharpen the coffee flavor, but too much will make the topping taste savory.
Finishing Touches: Cocoa, Cinnamon, Drizzle
Garnish immediately before serving. Dust cocoa or cinnamon through a fine mesh. Use thin lines of chocolate or caramel rather than heavy pools, which can weigh down a whipped surface.
| Finisher | Best for | How to apply |
|---|---|---|
| Unsweetened cocoa dust | Classic and stabilized cream | Sift lightly at the end |
| Cinnamon sugar | Hot or iced lattes | Mix dry and sprinkle evenly |
| Chocolate drizzle | Mocha-style coffees | Use thin lines rather than blobs |
| Caramel drizzle | Vanilla or nut flavors | Use short, light arcs |
Serving Guidelines By Drink Type
For hot cappuccino and café-style drinks, add the topping after the drink is made and garnish immediately. For iced coffee, the cold surface gives whipped toppings more time to hold, but keep the cap clear of the straw path. A latte can take either a clean dollop or a thin microfoam layer, depending on whether you want a distinct topping or an integrated finish.
If you are serving several cups, prepare the topping in a chilled batch and finish each drink at the last moment. A wet edge or loss of gloss means the topping is beginning to relax.
Best-use Scenarios And Troubleshooting
Choose between a spoonable topping and pourable foam first. Then consider whether the drink is hot or iced and whether it must wait before serving.
Best-use Scenarios: Hot Vs Iced, Cappuccino Vs Latte
Use classic whipped cream for hot drinks served promptly. It can also work on iced coffee when kept cold and stopped at soft peaks.
Use gelatin-stabilized cream when the drink must sit. For a dairy-free option, chilled coconut cream is the practical choice when the product is thick enough to whip.
Use microfoam for cappuccino-style drinks and for lattes where the foam should blend into the coffee. For an iced latte, make a thicker foam and apply it promptly so it does not turn patchy.
Common Problems And Fixes
Symptom: grainy, dry texture and fast collapse.
Cause: over-whipping.
Fix: stop mixing. If the cream is only slightly over-whipped, fold gently and use it promptly. Otherwise, start again and stop at soft peaks.
Symptom: liquid pooling around the cream.
Cause: warm ingredients, a warm drink, or a topping held too long.
Fix: chill the ingredients, apply the topping immediately, or switch to stabilized cream.
Symptom: peaks do not hold.
Cause: warm cream or coconut fat, an unsuitable product, or insufficient whipping.
Fix: chill the base and bowl, then whip until soft peaks form without pushing into graininess.
Symptom: microfoam looks bubbly or forms islands.
Cause: uneven aeration or overheating.
Fix: introduce air gently, keep the milk circulating, remove large bubbles with a tap and swirl, and pour immediately.
Edge Cases To Anticipate
Very hot or watery coffee will thin a whipped layer quickly. Use stabilized cream when a delay is unavoidable, or use microfoam if you want a layer that integrates with the coffee.
Strong or sweet coffee may need less added flavoring. If you must prepare ahead, refrigerate the topping and assemble close to service. Re-whipping can help with mild separation, but a fully broken topping is usually best replaced.
Storage And Make-ahead Tips
Store toppings in airtight containers in the refrigerator and use them within a short period for the best texture. Cold storage slows separation but does not prevent it indefinitely. Keep toppings chilled until the drink is ready to serve.
Quick Summary
Whip heavy cream to soft peaks and stop there. The remaining choice is whether you need a quick classic topping, extra stability, a dairy-free alternative, or a pourable milk foam.
Start with a small batch, test the texture on one drink, and adjust the cream temperature, whipping stage, or stabilization method before preparing more.
Frequently Asked Questions
How Far Ahead Can I Make The Cream Topping Without It Losing Its “Coffee Top” Texture?
Keep it refrigerated and assemble the drink as close to serving as possible. Cold storage slows weeping, but the topping will eventually lose definition, especially after it meets hot coffee. Stabilized cream generally gives you more working time than classic cream.
If the topping looks loose or wet, chill it and re-whip briefly if the separation is mild.
What Should I Do If My Whipped Cream Looks Grainy, Then Slides Off The Coffee Instead Of Sitting On Top?
Graininess usually means the cream was over-whipped. Stop mixing immediately. If it is only slightly grainy, fold gently and use it promptly. If liquid has separated from the solids, starting again with a cold, fresh base is more reliable.
Can I Sweeten The Topping Right Before Serving, Or Will Sugar “Break” It?
Sweeten consistently with the method you are using. Dissolved sugar is easiest to distribute before the final peak stage. If you need a late adjustment, use a small amount of thick flavoring, fold gently, and test it on a spoonful before topping the drink.
How Do I Verify That My “Soft Peaks” Or “Microfoam” Is Actually At The Right Stage?
For soft peaks, lift the whisk. The peak should bend over, and the cream should look smooth and glossy. An upright, matte, or clumpy peak indicates that the cream has gone too far.
For microfoam, look for a uniform, shiny surface with fine bubbles. Larger bubbles, a dry cap, or watery streaks indicate uneven aeration or overheating.
What Time Delay Is “Too Long” Between Topping And Serving?
There is no single delay that works for every drink. Heat, coffee strength, topping temperature, and product all affect the result. Assemble and serve promptly whenever possible. If a delay is unavoidable, use stabilized cream or keep the components chilled until the last moment.
When Should I Ask For Help Or Switch Methods Instead Of Troubleshooting Forever?
Switch methods when the same failure continues after you change one variable at a time, such as ingredient temperature, whipping stage, or equipment. Persistent separation may indicate that the base product is unsuitable or that the batch is too large for the equipment.
Scale down the batch or choose microfoam if you need a pourable finish rather than a spoonable cream top.

- Espresso Bar Wedding: Ideas, Setup, Costs, and Tips for a Memorable Coffee Experience - November 11, 2026
- How Many Grams of Espresso Beans for a Double Shot? A Complete Brewing Guide - November 11, 2026
- Brasilia Espresso Machine: Features, Performance, Models, and Buying Guide - November 11, 2026
1 thought on “How To Make Cream Top For Coffee? Four Lasting Recipes”