
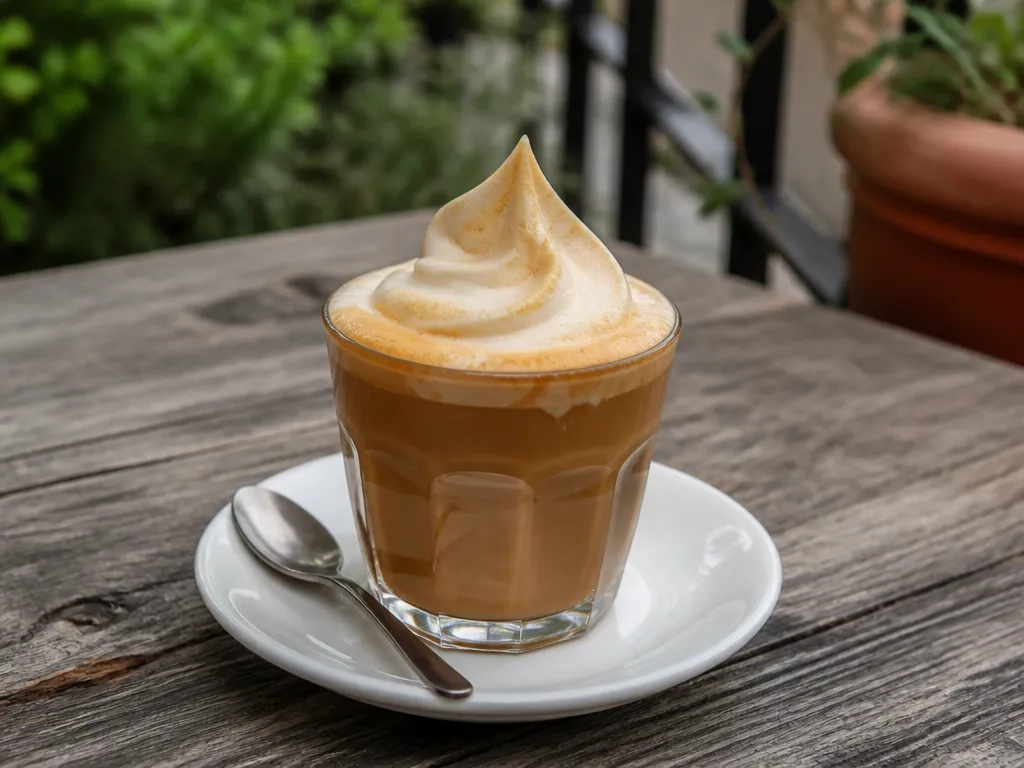
For a soft top, steam or froth the milk until it reaches a glossy, creamy texture and feels hot but still barely touchable on the outside of the pitcher. Stop before it feels painfully hot, then pour immediately so the foam stays pillowy instead of separating.
A true “soft top” is made of fine, glossy microbubbles rather than stiff foam. The milk should expand modestly, remain fluid enough to pour, and settle into a smooth cap that holds its shape briefly without looking dry or bubbly.
What Is Soft Top Foam And How Should It Look In A Cup?

Soft top is a visual and tactile target rather than a rigid shape. When the cap looks glossy, feels creamy rather than airy, and stays cohesive briefly, it is ready to pour.
How Does Microfoam Form And Why Glossy?
Gloss comes from a smooth layer of tightly packed, fine bubbles. The pillowy feel comes from foam that contains enough liquid to pour while retaining enough structure to sit briefly on the coffee.
Milk Choices And Fat Content For Soft Top

Milk choice affects body, sweetness, and how forgiving the foam is. Whole or 2% dairy milk is the easiest place to start, but the technique matters more than the label alone.
Quick decision: For the easiest result, begin with whole dairy milk. For non-dairy foam, choose soy or a barista-style oat product and use less aeration so the cap remains velvety.
Foaming Methods For Steam Wand, Handheld Frother, And French Press
Rule that keeps soft top consistent: Introduce air briefly, then switch to mixing. Stop as soon as the milk is glossy, cohesive, and hot but still barely touchable.
Visual And Tactile Cues For Ready Soft Top

Ready soft top microfoam looks glossy and uniform, feels silky, and moves as one fluid layer. If the surface is matte, coarse, or obviously bubbly, you have added too much air or have not mixed the foam sufficiently.
Glossy, Satin-smooth Surface And Uniform Microbubbles
Swirl the pitcher gently. The foam should fold over itself smoothly, with bubbles too small to stand out as individual beads.
Vortex Behavior And Jug Temperature
During steaming, the milk should turn in a smooth whirlpool. It should not surge violently or form a dry ring around the surface. The pitcher should feel hot but still barely touchable when the foam is ready. If you use a thermometer, follow the temperature guidance for your milk and machine.
Sound Cues And Flow Steadiness
A good vortex produces a controlled, fine hiss. A sharp, aggressive sound usually means the wand tip is too close to the surface. A dull sound can mean the tip is too deep and is adding too little air. Stop when the hiss becomes even, the milk turns smoothly, and the texture looks consistent.
| What you notice | What it usually means | What to do |
|---|---|---|
| Matte, bubbled surface | Too much coarse air | Reduce air intake and restore a smooth vortex |
| Quiet, thin milk | Not enough surface agitation | Raise the wand tip slightly or move the frother closer to the surface briefly |
| Jug too hot to hold comfortably | Overheating, which can weaken the foam | Stop earlier next time and pour promptly |
Pouring And Finishing To Keep The Foam On Top
Pouring determines whether the soft top stays on the surface or disappears into the coffee. Control the height, speed, and final position of the pour, then serve immediately.
For a latte-style drink, aim for a smooth, lightly domed cap. For a cappuccino-style drink, use more foam and stop the pour while the top still forms a soft mound.
Troubleshooting Soft Top Foam: Common Failures And Fixes
Most failures come from uneven air intake, excessive heat, or poor mixing. Change one part of the method at a time so you can identify the cause.
Recipe-style Examples For Latte And Cappuccino Foam
A latte and a cappuccino can use the same milk and stopping point. The main difference is how much air you add and how much foam you leave in the cup. Treat the amounts below as flexible starting points and adjust them to your cup and pitcher.
| Drink | Espresso | Cold milk in pitcher | Target volume expansion | Foam depth in cup |
|---|---|---|---|---|
| Latte, small to medium cup | A standard serving | Enough to leave room for expansion | Modest | Thin cap |
| Cappuccino, small to medium cup | A standard serving | Less than for a latte | Moderate | Deeper cap |
| Large latte | Adjust to cup size | Enough for the larger drink and room for expansion | Modest | Thin to moderate cap |
Pull the coffee first so it is ready when the milk is finished. Use a pitcher with enough headroom for the vortex, but do not fill it so high that the milk can spill while it expands. For a latte, keep the cap thin enough for the coffee to remain visible around it.
For a cappuccino, use less milk and add slightly more air. Spend the rest of the process mixing rather than continuing to expand the milk. Finish by laying the foam onto the coffee so it forms a visible, soft dome.
Non-dairy Adaptations
Barista-style oat and soy products often produce the closest texture to dairy, but they can thicken quickly. Use a shorter air-in phase, then mix until the surface is glossy. Stop as soon as the milk looks ready because these products can turn grainy when overheated.
Almond and rice products may foam weakly unless they contain suitable stabilizers or oils. Use them for a thin, pourable cap and do not compensate by adding excessive air. If the product will not hold structure, switch to a barista formulation.
Edge Cases For Foam: When The Standard Method Fails
The standard method works best with chilled milk, a consistent product, and a cool working environment. Change any of those conditions and you may need to shorten the air-in phase or allow more time for mixing.
Quick Summary
Soft top depends on controlled air, gentle mixing, and prompt pouring. Introduce only a little air, mix until the milk looks glossy, stop when it is hot but still barely touchable, and pour immediately.
| Condition | What changes |
|---|---|
| Milk is lower fat | Foam may feel thinner or become stiff more quickly. Aerate briefly, mix carefully, and pour immediately. |
| You want a cappuccino-style cap | Add somewhat more air and lower the pitcher for the final pour so more foam stays on top. |
| Milk is straight from the fridge or the kitchen is hot | Watch the pitcher and the milk’s movement rather than relying on a timer. Stop when the texture is glossy and the milk is hot but controllable. |
| Milk is non-dairy | Use shorter aeration bursts and pour promptly because plant-based foam can separate quickly. |
Your next test can be a small pitcher of cold whole milk. Briefly stretch the surface, mix until glossy, stop when the pitcher is barely touchable, swirl, and pour. Judge the cap before changing the milk or the technique.
Frequently Asked Questions
Do I Need To Buy A Milk Frother, Or Can I Get Soft Top With What’s Already In My Kitchen?
Technique matters more than the device. A French press, used with a steady gentle motion, can make usable foam. A handheld frother is convenient, while a steam wand gives you the most control over texture and temperature.
Do not buy a new tool to solve a heat or aeration problem. If foam is stiff or loose with one device, the same technique may produce the same result with another. Check current product information and prices yourself before buying.
How Long Does This Take From Cold Milk To A Finished Cup, Including Cleanup?
The active process is usually brief, but the exact time depends on the tool, milk volume, and starting temperature. Stop when the texture and pitcher feel are right rather than following a fixed timer.
Rinse the pitcher and wipe the steam wand immediately. Purge the wand according to the machine instructions so milk does not dry inside or around the tip. If full cleaning must wait, at least purge the wand and soak the pitcher.
My Machine Has An Automatic Temperature Cut-off. Can I Trust It To Stop The Steam For Me?
Test it before relying on it. Use a thermometer once and note the milk temperature when the machine shuts off. Compare that result with the temperature guidance for your milk and machine.
If the milk is already too hot or smells cooked when the cut-off activates, stop the steam manually earlier. Automatic settings are not necessarily designed for a soft, glossy cap.
My Steam Wand Has A Sleeve, Or The Steam Sputters. Can I Still Get Microfoam?
A wand needs to produce a steady vortex without repeatedly spitting water into the milk. Sputtering adds water and makes fine foam harder to achieve. Sleeves or attachments that draw in air may also produce coarser bubbles.
Check the manual before removing any sleeve or collar. Some parts are fixed, and forcing them off can damage the wand. If the wand remains unreliable, use a handheld frother or French press instead.
How Do I Check Whether My Milk Is Still Good For Foaming Without Wasting A Full Pitcher?
Follow the date and storage instructions on the carton, then test a small amount. Froth it in a cup, check whether it takes in air and holds a fine structure, and smell it. Sour or distinctly off-smelling milk should not be used.
Milk that has been open for a long time may foam poorly even when it still seems acceptable in other uses. If your method has not changed but the foam suddenly fails, check the milk before changing your technique.
Can I Froth The Milk Ahead Of Time, And Is Leftover Foam Safe To Keep?
Fresh foam is best. As it stands, it separates and becomes coarser. If you must wait, keep it under the storage conditions recommended for milk and swirl it gently before pouring, though the texture may be less stable.
Treat frothed milk as milk. Follow the storage and handling guidance on the product label and your local food-safety authority. If it has been left out for an uncertain length of time, discard it.

- Espresso Bar Wedding: Ideas, Setup, Costs, and Tips for a Memorable Coffee Experience - November 11, 2026
- How Many Grams of Espresso Beans for a Double Shot? A Complete Brewing Guide - November 11, 2026
- Brasilia Espresso Machine: Features, Performance, Models, and Buying Guide - November 11, 2026