

If you plan to make a soft top from loose fabric at home, the main challenge is creating seams that resist water and tension. Needle holes can leak, so you need a seam-sealing method suitable for the fabric, such as compatible seam tape or seam sealant. If you do not have equipment that can handle heavy fabric and reinforcement layers, replacing the cover with a vehicle-specific kit is the more realistic option.
DIY replacement is practical only when you can match the attachment style, including the rails or header seats, bows, side tension points, and seals. You also need an intact cover, frame, or reliable measurements from the vehicle. If the frame or bows are bent, or the top uses damaged or unusual OEM-specific parts, a home-built cover may not fit or seal correctly.
Are You Building From Scratch Or Replacing With A Kit?

Before buying fabric, decide whether “make” means sewing a new cover from parts or installing a replacement soft-top assembly. These jobs require different tools and involve different risks. Sewing a cover requires accurate pattern transfer, heavy-fabric stitching, reinforcement, and seam sealing. Kit installation usually involves checking the fit, reusing or replacing hardware, and following the attachment sequence.
Most home projects follow one of two paths. The first is cover-only replacement, where you reuse the frame, bows, rails, and suitable weatherstripping while making or buying a new fabric cover. The second is kit replacement, where a pre-cut or pre-fitted cover, and sometimes window or zipper components, is supplied for a particular vehicle configuration.
“At home” also affects the process. Without specialized equipment, expect trial fitting, careful labeling, and repeated checks. A leak-free result depends on accurate fit, even tension, and compatible sealing products rather than on speed. If you can obtain help with frame alignment or heavy-fabric sewing, a kit installation becomes more practical.
| Path | What you control | Main failure risk | Best fit |
|---|---|---|---|
| Cover sewing | Pattern, seam construction, openings, and reinforcement | Water entry or fabric failure at stitched interfaces | Sound frame with complete, usable hardware |
| Replacement kit | Fitting, attachment sequence, and seal contact | Misalignment at rails, bows, windows, or weatherstrips | Worn or damaged cover with an intact frame |
Audit the existing top before choosing. If the attachment points and frame alignment are reliable, a vehicle-specific kit is usually the lower-risk option. If the cover is the only defective part and you can copy its attachment design accurately, sewing a new cover offers more control.
Identify Your Soft-top Type And Diy Feasibility
The design determines what you must reproduce, how the roof tensions, and whether a home repair is realistic. Identify the attachment points and bow layout before taking the cover apart. A panel can appear to fit on a workbench and still bind, wrinkle, or leak when installed.
What to do next: photograph the frame from inside and outside, then label the front header, each bow area, side tension points, rear edge, and window or zipper area. Compare those photographs with the replacement kit or pattern before cutting anything.
Vehicle-matched Measurements And Templating Method
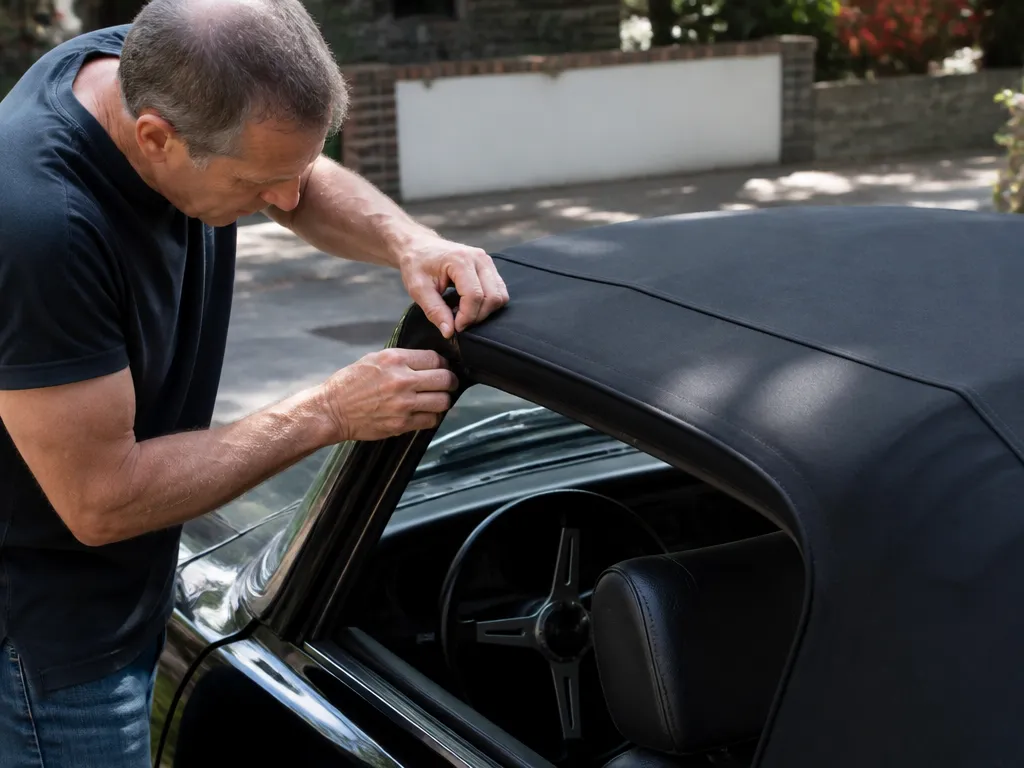
Make patterns from the installed, correctly aligned frame. A soft top is a tensioned surface, so a flat pattern must account for how the fabric sits when the roof is closed. Do not rely on generic dimensions when the vehicle, frame, or attachment system is unknown.
Place the frame in its normal closed position with the header seated, bows installed, and side attachment points available. Record the measurements on one pattern sheet and repeat them after checking that the frame has not shifted.
| Measurement to capture | How to take it | What it controls |
|---|---|---|
| Header length and curve | Measure along the rail path and mark offsets from the vehicle centerline | Header seam and hem position |
| Bow spacing | Measure bow-to-bow distance and bow height from a fixed reference | Panel shape and drape between bows |
| Side flap overlap | Measure the overlap at both sides and at areas where the fabric changes direction | Coverage and attachment position |
| Window openings and zipper or track edges | Trace the opening and measure its corners from fixed reference points | Track alignment and contact with the seal |
On-site Templating, Allowances, And Fabric Transfer
Create templates directly on the vehicle with paper or clear plastic film. Use several pieces where the surface bends, and mark the intended seam lines before removing the template. Check the template again on the frame before transferring it to fabric.
Record the seam allowance for each seam type. Any extra allowance needed for tension or stretch must be determined from the material and the original cover, not copied from a generic pattern. Keep the fabric grain or preferred stretch direction consistent with the original layout. Rotating a panel can change its behavior and move a window opening.
Transfer each piece in the same orientation. Mark the front, rear, left, right, top edge, and seam number before cutting. This prevents a mirrored or rotated panel from appearing correct on the bench while failing to fit the vehicle.
Tools And Supplies List For Diy Soft-top Construction
A home-built cover needs tools for cutting, reinforcement, stitching, fastening, and seam treatment. The exact list depends on the fabric and attachment system. Confirm that each tool can handle the thickest combined layer before cutting a finished panel.
Materials And Hardware List (Match Your Roof Design)
Choose fabric, reinforcement, thread, and hardware as a system. The material should be suitable for soft-top use and compatible with the machine, needle, fasteners, and sealing products.
| Item type | What to buy | Why it matters |
|---|---|---|
| Outer fabric | Soft-top vinyl or canvas matched to the existing cover and vehicle design | Controls fit, stretch, durability, and appearance |
| Reinforcement layers | Compatible reinforcement fabric or backing for header, bow, fastener, window, and zipper areas | Helps distribute loads at stress points |
| Thread and needles | Thread and needles suitable for the fabric and seam thickness | Reduces skipped stitches and thread failure |
| Fasteners | Rails, header retainers, clips, tension parts, grommets, eyelets, and other vehicle-specific hardware | Determines whether the cover can align and stay attached |
Choose seam tape, seam sealant, adhesives, and weatherstrip products for the fabric coating and the intended joint. A product that bonds to one material may not bond to another. Keep sealing products away from moving fasteners, zipper teeth, sliders, and surfaces that must remain flexible unless the product instructions specifically allow it.
Lay out the hardware and seal products before cutting. Dry-fit the attachment points and verify that the finished seam thickness will still fit the rails, header, and weatherstrip.
Cut, Reinforce, And Sew/bind The Roof Cover In Order
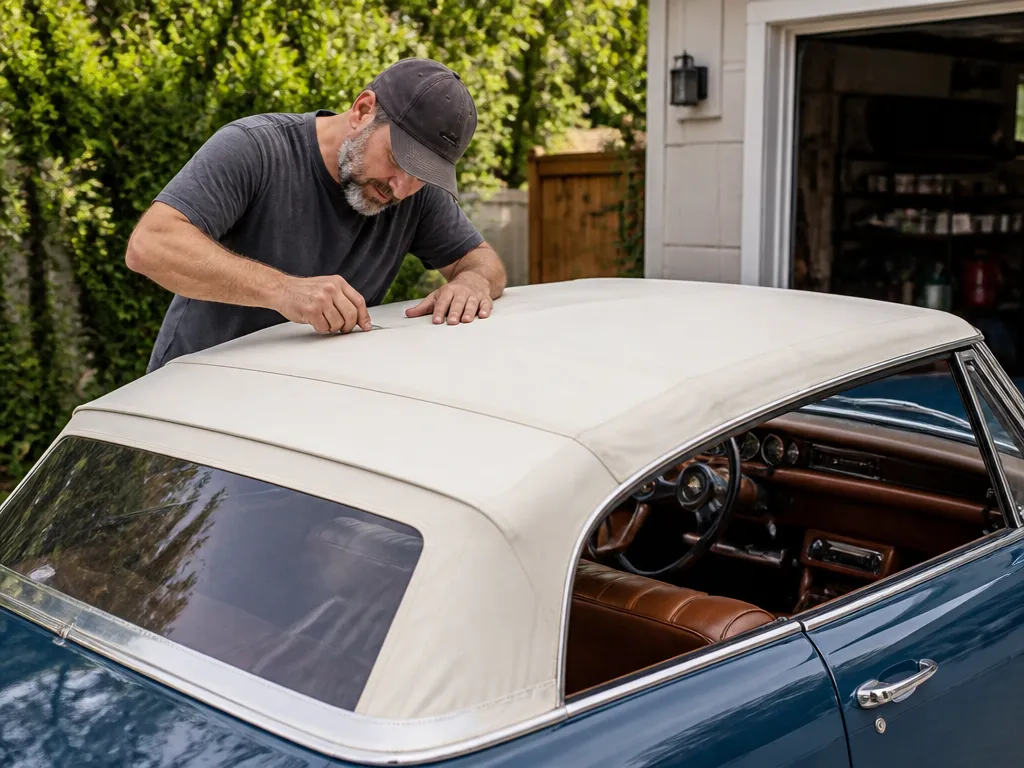
Work in this order: verify the pattern on the frame, cut the panels, add reinforcement, stitch the main seams, prepare the openings, and finish the edges. Check the cover on the vehicle between stages. This catches a misplaced bow crossing or mounting edge before it becomes part of a finished panel.
| Stage | What you do | Hold point before moving on |
|---|---|---|
| Pattern check | Lay each template on the installed frame and bows | Header, bow crossings, and window openings line up with the hardware |
| Cutting | Cut with the recorded allowances and mark every panel | Fabric direction and panel orientation are clear |
| Reinforcement | Add backing at bow contacts, header hem, side tension zones, and fastener points | The machine can feed the combined layers evenly |
| Critical seams | Stitch the main seams, then the shorter curved seams | Seams lie flat and the assembled panel still matches the pattern |
| Openings | Prepare the reinforcement and finish the window or zipper openings | Opening reinforcement is secure before the final cut |
| Edge finishing | Bind, hem, or tuck raw edges as required by the attachment design | Finished thickness does not block the rail, header, or seal |
Do not rush the pattern check or reinforcement stage. If a panel misses a bow crossing, correct the pattern before sewing. Add reinforcement before closing a seam whenever the reinforcement must be captured inside that seam.
The edge finish depends on its location. Binding covers a raw edge but can add thickness at the header and side flaps. A folded hem is thinner and may suit an edge that meets weatherstrip. A tucked edge can work on a straight mounting line if the original design uses one. Compare the finished edge with the original before committing to a method.
Stitching Stress Points And Openings
Use the thread, needle, stitch, and reinforcement arrangement appropriate for the fabric. Add reinforcement at bow contacts, the header hem, side tension points, and fastener locations. Test the arrangement on a scrap stack that matches the thickest finished section.
Prepare window and zipper openings with a full perimeter of compatible reinforcement before trimming the final opening. Mount the zipper or track to that reinforced edge, and keep the opening seam away from a bow crossing when the original design allows it. Follow the component maker’s installation requirements for zipper alignment and window material.
Install Rails, Bows, And Cover To Prevent Sag And Leaks
Install the cover from the center of the header outward. Leave fasteners only snug until the fabric is centered and the tension is even. Tightening one side completely before the other can pull the cover off-center and create diagonal wrinkles.
Inspect the frame and mounting surfaces before installing the fabric. A dirty channel, missing clip, distorted bow, or twisted seal can cause problems that look like cover defects.
Fastening By Design, And When To Set Tension
For a retaining-strip header, seat the fabric or bead in the channel from the center outward without forcing the fabric to stretch unevenly. Leave side flaps and other adjustable attachments available until the entire cover is positioned. If the design uses cables or springs, route them with the frame partly raised so the path remains visible.
Use the vehicle’s intended latch or over-center mechanism to establish tension. The header should close through its normal range without excessive force. If it will not close, stop and check the pattern, attachment position, bow alignment, and fabric routing instead of forcing the latch.
Complete the tightening sequence gradually: header center, outward along the header, side attachments, tension hardware, then trim and weatherstrip retainers. Walk around the vehicle between passes and check that the fabric remains centered over each bow.
Waterproofing The Seams And Weatherstrip Contact Points
Treat stitched seams and seal interfaces as separate tasks. Seam treatment addresses water passing through needle holes. Weatherstripping addresses gaps between the cover, frame, and body. Check the header and rail seams, side overlaps, window and zipper edges, and every fastener opening.
Water-test, Tension-check, And Fix Leaks Immediately
Test the closed roof only after the seam treatment has reached the handling or cure condition specified for that product. Keep the windows up and the header fully latched. A roof that is not in its normal closed position can give a misleading result.
Repeat the tension and water checks after the cover has been used and exposed to weather. The amount of settling depends on the fabric, frame, and attachment system. Follow the vehicle and material instructions for any later adjustment.
Troubleshooting Map For The 10 Most Common Failure Symptoms
Diagnose by symptom and location. A leak may come from a seam, fastener, seal, or misalignment, while a wrinkle may come from the panel, bow, or tension path. Identify the cause before tightening or sealing anything.
Quick Summary
Make a soft top at home only when the frame, bows, rails, seals, and attachment hardware are intact and you can reproduce the original cover accurately. Otherwise, use a vehicle-specific replacement kit or consult a trim shop.
There is no universal allowance, tension setting, cure period, cost, or installation time for every soft top. Verify those details for the vehicle, fabric, hardware, and sealing products you are using.
Your next action is to inspect the complete roof while it is installed, photograph every attachment point, and decide whether the frame is sound enough for a vehicle-matched replacement pattern or kit.
Frequently Asked Questions
What Actually Drives The Cost, And Where Should I Get Real Numbers?
The budget depends on whether the frame, bows, rails, tension parts, and weatherstrips can be reused, and on which components the kit includes. A cover-only project and a complete assembly replacement can require very different parts.
Price the cover or kit, reinforcement and seam treatment, thread and needles, hardware, and weatherstrip or sealing supplies before cutting. Request a quote for the exact model, year, and trim level. Ask whether damaged bows, rails, seals, or tension parts are included or sold separately. If the frame needs repair, compare the complete parts and labor cost with a trim-shop quote.
How Long Does A Home Soft-top Job Realistically Take?
The time depends on whether you are installing a vehicle-specific kit or creating a pattern and sewing a cover. Patterning, trial fitting, cutting, stitching, hardware installation, sealing, and curing are separate stages. Rework can add substantially to the project.
Allow enough elapsed time for the seam treatment and adhesives to reach the condition specified by their product instructions before water testing or operating the roof. Do not plan the first drive until the cover is correctly latched, the hardware is secure, and the water and tension checks are complete.
Can I Skip The Sewing Machine And Use Adhesive, Staples, Or Rivets Instead?
Do not substitute staples, rivets, or adhesive for the primary seam unless the vehicle’s original design uses that method and the replacement materials are approved for it. A tensioned cover needs an attachment method that can withstand repeated movement and remain compatible with the fabric and seals.
A household machine may manage some fabric layers, but the thickest areas can include vinyl or canvas, reinforcement, binding, and fastener layers. Test-sew a scrap stack that matches the thickest finished seam. If the machine skips stitches, cannot feed the layers, or damages the fabric, use a more suitable machine or have those seams made by a trim shop.
What Happens If I Leave A Small Leak Or A Wrinkle Alone For A Season?
A leak can wet nearby trim, padding, fasteners, and frame components. Continued dampness may cause material damage or unwanted odor, depending on the vehicle and materials. Dry the area and identify the entry point rather than assuming a small drip will remain harmless.
A wrinkle can become a rubbing point as the roof moves. Inspect the bow contact, panel alignment, and tension before the fabric becomes worn. A loose cover can also move against its hardware, so correct the cause instead of simply tightening one side.
At What Point Mid-job Should I Stop And Hand It To A Trim Shop?
Stop when the design requires equipment or adjustment you cannot reproduce safely. Examples include a bonded curved rear window, a power roof that requires control or limit-switch adjustment, or folding linkage that must be timed to the fabric and mechanism.
Also stop if the frame geometry is damaged, the original attachment path is unclear, or the same interface continues to leak after you have checked its alignment and applied a compatible treatment. Repeatedly adding sealant can make later repair more difficult without correcting the underlying fault.
How Do I Verify The Fabric, Thread, And Tape Are The Right Spec Before I Commit?
Ask the vendor for the fabric name, weight, backing, coating, and intended use. Confirm that the thread and needle are suitable for that material and that the seam tape or sealant is compatible with its coating.
Test the system on an offcut. Stitch and seal a sample, allow it to reach the product’s specified cure condition, then apply water to the side that will face the interior. Inspect for weeping and check whether the thread, fabric, or sealed seam fails first during a careful pull test. Confirm that the kit matches the model, year, and trim, and ask whether weatherstrips, tension parts, rails, and other hardware are included.

- Espresso Bar Wedding: Ideas, Setup, Costs, and Tips for a Memorable Coffee Experience - November 11, 2026
- How Many Grams of Espresso Beans for a Double Shot? A Complete Brewing Guide - November 11, 2026
- Brasilia Espresso Machine: Features, Performance, Models, and Buying Guide - November 11, 2026