
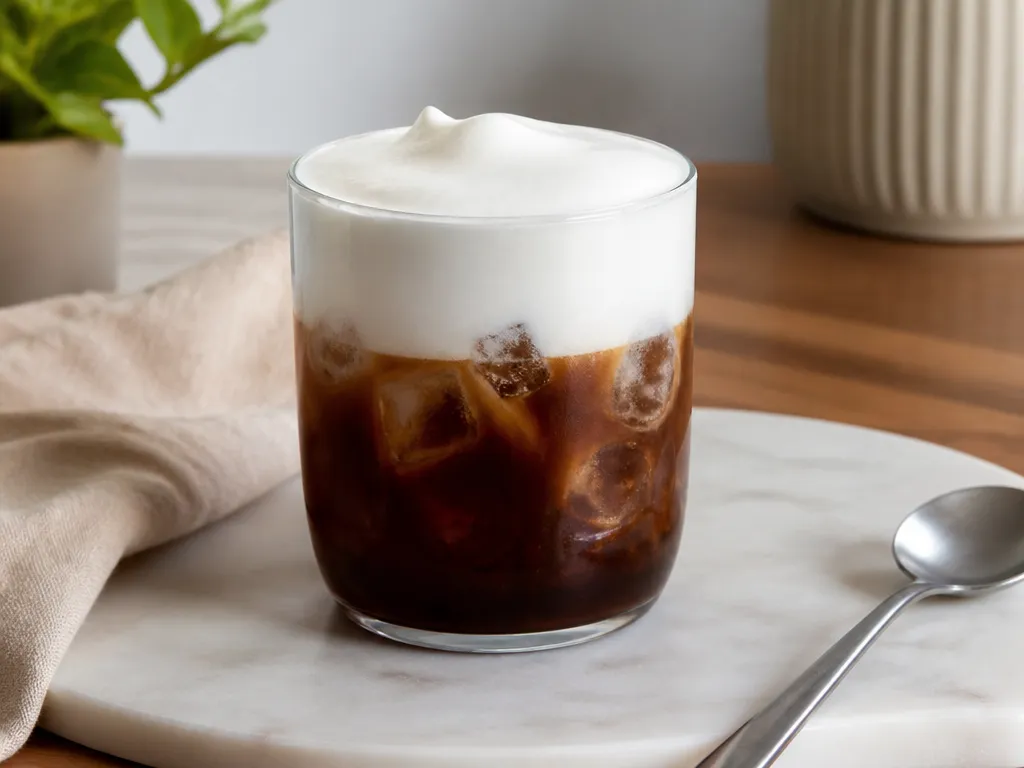
Use cold, unsweetened skim milk at about 2% to 6% fat for real foam, and froth for 15 to 30 seconds with a handheld electric milk frother. This is the lowest-cal route that still builds a pourable cap, because you are relying on protein structure to hold air, not heavy cream fat.
For a genuinely low-cal serving, make cold foam as 1/4 cup (60 ml) nonfat or skim milk plus 1 to 2 teaspoons (5 to 10 ml) sugar-free vanilla syrup, then froth cold. Plan for roughly 20 to 60 calories per topping serving depending on the syrup brand and the milk you choose.
What Is Cold Foam And Can It Be Low-cal At Home?

Cold foam is a thick, aerated milk topping that you build by introducing lots of tiny air bubbles into a cold dairy or dairy-like liquid, then keeping that foam from collapsing long enough to pour or spoon onto an iced drink. In most coffee shops, the “classic” version is made from heavy cream plus flavoring (often vanilla syrup), which is why it tends to feel rich and calorie-dense.
For this guide, “low-cal” means you can make a single serving topping that is generally in the tens of calories, not hundreds. That goal is achievable at home because the foam structure comes from a protein-rich liquid that can trap air bubbles, while cream drives calories up fast. The trade-off is texture control: the lower the fat and sugar, the more sensitive the foam is to temperature, agitation time, and how long it sits before topping your drink.
Expect three practical realities from homemade low-cal foam. First, foam made with low-fat milk or nonfat dairy alternatives often forms more easily with enough protein and a cold starting temperature, but it may collapse sooner than cream-based foam. Second, sweeteners and flavoring choices matter because sugar adds calories quickly and syrup can affect both thickness and collapse speed. Third, the “pourable cap” you want is a timing game, you build it, then top immediately so you get the foam height before it relaxes.
Given those constraints, a true low-cal cold foam is feasible at home, but it is not identical to the store version. Your best results come from using a protein-forward base and keeping your foam cold from the first whisking moment to the moment it lands on the drink.
How Does Foam Form And Stay Stable With Low-fat Bases?
Cold foam is a temporary “air-in-liquid” structure, and stability depends on how fast you trap tiny bubbles and how strongly the liquid resists them merging and collapsing. With low-fat or non-fat bases, the job gets harder because you have less fat-derived structure to slow down bubble breakup, so the protein network and any emulsifiers matter more.
If your foam collapses in minutes, treat it as a structure problem (too few stable bubble films), not a technique problem (you simply need more minutes).
Which Milk Bases Foam Well And What Are Their Calories?
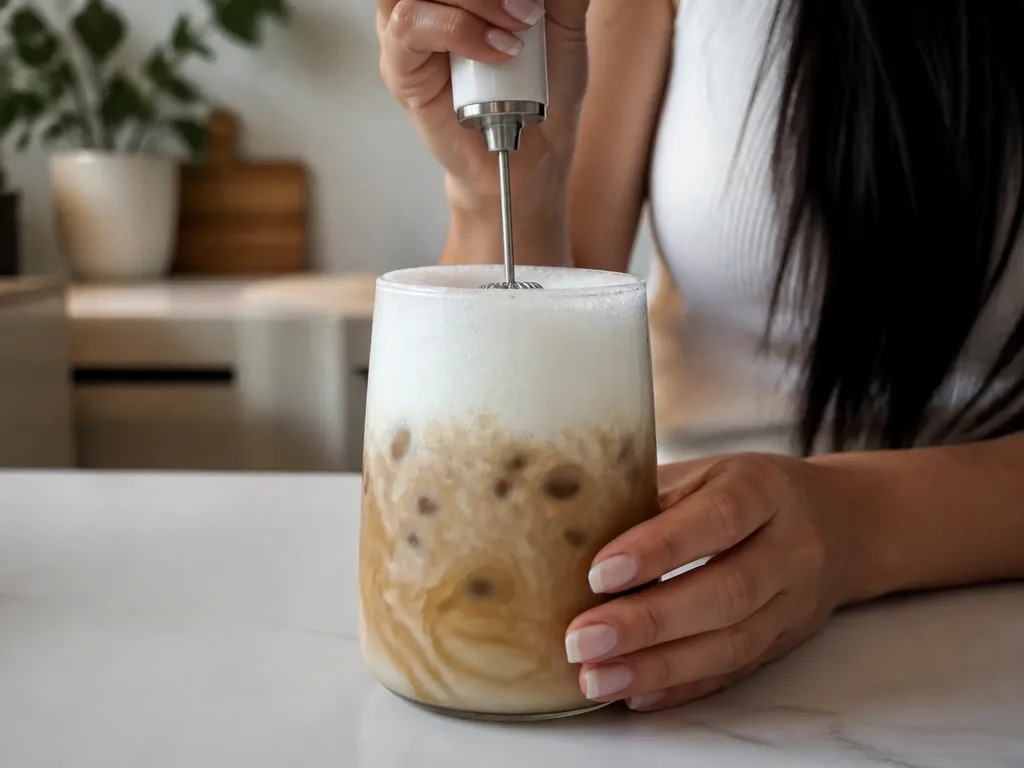
Some milk bases foam into a thick cap at home, while others struggle because they do not build a strong bubble structure. The best performers are low-fat dairy options and protein-heavy non-dairy mixes, while several popular non-dairy milks can foam poorly unless you add an emulsifier or foam booster.
| Milk base (typical use) | Foam behavior | Calorie range per cup (approx.) | Why it foams (or doesn’t) |
|---|---|---|---|
| Skim milk | Good foam, often a bit lighter than cream | ~80 to 90 cal | Low fat, enough protein to trap air bubbles |
| 2% or other low-fat milk (up to ~6% fat) | Better thickness than skim, more stable cap | ~100 to 150 cal | Extra fat can stabilize bubbles, but adds calories |
| Unsweetened soy milk | Often foams well | ~80 to 120 cal | Protein helps build a bubble structure |
| Unsweetened almond milk | May foam weakly or quickly collapse | ~30 to 60 cal | Lower protein, thinner emulsion unless fortified |
| Unsweetened oat milk | Can foam medium, texture depends on brand | ~100 to 160 cal | Higher solids can help, but sugar and stabilizers vary |
| Unsweetened coconut milk (carton) | Unreliable for thick foam if it’s very thin | ~40 to 120 cal | May separate; fat can help stability but depends on formulation |
For low-cal foam, start with skim or low-fat dairy, then move to soy if you want a non-dairy option that still builds structure. If you use almond, coconut, or some oat milks and the foam is thin, that usually signals a weak protein-driven bubble network (or an emulsion that collapses quickly).
What Tools Deliver Thick Foam Fastest For A Low-cal Base?
The fastest, thickest foam at home comes from tools that drive lots of tiny bubbles into cold liquid in under half a minute, with the handheld electric frother being the best match for low-cal bases. For a thick cap, you want fast air incorporation plus immediate foam formation, then pouring before the bubbles merge and collapse.
Handheld Electric Frother, French Press, And Mason Jar
A handheld electric frother is the most reliable option for a low-cal base because you can run it until the foam looks dense, then stop. Expect frothing around 15 to 30 seconds to reach a pourable top, especially when your base is pre-chilled and kept at low temperature. If your foam looks foamy but loose, continue in 5 second bursts rather than over-frothing, because going too long can thin the texture.
A French press works, but timing matters. You typically need about 30 to 60 seconds of pumping with the plunger moving steadily, and you should stop as soon as the foam becomes thick and spoonable. If you push too hard or too fast for too long, you can knock bubbles back down and end up with a thinner foam layer.
Mason jar shaking is the most hands-on method and the least consistent for thick results. Plan on about 1 to 2 minutes of vigorous shaking with the jar sealed, then pour immediately. The drawback is control, the foam can be uneven (lots of bigger bubbles near the edges), and it tends to collapse sooner, which means it rewards smaller drink sizes and faster serving.
| Tool | Typical foam time (low-cal bases) | Best result | Main failure mode |
|---|---|---|---|
| Handheld electric frother | 15 to 30 seconds | Thick, pourable cap | Thin foam if stopped too early |
| French press | 30 to 60 seconds | Spoonable texture | Over-pumping makes it looser |
| Mason jar shake | 1 to 2 minutes | Fast foam for immediate topping | Uneven bubbles, faster collapse |
If you only buy one tool, choose the handheld electric frother. If you already own a French press, use it as your backup and stick to a tight pumping window so you do not accidentally thin the foam before it hits the drink.
What Is A Precise Low-cal Cold Foam Recipe?
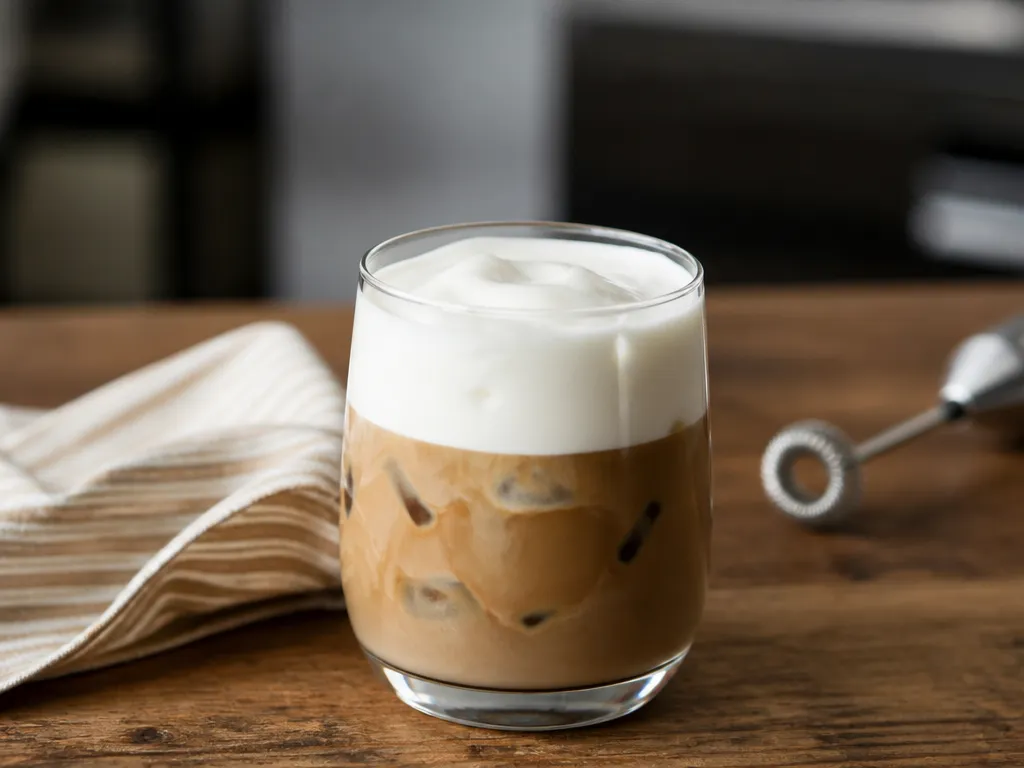
Use this single-serving base recipe to get a thick, spoonable cap while keeping the foam genuinely low-cal. It relies on cold skim/low-fat dairy (2% to 6% fat) and fast aeration so the bubble structure holds long enough for pouring.
Single serving ingredients (measure exactly)
Step-by-step (timing matters)
| Component | Amount | Estimated calories (range) |
|---|---|---|
| Low-fat milk (2% to 6%) | 60 ml | ~25 to 55 |
| Sugar-free vanilla (if using a syrup) | to taste | ~0 to low |
| Nonfat Greek yogurt (optional) | 10 ml | ~5 to 15 |
Estimated total per serving is roughly ~30 to 70 calories depending on whether you use the optional yogurt booster and whether your specific sugar-free syrup is truly calorie-free.
Which Sugar-free Flavors And Sweeteners Keep Calories Low?
Sugar-free flavoring can keep cold foam low-cal as long as you control two inputs: the sweetness source (syrup vs. powder vs. extract) and how much you add before the foam thickens less. The safest “low-cal” approach is using tiny amounts of sugar-free syrup plus high-impact extracts (vanilla, almond) and spices that add flavor without adding significant calories.
If you want the most reliable low-cal results, pick one primary flavor (usually vanilla or coffee) and then add only one small calorie-adjacent component (a measured sugar-free syrup dose) plus one spice or extract. This keeps flavor strong while protecting the foam structure.
What Are Common Foaming Pitfalls And How To Fix Them?
Foam fails at predictable points in the process, usually because the bubble structure never forms fully or it collapses before you pour. Treat each failure like a diagnosis, then change only one variable at a time (temperature, base, or aeration time) so you can fix it fast.
Quick troubleshooting rule: if you get bubbles but no thickness, you are under-building the bubble structure (either too little aeration or a base that lacks enough protein). If you get thickness but it vanishes fast, you are losing structure to time and temperature.
How Should You Store And Re-froth Cold Foam?
Cold foam is best treated like a short-lived texture, so storage is mostly about slowing collapse and preventing separation.
Practical rule: make the foam last, top right away, then refrigerate any extra only if you can re-froth soon. If you want the lowest-cal outcome, timing matters as much as the base, because texture loss can push you to add more foam to get the look you want.
How Does This Low-cal Foam Compare To Starbucks Or Store Versions?
A homemade low-cal cap runs roughly 20 to 60 calories per topping serving, against roughly 80 to 120-plus calories for a standard heavy-cream-and-syrup cold foam of similar volume. Treat that store-side range as approximate: the exact figure moves with drink size, number of syrup pumps, and how much foam the barista actually pours, and the published nutrition for any given drink is what you should check, not a remembered number. The honest summary is a 2x to 4x calorie reduction, not a free lunch.
Cost And Convenience, Weighed Honestly
On cost, homemade wins by a wide margin. A carton of skim milk plus a bottle of sugar-free syrup costs a few dollars total and yields dozens of servings, while a single store cold foam drink typically runs several dollars per cup. The break-even arrives fast, usually after two or three drinks.
Convenience cuts the other way. The store version is consistent every time and requires no cleanup, no frother to charge, and no cold milk in the fridge at 6 a.m. If your priority is texture fidelity and zero effort, buy it and take the calories. If your priority is a daily capped iced coffee that does not quietly add a few hundred calories a week, the home version is the better trade, and a handheld frother takes about 15 to 30 seconds.
Quick Summary
Sixty milliliters of cold skim or low-fat milk at 2% to 6% fat, frothed for 15 to 30 seconds with a handheld electric frother, then finished with 10 ml of sugar-free syrup, delivers a thick, pourable cap at roughly 20 to 60 calories, against 80 to 120-plus for the heavy-cream version.
Four conditions change that outcome:
No electric frother? A French press takes 30 to 60 seconds; a mason jar takes 1 to 2 minutes of hard shaking.
Do this next: chill 60 ml skim milk, froth 15 to 30 seconds, stir in 10 ml sugar-free syrup, and pour it straight onto the drink.
Frequently Asked Questions
Can I Use This Foam On Hot Coffee Instead Of Iced?
Cold foam is built for cold drinks. When you spoon it onto a hot liquid, heat from below warms the bubbles until they merge and drain, so the cap thins and slides down into the drink within a minute or two instead of sitting on top. You can still do it for the look, but expect it to vanish fast, and do not judge your base or your technique by how it behaves on a hot mug.
If hot drinks are your default, treat steamed milk as a separate project. It uses the same aerating idea, but heat sets the structure differently, and the low-cal logic of the cold version does not transfer neatly.
How Do I Test A Milk I Already Own Before Buying A Carton Of Something New?
Run a two-tablespoon test in a small, narrow glass. Froth for 15 to 30 seconds, then let it sit a full minute and watch three things: how much it rose, whether it holds a soft peak when you tilt the glass, and whether clear liquid collects at the bottom.
If it collapses back to runny milk inside that minute, that base will not carry a topping no matter how long you whip it, and you have spent two tablespoons instead of a whole carton. Note the brand and the fat percentage of anything that passes, since the same product line often changes formulation between sizes and regions.
I Need Foam For Six Drinks. Does The Recipe Scale, Or Do I Froth Each One?
Froth one 60 ml portion at a time. Handheld frothers are sized for a narrow glass and a small volume; dumping four servings into a wide bowl leaves the shaft too shallow to reach the liquid and spreads the air through too thin a layer to trap bubbles. Batch by lining up your glasses and working through them in the last two minutes before serving.
You can pre-chill and pre-measure the milk and syrup ahead, which is where the real time saving sits. The aeration step itself is short, so a queue of six is a couple of minutes of actual work, not a reason to buy a bigger machine.
How Do I Verify A Sugar-free Syrup Is Genuinely Near-zero Calorie At The Pour I Use?
“Sugar-free” tells you about sugar, not about calories. Some zero-sugar syrups still carry carbohydrate from sugar alcohols or thickeners, so read the nutrition panel for calories per stated serving and check what that serving actually is, because it is often one pump or one tablespoon, not the two teaspoons you are pouring.
Measure once with a teaspoon so you know what your real pour looks like. Two teaspoons is 10 ml and a level tablespoon is 15 ml, so eyeballing a splash can quietly add half again as much as you think you are using.
What Happens If I Skip The Sweetener And Flavoring Completely?
The foam still forms. At these volumes the syrup contributes flavor far more than structure, so dropping it leaves you with aerated milk, which tastes like aerated milk sitting on your coffee. Most people find that bland rather than bad.
The fix is not adding sugar back. A drop of vanilla or almond extract, a pinch of cinnamon or cocoa, or a small pinch of salt costs effectively nothing in calories and does the flavor work the syrup was doing. If your coffee is already sweetened, plain foam on top is the cleaner call anyway.
Is 60 Ml The Right Amount, And What If I Want More Coverage?
Treat 60 ml as one topping serving, roughly a quarter cup. Calories move with volume, so doubling the portion roughly doubles the count, and halving it gets you a thinner, less impressive cap for about half.
If you want more coverage without more calories, aerate harder instead of pouring more. The same 60 ml takes up noticeably more space once it is full of air, so a proper 15 to 30 seconds of frothing will cover a large glass where a lazy five seconds will not.

- Espresso Bar Wedding: Ideas, Setup, Costs, and Tips for a Memorable Coffee Experience - November 11, 2026
- How Many Grams of Espresso Beans for a Double Shot? A Complete Brewing Guide - November 11, 2026
- Brasilia Espresso Machine: Features, Performance, Models, and Buying Guide - November 11, 2026