

Vanilla cold foam is chilled milk aerated until it forms a dense, creamy head. Keep the milk, mixing vessel, and finished drink cold, then pour the foam soon after whipping. The exact time depends on the milk, tool, and batch size, so stop when the foam looks thick and holds a soft mound.
To make it, combine cold milk with vanilla and a sweetener, then froth until you see a dense, creamy head. Use a small batch while you learn how your milk and frother behave. If the foam will not mound, check the milk temperature, the frother’s contact with the liquid, and the amount of air being incorporated before adding more sweetener or vanilla.
What Is The Base Vanilla Cold Foam Recipe And How Do I Start?
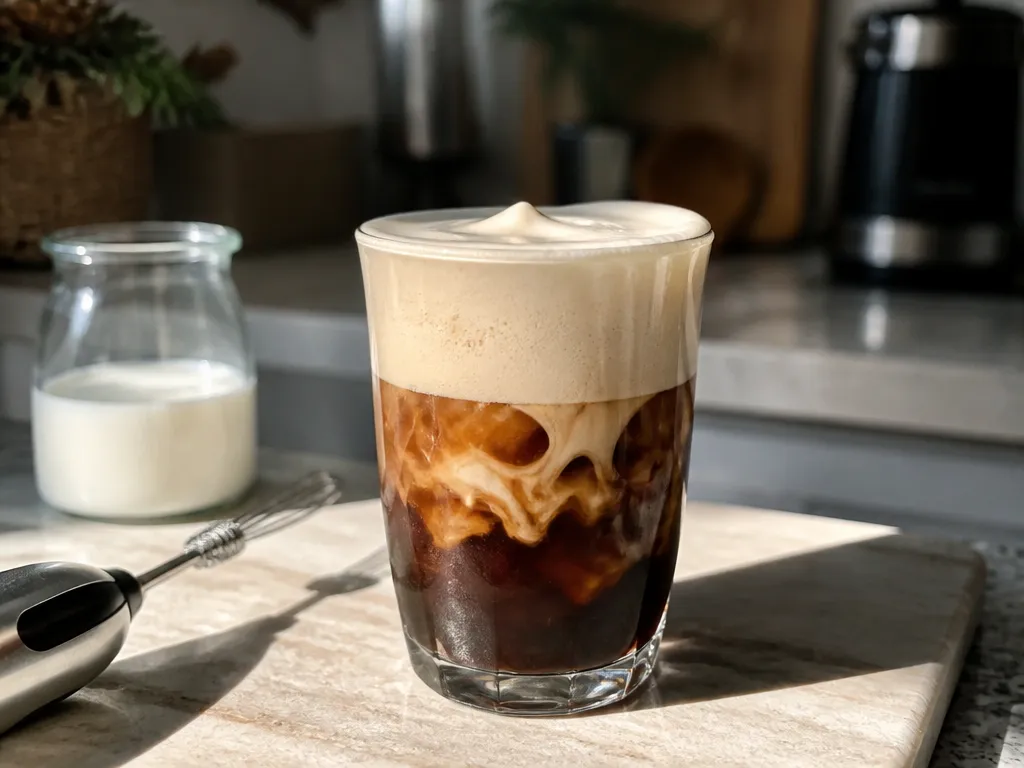
Build vanilla cold foam from chilled milk, vanilla, sweetener, and air. The recipe is deliberately flexible because milk brands and frothers behave differently. Begin with a small serving, taste it, and record the amounts that work with your ingredients.
Visual Aids, Recipe Card, And Substitutions You Should Set Up Now
Use a visual workflow because cold foam depends on texture and timing. If you use a step-by-step photo or video, look for the sequence of chilling, mixing, whipping, and pouring. Match the final texture rather than copying a fixed whipping time.
Keep a recipe card beside your station. Record the milk, vanilla, sweetener, tool, and texture you achieved. That makes it easier to repeat a successful batch and adjust sweetness without guessing.
Choose substitutions before you begin. For dairy-free foam, use a non-dairy milk that is labeled for foaming when possible. Some varieties produce a looser topping. For a sugar-free version, choose a sweetener that dissolves in cold liquid and check its label for serving and allergy information. Vanilla extract can increase vanilla flavor without adding the sweetness of vanilla syrup.
Allergen notes: Milk, soy, oats, nuts, and sweetener flavorings may be relevant allergens, depending on the product. Read the label for the specific milk and flavorings you use, and avoid shared equipment when cross-contact is a concern.
Why Does Vanilla Cold Foam Form And Stay Aerated?
Cold foam forms when whipping traps air in a liquid and milk components help surround the bubbles. The result is a layer of small bubbles that remains suspended for a while before liquid drains and the foam thins.
Milk proteins contribute to the structure around air bubbles, while fat affects creaminess and mouthfeel. Milk type matters because protein, fat, and added ingredients vary by product. A thinner or less suitable milk may produce a looser foam even when the technique is the same.
Sugar and vanilla mainly affect flavor, although dissolved sugar can change the feel of the liquid. Vanilla syrup also adds sweetness and other ingredients, so it may behave differently from extract. The milk, temperature, tool, and whipping technique usually have the greatest effect on the final texture.
Whipping creates the foam by forcing air into the milk. Under-whipping leaves larger bubbles and a loose topping. Excessive whipping can make the foam coarse or cause separation, so stop when the texture becomes dense rather than following a rigid timer.
| Stability factor | What it changes | What you should see |
|---|---|---|
| Milk fat and protein | How well the liquid supports air bubbles | A creamy foam that holds a soft mound |
| Air bubble size | How quickly the foam drains or collapses | Fine, velvety foam rather than large bubbles |
| Holding temperature | How quickly the foam warms and thins | The strongest structure soon after whipping, followed by gradual thinning |
Temperature sets the pace of change. As the foam warms, liquid drains from between the bubbles and the topping loses volume. Make the drink first, whip the foam last, and serve it while it is still cold.
What Variables Affect Foam Quality And What Targets Apply?
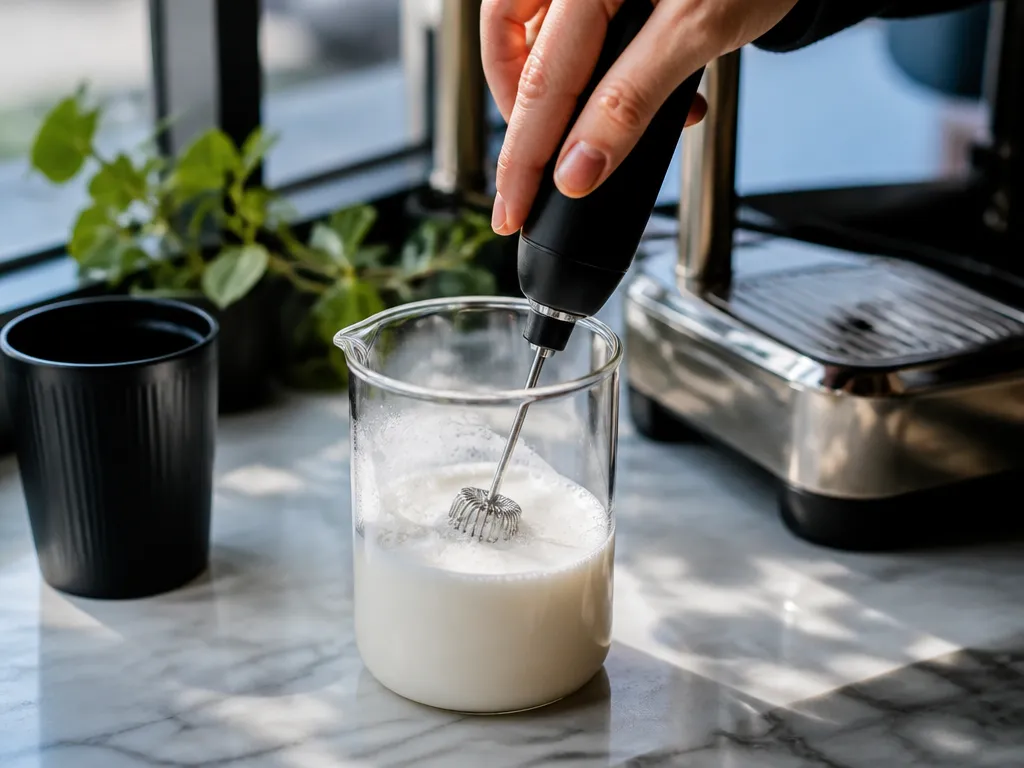
Foam quality depends on the milk, temperature, tool, flavoring, and handling. Use the following as starting points, then adjust according to what you see in the bowl.
My rule: if your foam will not mound or thins quickly, fix temperature and tool technique first. Change the milk next, then adjust vanilla and sweetness.
How Do I Tailor The Method For Dairy Vs Non-dairy Milks?
Dairy and non-dairy milks vary by brand and formulation, so use the same basic method but judge the result by texture. Start with chilled milk, then adjust the tool, flavoring, and serving speed.
My rule: if the foam will not stay mounded, change the milk or improve chilling and pouring technique before reaching for a stabilizer.
How Can I Make A Quick 30 – 45 Second Handheld Frother Version?
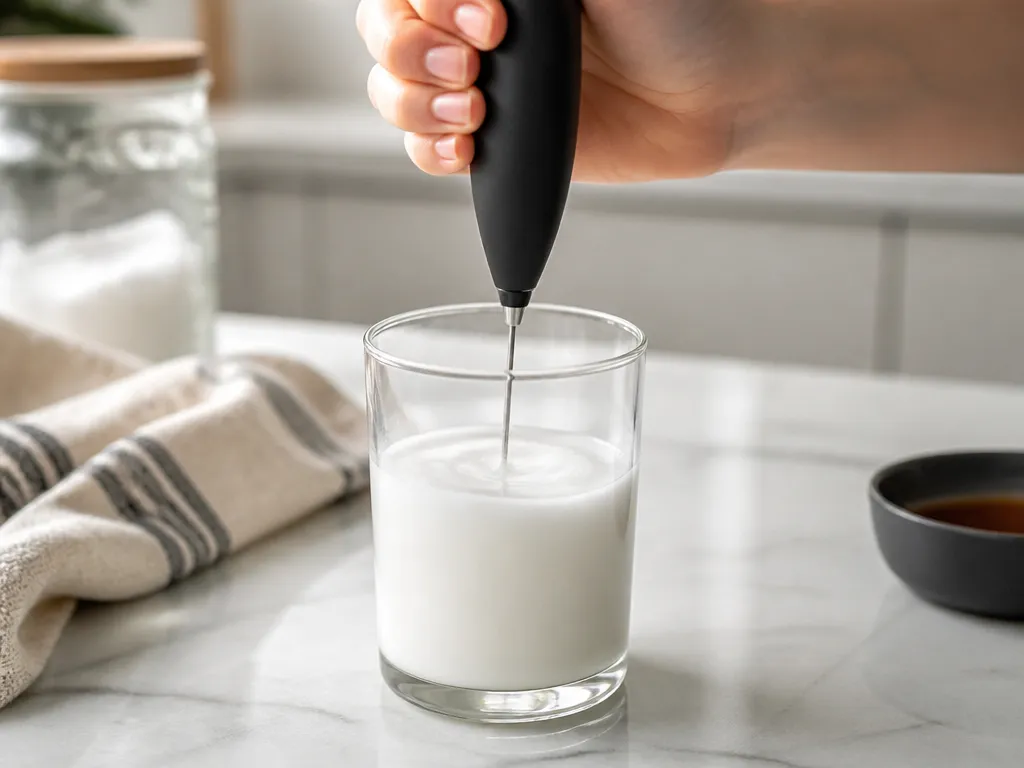
A handheld frother can make vanilla cold foam quickly, but the correct stopping point depends on the tool, milk, and batch size. Treat the time in this method as a starting experiment, not a guarantee.
Required Basic Setup
You need a chilled container, cold milk, vanilla, a sweetener if desired, and a handheld frother. Use a vessel tall enough to prevent splashing and large enough for the milk to circulate. Keep the prepared drink nearby so the foam can be used promptly.
Texture Expectations And Fast Tweaks
This quick method is best for a light topping rather than a thick, layered pour. Your main controls are cold milk, the frother’s position, the point at which you stop, and how quickly you serve the foam.
What Are The Common Failure Modes And How Can I Troubleshoot?
Most failed batches involve warm ingredients, insufficient air, excessive whipping, or a container that prevents circulation. Check those causes in order.
If the foam still fails, test another milk or another formulation of the same type. Protein, fat, gums, and other ingredients vary by brand, so a carton that performs poorly is not proof that the technique is wrong.
What Serving Ideas And Drink Pairings Showcase The Foam?
Cold brew is a natural pairing because its cold, bitter base contrasts with sweet vanilla foam. Iced espresso, iced matcha, iced chai, and iced tea can also work. Taste the base before sweetening the foam so the finished drink does not become overly sweet.
| Drink (12 oz) | Foam to add | Why it works |
|---|---|---|
| Cold brew, unsweetened | Add enough for a visible cap | The bitter base contrasts with vanilla |
| Iced shaken espresso | Add a moderate layer | The cold, concentrated drink supports a creamy topping |
| Iced matcha or hojicha | Add a light to moderate layer | Vanilla rounds out the tea’s flavor |
| Iced chai | Add a light layer | Spice and vanilla complement each other, but the chai may already be sweet |
| Iced Americano or iced tea | Add a light cap | A thinner drink can be overwhelmed by too much foam |
Leave room at the top of the glass. A narrow, chilled glass can keep the topping visually distinct, while a wide vessel spreads it thin. Do not pour the foam over a hot drink if you want it to retain its texture.
Garnish after pouring. A small amount of vanilla bean, cocoa, cinnamon, nutmeg, toasted coconut, or salt can complement the topping. Check each garnish for allergy information, especially when serving others.
Timing matters more than decoration. Make the drink first, whip the foam second, and serve it promptly. If you are preparing several drinks, work in batches that your tool and serving setup can handle without leaving the finished foam at room temperature.
What Allergy, Nutrition Notes And Substitutions Should I Consider?
The main choices are the milk, sweetener, and vanilla. Dairy milk contains milk ingredients and lactose. Oat and almond milks may suit different dietary needs but can contain other allergens or be made on shared equipment. Read the label for the exact product, including any barista-style additives.
Pure vanilla extract and vanilla syrup are not interchangeable. Extract provides vanilla flavor, while syrup usually adds sweetness and may contain additional ingredients. Check the label if you need a product that meets vegan, gluten-free, sugar-free, or allergy requirements.
| Swap | What it changes | What to watch |
|---|---|---|
| Vanilla syrup to pure extract | Reduces added sweetness | Add a separate sweetener if needed and adjust gradually |
| Sugar to a sugar-free sweetener | Changes sweetness and possibly mouthfeel | Choose a product that dissolves in cold liquid and follow its label |
| Dairy milk to oat or almond | Changes protein, fat, and foam structure | Check the label for nuts, soy, gluten, and shared-equipment warnings |
| Whole milk to skim | May produce a lighter topping | Judge the texture rather than assuming a longer whip will fix it |
A reliable nutrition figure cannot be given for this method because the milk, sweetener, vanilla product, and serving size can all change the result. Use the nutrition panel on your own ingredients if you need an exact estimate. Vanilla extract and vanilla syrup should also be compared by label rather than assumed to have the same nutritional profile.
Shared tools can transfer milk proteins or other allergens between batches. Wash the frother, pitcher, and utensils according to the manufacturer’s cleaning instructions before making a drink for someone with an allergy. Check non-dairy products for soy lecithin, gums, nuts, and other ingredients relevant to your household.
Make the foam close to serving time. Once it has collapsed, chilling may slow further thinning but does not reliably restore the original texture. If you want to prepare ahead, chill the flavored milk mixture in a covered container and whip it just before serving. Store milk, extract, and syrup according to their individual labels.
Quick Summary
Vanilla cold foam works best with thoroughly chilled milk, gradual flavoring, suitable equipment, and immediate serving. Whip until the foam looks dense and mounded rather than following a fixed time. If it fails, check temperature, tool position, container size, and milk type before changing the recipe.
Four conditions change the plan:
| Condition | What changes |
|---|---|
| Handheld frother instead of a whisk or stand mixer | Use the shorter method as a starting point and stop by texture |
| Lower-fat or non-dairy milk instead of whole milk | The topping may be lighter or less stable; test the brand and serve promptly |
| Foam has to sit before serving | Expect gradual thinning and keep it cold until needed |
| Drink is larger than a single serving | Make enough foam for the drink without overfilling the vessel or delaying the pour |
Prepare the drink and chill the mixing vessel before you begin. Make a small batch, taste it, and record the vanilla and sweetener amounts that suit your milk and coffee. Adjust the next batch rather than trying to correct a large bowl after whipping.
Frequently Asked Questions
Can I Make Vanilla Cold Foam For Four Drinks At Once Instead Of One At A Time?
You can scale the ingredients, but a larger batch may need a different container and tool. The foam will also thin while you pour multiple drinks. If your equipment struggles with a large volume, make smaller batches and use each one promptly.
Prepare all the base drinks first, then whip the foam and distribute it without delay. Do not leave the finished topping uncovered while you work through the rest of the order.
I Have No Frother And No Whisk. What Else Works?
A clean lidded jar can incorporate air. Leave room for the milk to move, seal the jar securely, and shake until the mixture looks foamy. Stop to check the texture rather than shaking for a fixed period.
A French press can also aerate milk if it is clean and large enough for the batch. Any tool can overwork the foam, so stop when it becomes dense and use it immediately.
How Do I Tell Whether The Milk Is The Problem Or My Technique Is?
Change one variable at a time. Use the same cold milk in two identical containers and compare the results with the same tool and motion. If neither batch thickens, check the milk, tool, and container. If one batch works, your timing or technique needs refinement.
You can also compare the product with another milk, keeping the temperature and tool the same. A clear difference points to the milk’s formulation rather than proving that one technique works for every carton.
What Does A Homemade Batch Cost Compared With Buying One?
A dependable per-drink figure cannot be given because milk, vanilla, sweetener, equipment, store, and region all affect the cost. Calculate it from your own receipt: divide the price of the milk by the servings it provides, then add the portions of vanilla and sweetener used.
Compare that total with the price of a prepared drink in your area. The result will vary, so treat any comparison as a personal calculation rather than a universal saving.
When Is It Smarter To Just Buy The Cold Foam Instead Of Making It?
Buying it may be easier for a one-off drink, a large gathering, or a situation where you cannot serve the foam soon after whipping. Homemade foam is most convenient when you already have suitable milk, flavorings, and a clean tool.
A prepared product may also be practical if your preferred non-dairy milk repeatedly produces weak foam. Check its ingredient and allergen label before choosing it.
How Do I Pour Cold Foam So It Sits On Top Instead Of Mixing In?
Pour slowly over the back of a spoon held just above the drink’s surface. This reduces the force of the pour and helps the foam settle as a layer.
Leave headroom in the glass before adding the foam. A full cup gives the topping nowhere to settle and makes overflow or mixing more likely.

- Espresso Bar Wedding: Ideas, Setup, Costs, and Tips for a Memorable Coffee Experience - November 11, 2026
- How Many Grams of Espresso Beans for a Double Shot? A Complete Brewing Guide - November 11, 2026
- Brasilia Espresso Machine: Features, Performance, Models, and Buying Guide - November 11, 2026