
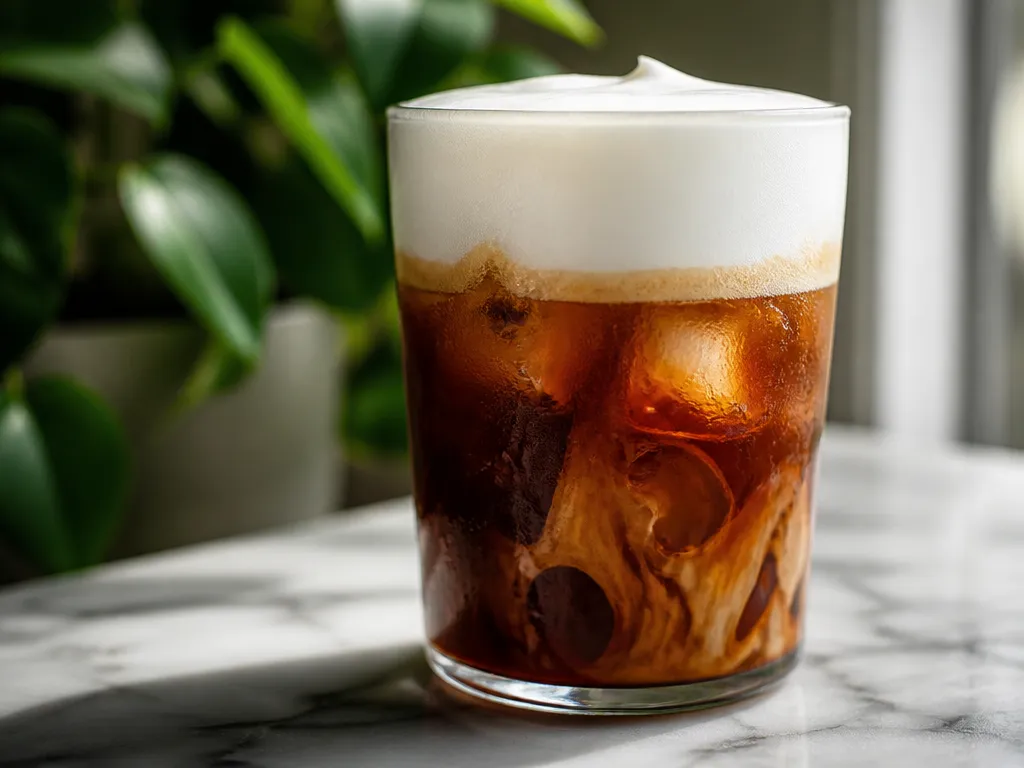
Cold foam is made by frothing a chilled milk or dairy-free base until it becomes visibly airy, then serving it immediately. With a handheld frother, start with about 2 to 3 minutes of frothing and stop when the mixture looks evenly frothy.
The amount of base depends on the tool, drink, and amount of topping you want. Begin with a small batch, then adjust after seeing how much foam it produces. If the foam is thin or collapses quickly, check the base temperature, increase the consistency of your agitation, and transfer it to the drink without delay. Cold foam does not require heat.
How Is Cold Foam Made For Iced Drinks?
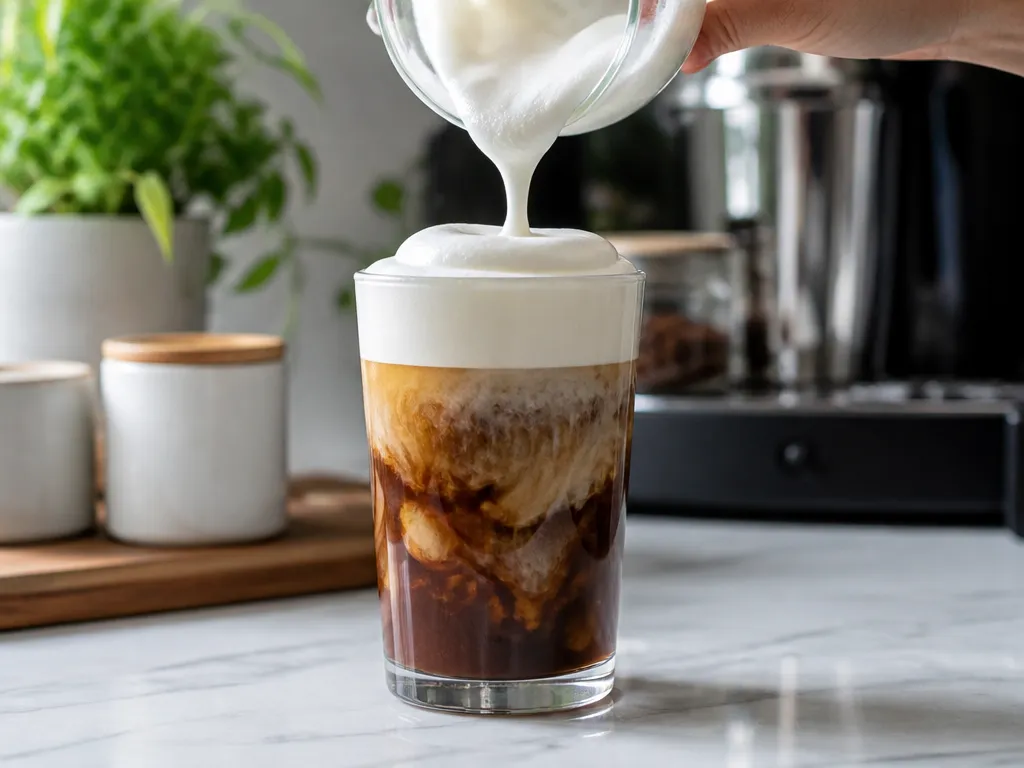
Build cold foam by frothing a chilled dairy or dairy-free base until it looks evenly frothy, then add it to the iced drink in one quick transfer. A handheld frother usually takes about 2 to 3 minutes, but the visual texture matters more than the timer.
Texture and yield to expect from the quick method. The finished foam should look evenly aerated and thick enough to sit on the drink briefly. If it looks thin or runny, continue aerating while checking the texture, or use a smaller batch so the tool can work through the base more effectively.
What to watch for while it forms. Look for a uniform, visibly frothy surface rather than bubbles gathered only around the edges. Once the foam reaches that stage, stop and serve it.
Why Does Cold Foam Hold Shape Without Heat?
Cold foam holds its shape because aeration disperses air through the liquid and creates a layer of bubbles. The practical factors you can control are the starting temperature, the base, the tool, the amount of agitation, and how quickly you serve the foam.
A foam with small, fairly even bubbles usually looks more cohesive than one with a few large bubbles. The type of milk or dairy-free alternative also affects the result, so a base that works well with one tool may produce a looser foam with another. Treat “stable” as a serving goal rather than a promise that the foam will remain unchanged.
Why The Air Bubbles Behave Differently When It Is Cold
Frothing traps air throughout the liquid. As the bubbles settle, the foam can become thinner or separate, which is why cold foam is best transferred soon after aeration. Starting with a chilled base and using a steady technique gives you more control during the short period when the foam is at its fullest.
Why Heat Is Not Used To Stabilize Cold Foam
Cold foam is designed to be aerated without warming the base. Heat changes the process and produces a hot-milk froth rather than the chilled topping used for iced drinks. If your equipment heats the mixture, confirm that it has a cold-froth setting before using it for this method.
The aim is simple: create enough air and structure for a spoonable layer, then serve it while it is fresh. There is no need to heat or cook the base.
What Variables Affect Foam Texture And Yield?

Cold foam changes when you alter the base, additions, batch size, container, or amount of agitation. Adjust one factor at a time so you can identify what improves your result.
What I would do: choose one base, keep it chilled, and use the same tool and container until the result is repeatable. Then adjust the base, sweetness, or batch size one change at a time.
What Is A Concrete Home Cold-foam Recipe And Ratio?
For a home batch, measure a small amount of chilled milk or dairy-free alternative, then froth it until it looks visibly airy and thick enough to sit on the drink. The available evidence supports the frothing method and timing, but not one universal milk-to-drink ratio. Start with enough base to cover the bottom of your frothing vessel and make the amount of topping you want, then adjust for your equipment.
What to aim for visually: the foam should look aerated and should sit on the drink rather than immediately blending back into it. If it runs flat when lifted with a spoon, continue aerating briefly or try a smaller batch.
| Serving target | Cold-foam base to froth | What to look for | How you use it |
|---|---|---|---|
| 1 iced drink | A small, chilled batch sized to your tool and desired topping | Evenly frothy foam | Add immediately in one transfer |
Texture cues that tell you you’re done: the foam should look uniform, with fewer obvious large bubbles, and should hold a soft mound briefly. For a handheld frother, the workable starting time is 2 to 3 minutes, followed by a visual check.
For a larger batch, make sure the container has enough room for the foam to expand and that the tool can circulate through the base. If the foam stays thin, reduce the batch size before simply adding more mixing time.
My setup choice: measure a small, repeatable amount of chilled base, froth it with the same tool until it looks evenly frothy, then spoon it onto the iced drink immediately. This is more reliable than treating an untested volume as a fixed recipe.
How To Foam With Jar Shaker, Handheld Frother, And Blender?

Use a cold, pre-measured dairy or dairy-free base and aerate it until it looks evenly frothy. The bar-style goal is a denser, more uniform topping, while a quick home version can be looser as long as it sits on the drink long enough to serve.
Jar Shaker Method
Handheld Frother Method
Blender Method
When Should Foam Be Prepared And How Long Does It Last?
Make cold foam close to serving time. Aeration changes the texture as the foam sits, so the most dependable workflow is to prepare the drink first, froth the base, and add the foam immediately.
If you want repeatable results, arrange the workflow around the frothing step so the foam does not sit while you finish the drink.
What Are Common Foam Failure Modes And Fixes?
Most problems come from insufficient aeration, an unsuitable batch size, uneven agitation, or a delay before serving. Use the symptom as a guide, then change one variable at a time.
Foam Too Runny Or Lacks Stiffness
Symptom: The foam looks bubbly but will not mound, pours like milk, or disappears as soon as you lift it with a spoon.
Likely cause: The batch may be too large for the tool, the base may not have been aerated evenly, or the foam may have sat too long.
Fix: Start with a smaller chilled batch and use steady agitation. With a handheld frother, work within the 2 to 3 minute starting range, then serve as soon as the foam looks ready.
Large Or Uneven Bubbles
Symptom: The surface has large bubbles, a rough texture, or a watery layer around the edges.
Likely cause: The agitation may be uneven, the container may be too full, or the foam may have been moved repeatedly after forming.
Fix: Use a container with headspace, keep the frother moving through the base, and transfer the finished foam in one pass. Avoid repeatedly stirring it after aeration.
Foam Collapses Too Quickly
Symptom: The foam looks good at first but thins noticeably before you finish serving.
Likely cause: The foam sat too long, the base or drink was not cold, or the batch did not produce enough structure for the tool and base you used.
Fix: Chill the base, prepare the drink first, and serve immediately after frothing. If the result remains weak, test a smaller batch or a different base.
Foam Tastes Flat Or Separates
Symptom: The flavor is uneven, or you see streaks or a watery layer separating from the thicker foam.
Likely cause: Sweetener or flavoring may not have been distributed evenly, or the foam may have been mixed aggressively after forming.
Fix: Mix flavorings into the chilled base before frothing. Use a modest amount at first, then froth until the texture is ready and stop rather than continuing indefinitely.
Foam Becomes Too Thick Or Gloopy
Symptom: The foam is stiff, clumpy, or difficult to spread over the drink.
Likely cause: The base may be too thick for the amount of agitation, or the mixture may have been aerated beyond the texture you want.
Fix: Use a smaller starting batch and stop as soon as it becomes spoonable. If the same base repeatedly turns clumpy, reduce the agitation or try another base.
How Does Cold Foam Differ From Hot Froth And Why It Matters?
Cold foam and hot froth use different starting conditions. Cold foam begins with a chilled base and is aerated without heat for an iced drink. Hot froth involves warming the milk during the process and is generally used with hot drinks.
Quick Summary
Make cold foam by aerating a chilled milk or dairy-free base, then spooning it onto the iced drink while it is freshly formed.
Make the foam close to serving time. If it is thin, continue aerating while checking the texture; if it has large bubbles, use steadier mixing and more headspace; if it collapses quickly, serve sooner and test a smaller batch or different base.
Next action: chill your base, measure a small batch, froth it with a handheld frother for 2 to 3 minutes, and spoon it onto the iced drink immediately.
Frequently Asked Questions
Does Making Cold Foam At Home Actually Save Money?
The cost depends on the milk or dairy-free base, the amount used, and whether you already own the equipment. Compare the amount of base used in your test batch with the price of a prepared topping or café upcharge in your area. That will give you a more useful answer than assuming every home batch costs the same.
Waste matters too. Foam that collapses before it reaches a drink, or a batch larger than you need, uses additional base. If you already own a jar, the extra equipment cost is zero. A handheld frother adds an upfront cost that may make sense if you use it regularly.
When Is It Worth Buying A Dedicated Milk Frother?
If a jar or handheld frother produces foam you are happy to spoon onto a drink, more equipment may not improve the result. A dedicated device is more useful when you want a repeatable process, need to make multiple batches, or prefer not to froth by hand.
Check the settings before buying. Some countertop milk frothers are designed mainly for heating, while cold foam requires a chilled base and no added heat. Choose a model that specifically supports cold frothing if that is the result you want.
What Happens If You Skip Frothing And Just Pour Milk On Top?
You still have a milk-based iced drink, but you will not have a spoonable foam layer. Plain milk usually mixes into the coffee more readily because it has not been aerated.
That is a reasonable fallback when the foam fails or you do not want to use extra equipment. If you prefer the flavor and texture of plain milk, there is no need to force the drink into a cold-foam format.
Is Cold Foam Safe To Leave Sitting Out?
The base is perishable dairy or a dairy-free beverage, so keep the base and finished foam cold and follow the storage directions on the product packaging. The appropriate holding time depends on the specific base, its label, and local food-safety guidance. When in doubt, prepare only what you can serve promptly.
For a group, keep the base refrigerated until you are ready to froth it, and avoid leaving a finished batch out between servings. If you are serving someone with a food allergy, clean the jar, frother, or blender according to appropriate allergen-handling practice before preparing another batch.
Does The Drink And Ice Underneath Affect How The Foam Holds?
The drink beneath the foam affects how the topping sits and how quickly it mixes in. Leave enough room in the glass for the foam instead of filling it completely to the rim. Use a cold coffee or cold brew so the topping remains a cold layer during assembly.
Prepare the iced drink before frothing. That way, you can add the foam as soon as it reaches the desired texture rather than leaving it to stand while you arrange the glass.
How Do You Tell Whether A Cold Foam Recipe Is Worth Following?
Look for three practical details: the tool, the starting amount of base, and a stopping cue. A method that gives a handheld frother and a 2 to 3 minute starting time is more useful when it also explains what “ready” looks like.
A starting volume is helpful, but it is not a universal rule because tools and bases behave differently. Test a small batch, look for an even, spoonable foam, and change one variable at a time before scaling up.

- Espresso Bar Wedding: Ideas, Setup, Costs, and Tips for a Memorable Coffee Experience - November 11, 2026
- How Many Grams of Espresso Beans for a Double Shot? A Complete Brewing Guide - November 11, 2026
- Brasilia Espresso Machine: Features, Performance, Models, and Buying Guide - November 11, 2026