
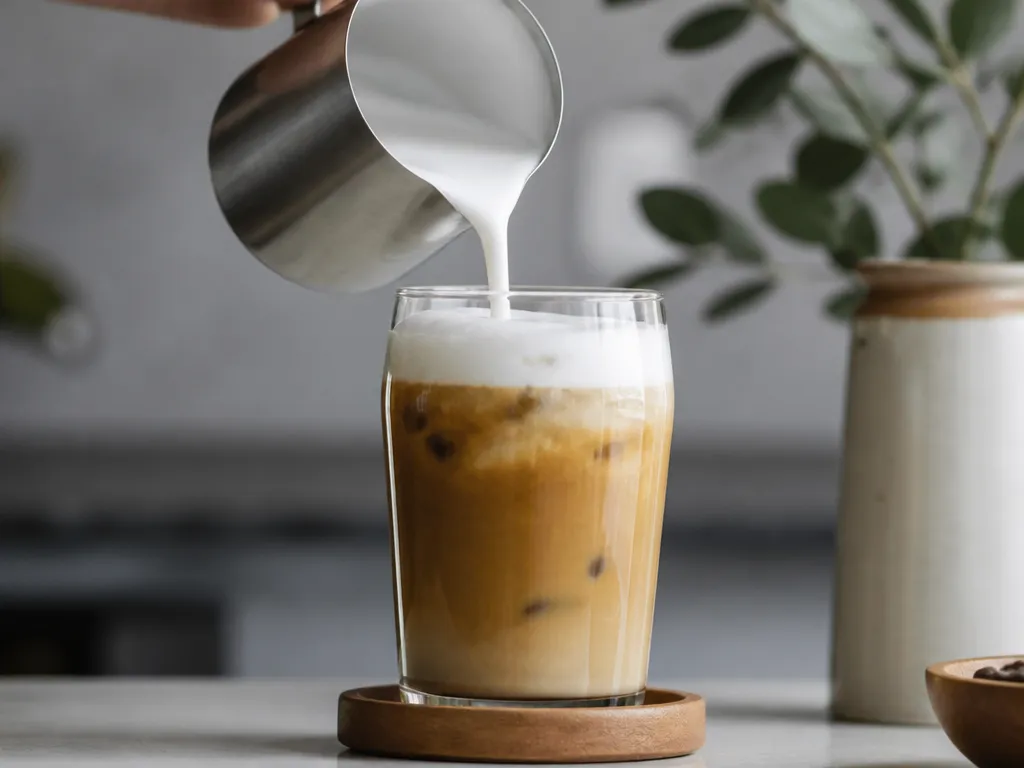
Cold foam is won or lost at two points: how cold your milk is and how fast you stop aerating once it thickens. If you overmix, it collapses. If your milk is too warm or too low-fat, it stays foamy for a blink and then turns watery. The “best way” is a method that controls temperature and stops on time.
best way to make cold foam: use cold milk (about 4 to 10°C / 39 to 50°F) and aerate just until the foam looks glossy, then stop immediately. For a standard 8 to 12 oz (240 to 355 ml) iced drink, froth 2 to 3 tbsp foam on top. Choose whole milk for best texture, heat nothing, and avoid shaking after frothing.
Best Way To Make Cold Foam
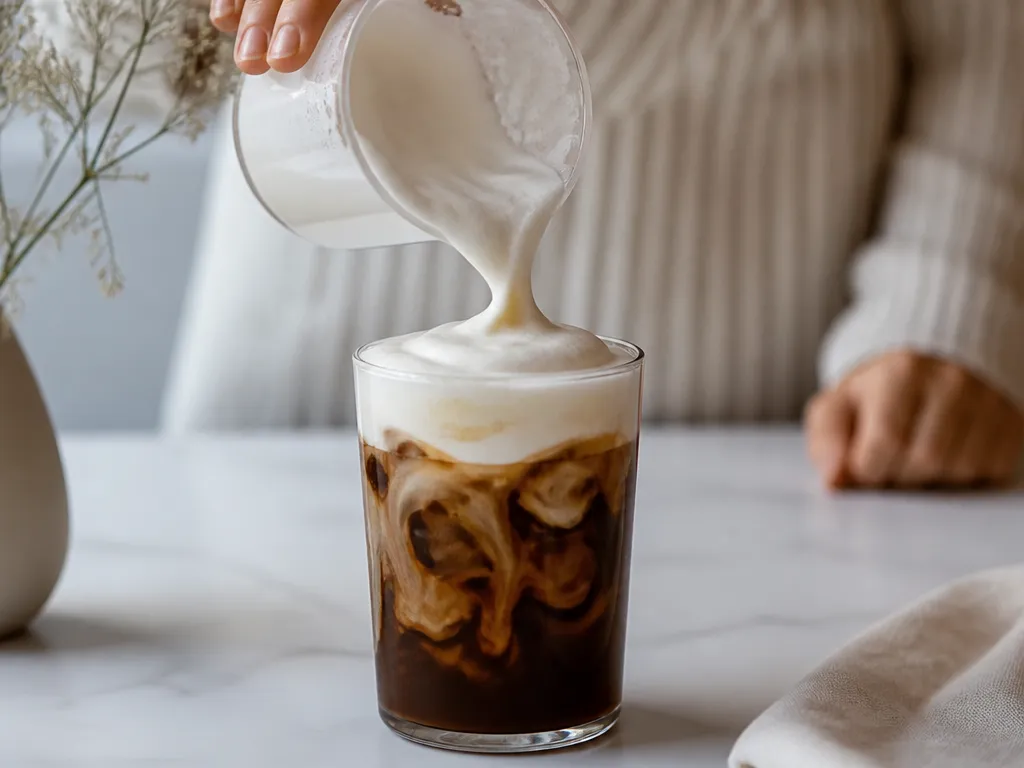
Cold foam turns out best with an immersion blender plus a chilling step, because you create dense microfoam at low temperature while keeping the foam stable. Use very cold milk (about 40°F to 45°F, 4°C to 7°C) and whip in a narrow container so shear stays high without overheating the drink base.
Equipment, Ingredients, Temperatures
For consistently thick foam, pick a milk you can spin easily and keep it cold throughout. Whole milk gives the richest texture, while lower-fat milks foam less densely and break down sooner. Soy and oat can work, but they foam differently by brand and added oils or gums.
| Item | Amount/Specification | Notes |
|---|---|---|
| Milk | 120 mL (about 1/2 cup) | Use very cold milk (target 40°F to 45°F / 4°C to 7°C). Whole milk is the most forgiving for thick foam. |
| Sweetener (optional) | 1 to 2 tsp simple syrup | Add only if you want sweet foam. Avoid granulated sugar, it can leave grainy foam. |
| Immersion blender | Any countertop immersion blender with a small head | Goal is fine bubbles. Keep the head near the surface to avoid splashing. |
| Chilled narrow cup or pitcher | Capacity 300 mL or more | Narrow walls help keep foam dense and reduce air loss. |
| Thermometer (optional but recommended) | Instant-read | Used to control milk temperature so the foam stays thick. |
Judgment call: if the foam looks frothy but collapses quickly, reduce blending time and keep the milk colder rather than “chasing” more volume.
Alternative Method A: Handheld Frother
Handheld frothers make cold foam by pushing milk through a small aeration zone, then stabilizing the bubbles with whatever proteins are in your milk. The most repeatable results come from cold whole milk (or barista-style dairy) and a tight technique: brief pre-chill, controlled swirl, and stopping as soon as the foam looks glossy.
Equipment And Setup
Use a handheld electric frother with a whisk attachment and a narrow shaft, so the tip stays submerged. Keep a tall, narrow cup nearby, because wide pitchers let foam expand and collapse faster. If you have a thermometer, target “very cold” rather than freezer-chilled, since extreme cold can slow bubble formation.
Before you start, chill the cup for a minute, then fill it with your milk. Dip the frother head fully into the milk before turning it on, otherwise you pull air from the surface and get froth instead of dense cold foam.
Milk Type And Ratio Guidance
Whole dairy makes the most stable foam because higher-fat milk helps slow bubble collapse. If you use plant milk, choose the creamiest barista-style option you have, and expect weaker structure. For most iced coffee sizes, the goal is enough foam to sit on top, not enough to cover the entire drink.
| Drink size | Milk for foaming | Foam target |
|---|---|---|
| Small (about 8 oz) | 60 to 80 ml | Thin layer, visible bubbles |
| Medium (about 12 oz) | 90 to 110 ml | Thick cap that holds shape briefly |
| Large (about 16 oz) | 120 to 150 ml | Heaped spoonfuls |
Ratio rule: start by foaming a modest amount (the range above) and adjust by adding a bit more milk next time if you keep running out. The bigger lever is milk choice and time, not exact measurements.
Troubleshooting For This Tool
My practical choice with a handheld frother is whole milk, foaming 20 to 30 seconds, then pouring immediately for the thickest “cap” before it settles.
Alternative Method B: French Press
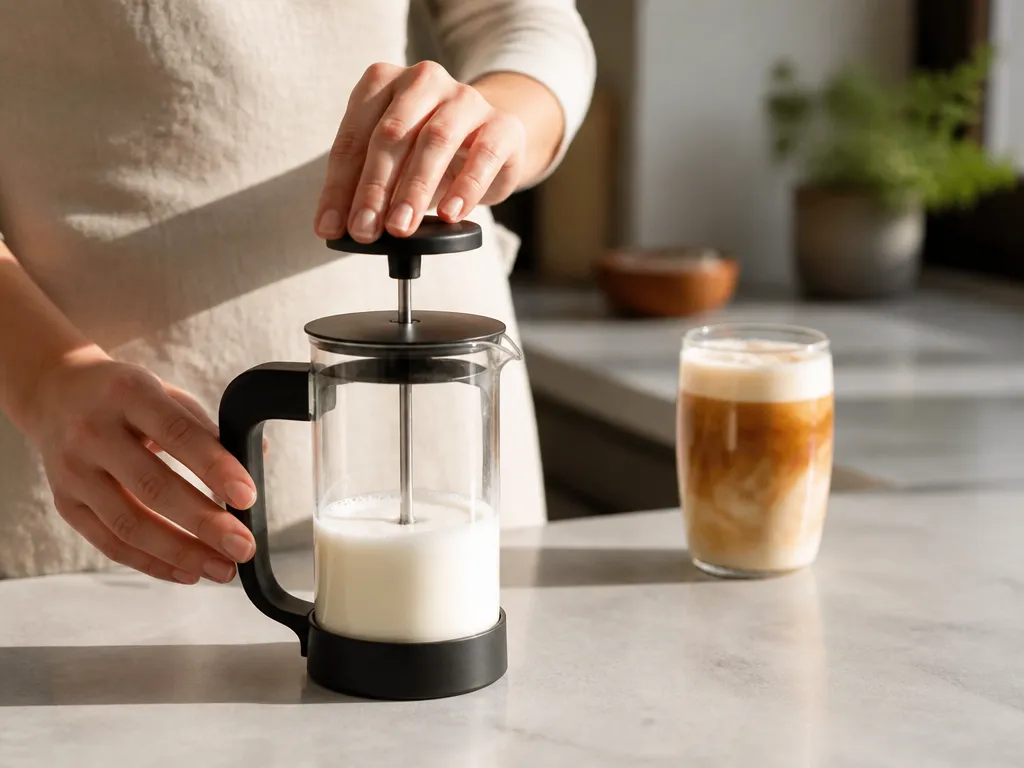
A French press can whip cold milk into stable, spoonable foam by forcing air through the milk while the press plunger creates shear. For best results, use a pre-chilled press, cold milk, and a tight plunge rhythm so the foam thickens before it settles.
Equipment and setup should be simple and specific. Use a standard glass or stainless French press with a metal plunger, and grab a kitchen scale or measuring cup so your milk volume stays consistent. Pre-chill the empty carafe in the fridge or with ice water for a few minutes, then dump the water.
Milk type and ratio are the main levers for foam quality in this method. Aim for a batch that gives you enough headspace to plunge without leaking foam around the edges, and expect that higher-fat milk creates thicker bubbles but can feel heavier in taste.
| Milk choice | Foam result | How to adjust |
|---|---|---|
| Higher-fat dairy (whole milk) | Thicker, more stable foam | Use a smaller fill level to keep the plunge smooth |
| Lower-fat dairy (2%) | Finer foam, less hold | Plunge a bit faster and pour immediately |
| Oat milk or other barista-style non-dairy | Can foam well, texture varies by brand | Start with a conservative fill level and test plunge timing |
Pros are practical: the method is quiet, repeatable, and creates foam without extra gadgets. Cons show up fast: foam can lose volume if you wait, and non-dairy results vary widely by formulation.
Ideal use: when you want batch foam quickly with minimal equipment, and you plan to pour right away.
Potential pitfalls are predictable and fixable. If you get large bubbles or watery foam, reduce fill level and shorten the wait before pouring; if you get stiff foam that looks clumpy, slow the plunge slightly and use a slightly higher fill level next time to reduce shear extremes.
Milk Type Guidelines For Cold Foam
For the smoothest, longest-lasting cold foam, use dairy whole milk (or 2% at a pinch) and keep it cold and protein-rich. Plant milks foam more inconsistently because many have less protein and different fat and stabilizer behavior, so you need either higher-protein blends or added foam stabilizers.
Dairy Vs Plant Milk: Why Foam Texture Changes
Dairy cold foam gets structure from milk proteins (especially casein and whey) and from milk fat. Whole milk tends to produce a thicker foam because it has more fat to slow collapse and a higher overall ability to hold air bubbles through agitation. If you switch to lower-fat dairy, the foam often gets thinner and “foamy” rather than creamy.
Plant milks foam according to their protein content and any added emulsifiers or thickeners. Soy milk generally foams better than oat or almond because it typically has more protein, which helps trap air during whipping. Oat and pea-based options can also work well when they include ingredients that improve viscosity and stability, but two “oat milks” can behave very differently.
Recommended Ratios And Practical Targets
For cold foam, the mixing ratio matters as much as milk type. Use a base of 6 to 8 ounces milk for a single serving top, then add any sweeteners after foaming if you want maximum stability. If you must sweeten before frothing, keep the added sweetener low because extra dissolved solids can weaken the foam feel.
When using a plant milk, treat it like a “stability problem” first. Start with a higher-protein option (soy or a pea-based barista milk) and keep the milk amount the same as dairy, then adjust only with stabilizer (see next section) rather than loading more sugar.
| Milk type | Best starting point | What to expect |
|---|---|---|
| Dairy whole milk | 6 to 8 oz base | Thick, creamy foam that holds up well in iced drinks |
| Dairy 2% or lower | 6 to 8 oz base | Less body, foam collapses faster unless you add stabilizer |
| Plant milk (soy or pea-based) | 6 to 8 oz base | Often close to dairy texture, if protein is high |
| Plant milk (oat or almond) | 6 to 8 oz base + consider stabilizer | Can be airy but less creamy, breaks down sooner without help |
Stabilizers And Additives That Change The Outcome
Stabilizers are where you “buy back” consistency for plant milks or lower-fat dairy. The goal is thicker interfacial film around bubbles, so a small amount of an appropriate foaming additive can make a big difference without turning the foam gritty. If you are adding vanilla, cocoa, or flavored syrups, add them after foaming so particles do not disrupt bubble formation.
In practice, use one stabilizer choice at a time, then re-test. Start small, foam, then taste and observe collapse after a few minutes, because some additives improve texture but can also leave a coating that feels sticky in iced coffee.
Temperature And Handling Tips That Keep Foam Alive
Temperature controls how quickly fat and proteins behave, which affects both foam formation and collapse. Keep the milk cold before frothing, then foam promptly and pour directly onto the drink so the foam does not sit warming in the pitcher. If your foam looks dry or loses shine quickly, the milk may have warmed too much before agitation or your milk type lacks sufficient protein and viscosity.
Cold foam also hates reheating and repeated cycles. Whipping twice can thin out the structure because bubbles merge, so rework only if your first batch truly fails.
Foam Stability And Lifespan
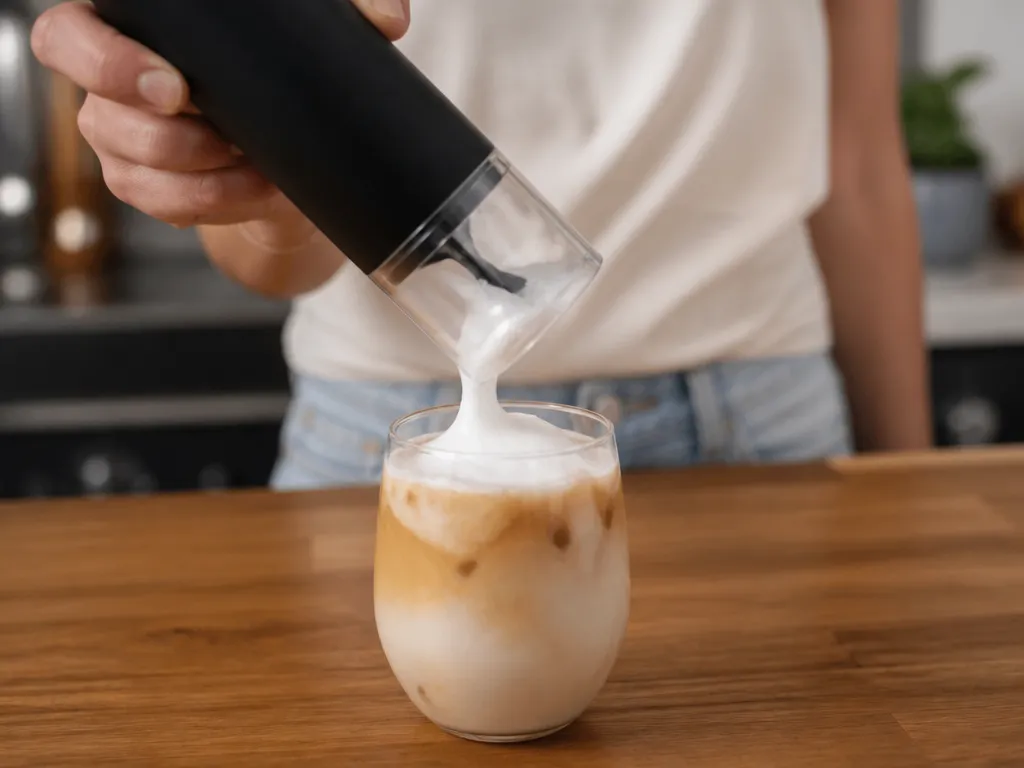
Cold foam texture peaks within about 30 to 90 seconds after you stop aerating, then it visibly loosens as bubbles merge and rise.
In practice, you still get usable foam for a few minutes, but the last bite becomes thin and “foamy water” fast if anything warms or if you over-aerate.
What Volume To Expect, Depending On Your Method
Because the research pack has no extractable numbers for foam volume by method, treat any “percent increase” claims you see online as marketing. Instead, plan around a stable, practical output: cold foam should fill the top of your drink with a clear boundary line, not spread to the surface like cream.
In practice, you can predict volume more reliably from viscosity and temperature than from the tool. Lower-temperature milk and a thicker milk base tend to hold shape longer and look fuller, while thin milk or warm milk collapses sooner even if it froths well.
| Method choice | Expected foam behavior | What to watch |
|---|---|---|
| Manual whisk (short burst) | Fast peak, faster collapse, “mousse” look for a short window | Surface turns glossy and flat quickly |
| Milk frother (aeration focused) | More initial volume, but larger bubbles can form if you run too long | Foam starts to sink in patches |
| Blender (high shear) | High peak and lots of microbubbles, highest risk of rapid collapse if over-blended | Foam gets airy, then thins and separates |
Timing: When Foam Is Best And When It Fades
Foam reaches peak stability very quickly after aeration, typically within the first minute. After that, dissipation accelerates as bubbles coalesce and liquid drains downward, so your goal is to pour immediately after you finish mixing.
Room temperature speeds collapse, so if your kitchen is warm, cut your delay between making and serving. Iced drinks are usually more forgiving because the drink keeps the foam cooler, extending the “still holds a ridge” window.
Foam lifespan shortens most when milk warms, when you over-aerate, and when you dilute the foam (for example, by adding too much liquid ingredient). Foam lifespan extends when the milk stays very cold, when you stop aeration as soon as you see a thick, uniform cap, and when you place it on a cold base.
Trade-off: methods that maximize peak height also tend to collapse faster if you run them too long, so the “best” approach is the one that gives you a thick cap quickly, then you stop immediately.
Troubleshooting Checklist
Use temperature control first, then milk prep, then aeration method. Cold foam fails mainly from fat/temperature misalignment and from over-aeration that breaks the foam film.
Fattiness And Lumpiness Fixes
Fattiness and lumpiness usually come from milk that is too warm, too thin, or not emulsified before foaming. Cause is uneven fat distribution, which makes curd-like flecks and “grainy” foam that collapses fast.
For example, if you switch from a higher-fat milk to a lower-fat one, the foam often becomes thinner and looser, so you have to reduce time and increase aeration consistency (same depth, same speed). If you see both lumps and quick collapse, treat it as a prep problem first (temperature and mixing), then adjust texture.
Weak Or Patchy Foam Remedies
Weak or patchy foam usually comes from insufficient aeration contact, poor foam-building surface area, or milk temperature that is off target. Cause is bubbles that never build a continuous layer, so you get islands of foam with liquid underneath.
If the foam is patchy even after consistent technique, pick a different milk type and stick with one for the rest of your tests. Plant milks can vary wildly by brand, and foam performance can change even when the label says “barista” or “froth-friendly.”
Fast Meltdown And How To Slow It
Fast meltdown is usually from heat transfer, weak bubble structure, or agitation that continues after the foam is made. Cause is that the foam film thins quickly when it sits in contact with warm coffee or when you move the drink too much.
For instance, if you pre-dilute your coffee with ice, you buy stability, but if your coffee is still warm when you foam, you trade speed for consistency. Cooling the base is the simplest lever for slower meltdown, even before you change milk.
Prepping Milk And Equipment To Prevent Issues
Cold foam prep works when the milk and the tool are clean, cold, and predictable. Cause of recurring failures is leftover residue, warm metal parts, or milk that sat long enough for separation before you pour.
Judgment call: if you are getting lumps or oily streaks, stop chasing “more froth” and fix prep first (milk temperature and mixing plus clean tools). If you get thin, watery foam, adjust aeration time and depth before you change milk again.
Quick-reference Charts And Visuals
8 oz to 16 oz drinks need roughly the same foam “height per sip,” so your target is stability first, volume second. Use the blender-cold approach for the fastest path to a tight foam, then scale milk volume and pour timing to keep the foam from collapsing within the first few minutes.
Serving-size Guide (8 Oz, 12 Oz, 16 Oz)
Cold foam looks best when it covers the surface in a thin layer with visible micro-bubbles, not when it piles into a thick mound. Keep the foam fraction fairly consistent and adjust the base coffee volume so the foam still forms a smooth top.
| Drink size | Target foam amount (practical) | Texture target | Pour timing |
|---|---|---|---|
| 8 oz | 1 to 2 tablespoons on top | Dense, creamy, small bubbles | Pour immediately after topping the coffee |
| 12 oz | 2 to 3 tablespoons on top | Dense cap that stays level | Pour right after you stir or shake the base |
| 16 oz | 3 to 4 tablespoons on top | Thick but smooth layer, no watery sheen | Pour as soon as the cup is at final dilution |
Foam amount is your easiest control knob, but density is the real one. If your foam looks airy or “foamy” instead of creamy, reduce aeration and focus on keeping the liquid phase cold while mixing.
Time-to-stable-foam By Method (What To Watch)
Stability is the clock that matters. Across methods, aim for a foam that holds its surface texture for several minutes; if it collapses quickly, your mix is too warm, too diluted, or you over-aerated.
Stability signal: if the foam shows a thin watery ring or separates into liquid and bubbles, stop and adjust temperature and aeration on the next batch.
Foam Density And Texture Targets (Visual Cues)
Density should feel thick in the cup. Visually, tight cold foam has uniform micro-bubbles and a matte, creamy surface; weak foam has big bubbles, shine, or a quick “deflate” look.
| Target | What you see | What to adjust |
|---|---|---|
| Dense micro-bubble foam | Small, uniform bubbles; level surface | Keep ingredients cold; shorten mixing time; pour immediately |
| Too airy foam | Large bubbles; looks fluffy but thins fast | Reduce aeration; avoid long mixing passes |
| Watery collapse | Wet sheen, separation, ring around edges | Lower temperature; tighten ratio; use fresh cold base |
Texture consistency matters more than maximum volume. Your next batch should prioritize stability over height, because the best-looking foam after 30 seconds often becomes the worst after 3 minutes.
Quick Summary
The most reliable approach is to use very cold milk in a narrow container, aerate until the foam is thick and glossy, and pour it onto the drink immediately. Whole milk generally gives the most stable, creamy texture, while plant-based options vary by protein content and stabilizers.
If your foam turns thin or watery, check the milk temperature, milk type, container, and aeration time before changing the recipe. For a consistent result, use very cold milk at about 40°F to 45°F (4°C to 7°C), chill the narrow container, blend for 20 to 30 seconds, and stop as soon as the foam is thick and glossy.
Frequently Asked Questions
How Much Does It Cost To Make Cold Foam At Home?
Your cost is mostly the milk or cream you buy and any sweetener you add. Live scrape research for exact price benchmarks was not available, so the safest way to estimate is to count your per-serving milk (and syrup) amount and divide by the container price you pay locally.
How Long Does Cold Foam Take To Make, And When Should You Serve It?
Plan on about 1 to 5 minutes for whipping or blending plus a quick taste adjustment. Cold foam is best when you serve it immediately, because it tends to lose volume as it sits, especially if you over-agitate or use heavier mixing gear.
What Happens If I Do Nothing After Making Cold Foam And Let It Sit?
If you leave it sitting, it will usually deflate and separate, turning from thick foam into a thinner, less stable layer. The risk of separation increases with high agitation, warm milk, or adding sweeteners too early that change how the foam holds.
Can I Safely Make Cold Foam If I Have A Dairy Allergy, Lactose Intolerance, Or I Am Avoiding Caffeine?
For dairy allergy, use non-dairy milk that matches your allergen needs, but check the label because many substitutes contain ingredients you may still react to. For lactose intolerance, lactose-free dairy often works, but the best results depend on the milk’s protein content, which directly affects foam stability.
How Can I Verify A Cold Foam “Claim” (Like Stability Time Or Thickness) Before Trusting A Recipe?
Do a simple at-home test: make a small batch, then measure or observe the texture at 0, 2, 5, and 10 minutes under the same conditions (temperature, container, and mixing time). If a claim says it holds for a long time, your quick time-series check should confirm whether it stays thick or separates.

- Espresso Bar Wedding: Ideas, Setup, Costs, and Tips for a Memorable Coffee Experience - November 11, 2026
- How Many Grams of Espresso Beans for a Double Shot? A Complete Brewing Guide - November 11, 2026
- Brasilia Espresso Machine: Features, Performance, Models, and Buying Guide - November 11, 2026