
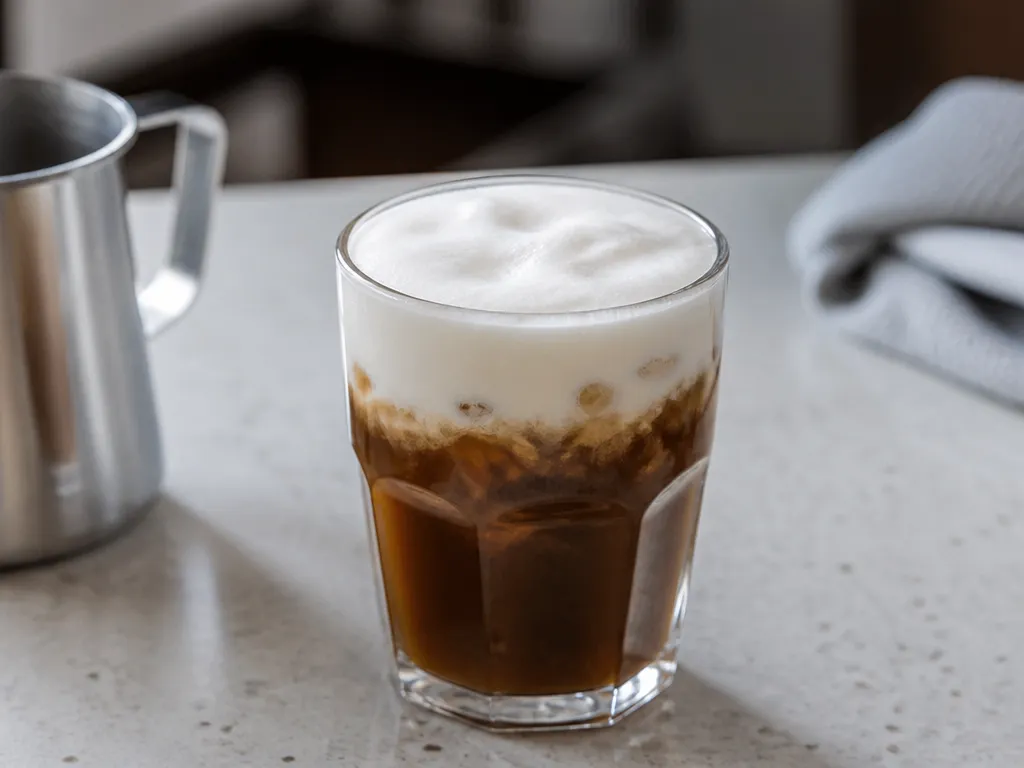
Yes. Whole milk can make cold foam for iced coffee or cold brew. Start with milk that is thoroughly chilled, use a tool that adds air without warming or overworking it, and spoon the foam onto the drink as soon as it reaches a thick, glossy texture.
A handheld electric frother is the easiest option, while a sealed jar, shaker, or French press can work without specialized equipment. The exact frothing time depends on the tool and the amount of milk, so stop when the foam looks dense and cohesive rather than following a rigid timer.
Is Whole Milk Suitable For Cold Foam?

Whole milk is a good choice for cold foam because its fat and proteins can help create a creamy layer that holds together on top of a drink. When the milk is very cold, it is more likely to produce a thick foam instead of a loose froth that disappears quickly.
The fat contributes richness and texture, while milk proteins help support the air bubbles created during frothing. Lower-fat milk can still aerate, but its foam may feel lighter and lose volume sooner. Results also depend on the milk, the tool, and how aggressively you froth it.
Temperature is the main practical constraint. Use milk that is well chilled, ideally straight from the refrigerator. Room-temperature milk may still foam, but it usually produces a softer texture and thins more quickly.
| Whole-milk condition | What you’ll likely see | What to do |
|---|---|---|
| Very cold | Thicker foam with better shape | Chill the milk before frothing and keep the tools cool when practical |
| Warmer than refrigerator temperature | Looser foam that thins sooner | Re-chill the milk before trying again |
| Fresh, properly stored whole milk | More predictable texture | Keep the milk cold and mix it gently before measuring |
For the most reliable home result, chill the milk, froth it until the texture changes from liquid to dense and glossy, then add it promptly to iced coffee or cold brew.
Why Does Whole Milk Foam?
Frothing traps air in milk. Fat and proteins help support the walls around those air bubbles, while cold temperatures slow the foam from draining and collapsing. That combination gives whole milk a creamy texture when it is aerated correctly.
Role Of Fat In Foam Stability
Whole milk’s fat contributes to its fuller mouthfeel and can help produce a more substantial foam than lower-fat milk. It does not make the foam completely stable, however. Excessive mixing, warmth, or a long wait before serving can still cause the bubbles to merge and the liquid to separate.
Role Of Milk Proteins (Casein And Whey)
Casein and whey proteins help form a film around air bubbles during aeration. That film supports the foam structure and helps it remain cohesive after frothing. Milk can vary in how consistently it foams, so technique still matters even when the milk is cold.
Impact Of Temperature On Foam Integrity
Cold milk generally gives you more time to work before the foam thins. As the milk warms, the foam can lose volume and become more liquid. Keep the milk and, when possible, the container cold, and add the finished foam to the drink without delay.
| What you see | Most likely cause | What to change |
|---|---|---|
| Thick, creamy foam | Cold milk and controlled aeration | Stop when the foam looks glossy and slightly mounded |
| Foam looks airy but watery | Warm milk, excessive agitation, or rapid drainage | Use colder milk and shorter frothing bursts |
| Fast collapse after pouring | The foam warmed, sat too long, or was overworked | Use a narrow container, minimize waiting, and serve immediately |
What Whole-milk Specs Maximize Foam?

Three practical factors affect whole-milk cold foam: the milk’s fat level, its starting temperature, and how evenly it is mixed. The label can confirm that you are using whole milk, but the best result still comes from cold milk and controlled aeration.
| Spec | Target for best whole-milk cold foam | Why it matters | If you miss the target |
|---|---|---|---|
| Fat content | Milk labeled whole milk | Its fat contributes to a richer, creamier foam | The foam may feel lighter or thin sooner |
| Milk temperature | Thoroughly chilled, preferably refrigerator-cold | Cold milk generally holds a thicker foam more effectively | Warmer milk may produce a loose foam that collapses sooner |
| Frothing window | Work while the milk is still cold | Foam texture is easier to control before the milk warms | The foam may lose thickness during preparation |
| Freshness and uniformity | Fresh, properly stored milk that has been gently mixed | Consistent milk gives more predictable results | The texture may be uneven from one batch to the next |
In practice, choose whole milk, chill it well, and work quickly. A gentle shake before measuring can redistribute the milk without adding much air. There is no need to heat it: cold foam is made with chilled milk.
What Tools Reliably Foam Whole Milk At Home?
The best tool is the one that creates small bubbles while giving you enough control to stop before the milk becomes thin. Milk temperature and technique matter as much as the equipment. A tool that keeps agitating the milk after the foam has formed can produce a less stable result.
Handheld electric frother is the easiest option for a dense serving of foam. Use a narrow cup, keep the whisk just below the surface, and move it gently through the milk. Stop when the texture looks thick and uniform.
Immersion blender can aerate a larger amount, but it is easy to overmix the milk. Use a tall container, keep the blade covered, and work in brief bursts. This option is useful when you are making more than one drink, but it offers less delicate control than a small frother.
Mason jar or shaker requires no electrical tool. Shaking introduces air quickly, although it usually creates larger and less uniform bubbles than an electric frother. Use a secure lid and serve the foam promptly.
| Tool | Best for | Foam texture control | How to use |
|---|---|---|---|
| Handheld electric frother | A thick foam cap for one drink | High | Use a narrow container and stop when the foam looks dense |
| Immersion blender | A larger batch | Medium | Use a tall container and short bursts to avoid overmixing |
| Mason jar or shaker | Quick foam with minimal equipment | Medium to low | Seal tightly, shake vigorously, then serve promptly |
Choose the frother when consistency matters most. Use a jar or shaker when convenience matters more than a perfectly smooth texture.
How To Froth Whole Milk With A Handheld Frother?
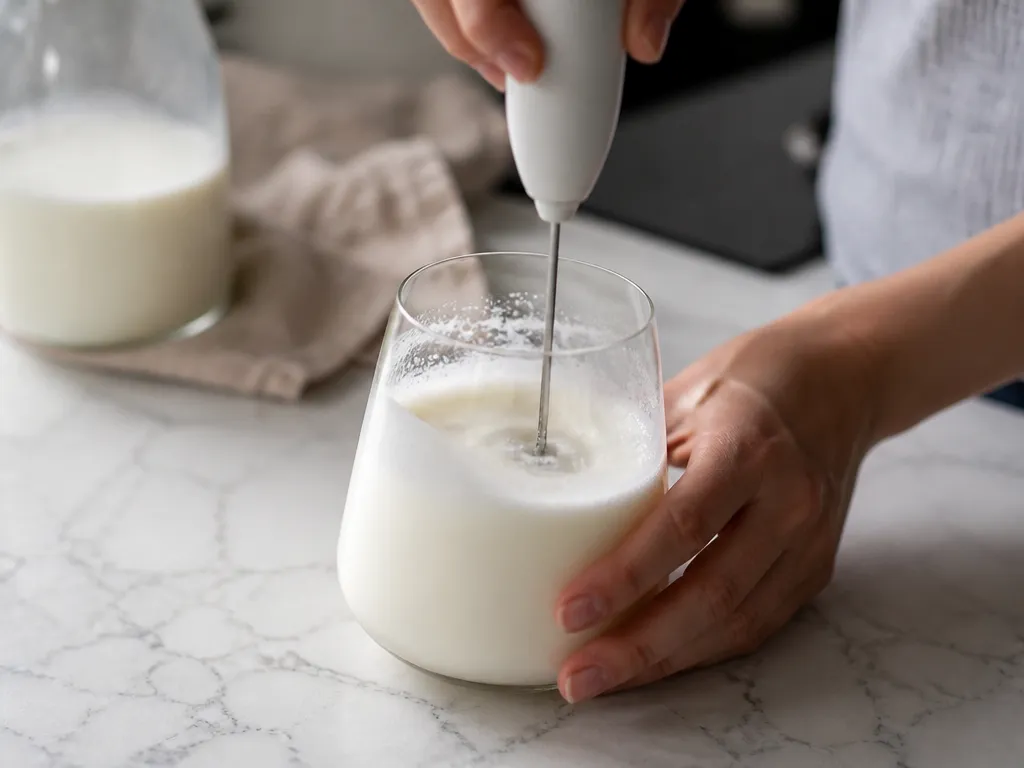
A handheld frother can turn well-chilled whole milk into a thick topping for iced coffee or cold brew. The method is simple: use a narrow container, introduce air gradually, and stop as soon as the foam looks cohesive.
Serving cue: Add enough foam to create a visible cap without burying the drink. Start with a modest spoonful and add more if needed.
Timing cue: Make the foam at the end of the drink-building process. If it sits and thins, the better fix is to froth a fresh portion rather than trying to stir air back into collapsed foam.
How To Froth Whole Milk With A Jar Or French Press?
A jar or French press can aerate cold whole milk without an electric frother. These methods usually create a less uniform texture, so watch the milk rather than relying on a fixed time.
Aeration tips that make the difference: keep the milk cold, leave room in the container, and use short checks instead of one long session. Texture checks: strong foam looks dense and creamy with relatively small bubbles. Weak foam looks uneven, while separated foam looks watery around the edges.
How To Serve, Store, And Vary Whole-milk Cold Foam?
Whole-milk cold foam is best treated as a fresh topping. Make only what you plan to use, add it at the end, and keep it cold until serving.
For the most consistent result, make one fresh batch at a time, keep it chilled, and top the drink immediately. If you need to store milk, follow the storage instructions on its packaging and keep it refrigerated. Finished foam is not a good make-ahead topping because its texture changes as it sits.
Quick Summary
Yes, you can make cold foam with whole milk. Use milk that is thoroughly chilled, aerate it with a handheld frother, immersion blender, jar, shaker, or French press, and stop as soon as the foam looks dense and glossy.
Whole milk cold foam quality changes if:
Next action: Chill whole milk, froth a small serving in a narrow container, and spoon it onto your iced coffee or cold brew as soon as it becomes thick and uniform.
Frequently Asked Questions
How Long Does Whole-milk Cold Foam Take To Make At Home?
The active frothing step is usually brief when the milk is already cold, but the exact time depends on the tool, container, and amount of milk. Watch the texture instead of following a fixed timer.
Stop when the milk looks expanded, glossy, and cohesive. If it remains thin, use another short burst rather than continuing indefinitely.
What’s The Typical Foam-to-drink Ratio If I Want A “Café Look”?
Use enough foam to create a visible cap while leaving some of the drink visible. Start with a modest layer and add more if you want greater height.
The right amount depends on the size of the drink and your preference. A lighter cap will disappear into the coffee more quickly, while a heavier cap may slump if it is not thick enough.
Can I Sweeten The Whole Milk Before Frothing, And Will It Ruin The Foam?
You can mix a small amount of sweetener into the cold milk before frothing, but added ingredients may change the milk’s texture and how it aerates. Test the amount you plan to use rather than assuming the foam will behave exactly like plain milk.
For the simplest troubleshooting, froth plain whole milk first and sweeten the coffee separately. Once your technique works, add flavoring to the milk before frothing.
What If I Leave The Foam Sitting While I Finish My Drink, Does It Still Work?
It may still work, but the foam will gradually lose volume as it warms and the bubbles break down. The best workflow is to finish the coffee first, then froth the milk and add the foam immediately.
If the foam has become watery, a fresh portion of chilled milk is more reliable than prolonged re-frothing of the collapsed mixture.
How Can I Tell Whether My Milk Is Foaming Correctly, Without Guessing?
Look for a thick, uniform surface with small, cohesive bubbles. Properly formed foam should appear creamy rather than watery or sharply separated.
Stop when the foam holds a gentle mound. If it becomes coarse, streaky, or thinner after continued mixing, you have likely overworked it or allowed it to warm.
When Would I Stop Diy Troubleshooting And Ask For Help?
For a kitchen result, ask for help with the equipment or technique if thoroughly chilled whole milk still refuses to foam after you try a different tool and a narrow container. The issue may be a weak frother, an unsuitable container, or a tool that is not drawing air into the milk.
Do not use milk with an off smell or unusual appearance. Follow the storage guidance on the package, and replace the milk if you are unsure that it is fresh.

- Espresso Bar Wedding: Ideas, Setup, Costs, and Tips for a Memorable Coffee Experience - November 11, 2026
- How Many Grams of Espresso Beans for a Double Shot? A Complete Brewing Guide - November 11, 2026
- Brasilia Espresso Machine: Features, Performance, Models, and Buying Guide - November 11, 2026