
Making pour-over coffee involves precise measurements, proper grind, and a controlled pour for a clean, flavorful cup.
As a passionate coffee enthusiast who has meticulously explored countless brewing methods, I can attest that mastering how to make pour over coffee step by step is a truly rewarding endeavor. This guide isn't just about following instructions; it’s about unlocking the nuanced flavors and rich aromas that a well-executed pour over can deliver, transforming your daily ritual into an elevated experience. Prepare to delve into the expertise required to consistently brew an exceptional cup, highlighting every critical detail to ensure your pour-over journey is both successful and delicious.
Understanding the Art of Pour Over Coffee
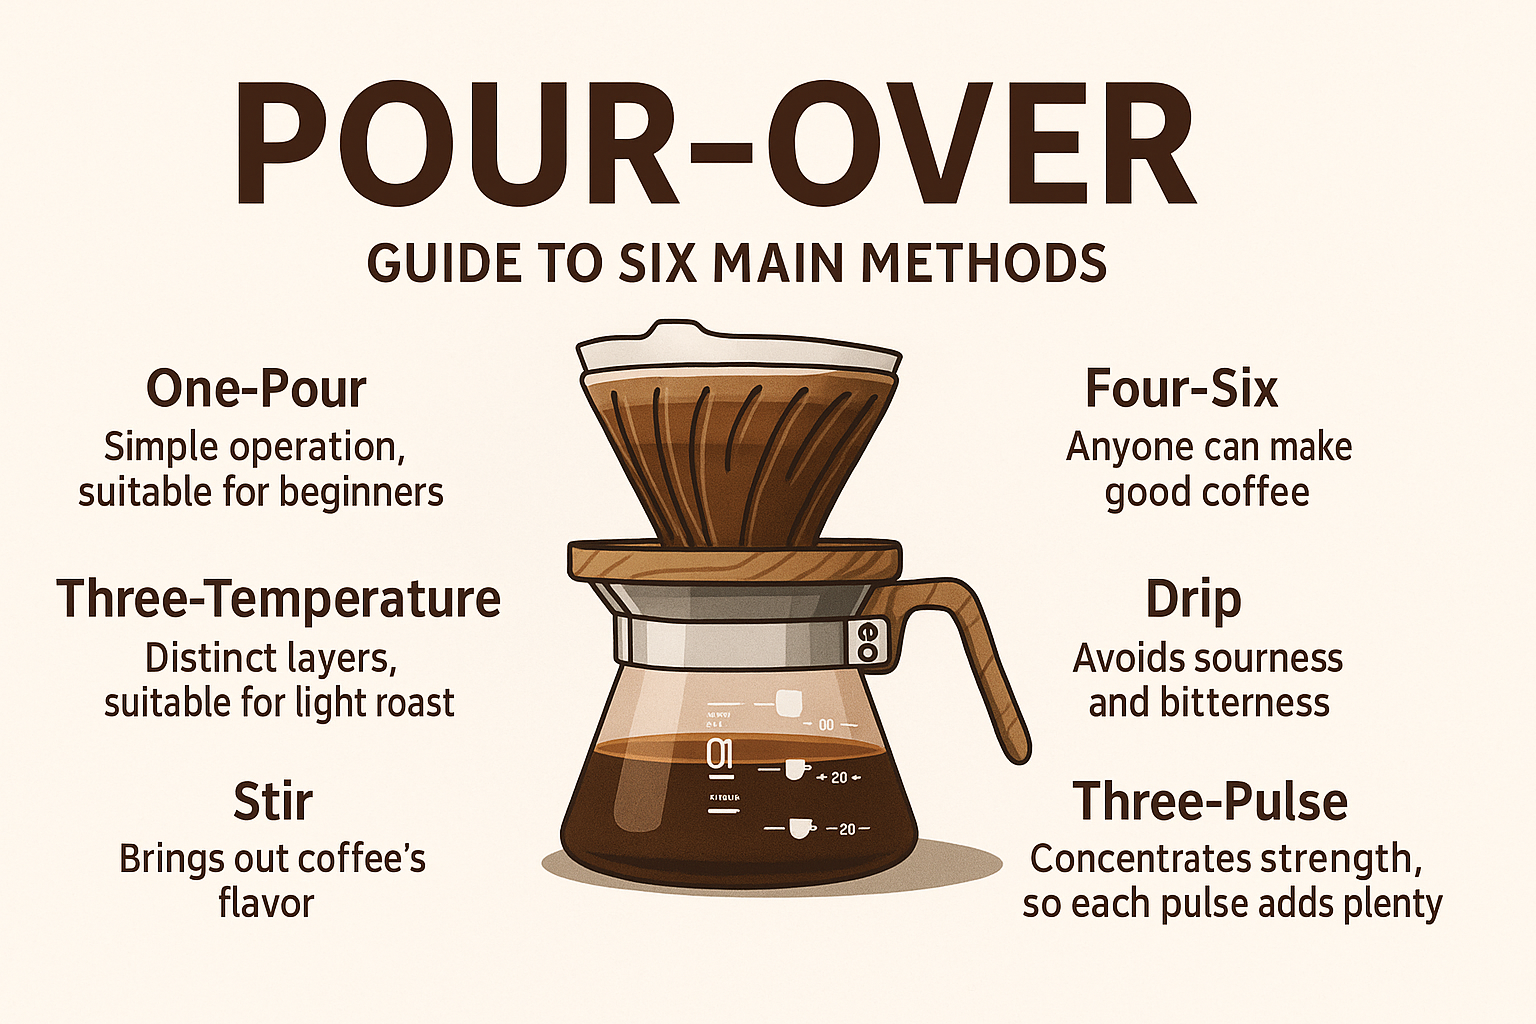
Pour-over coffee, also known as drip coffee, is a manual brewing method that emphasizes precision and control, allowing the brewer to exert significant influence over the final taste profile. Unlike automated drip machines, pour over involves carefully pouring hot water over a bed of coffee grounds, letting gravity do the work of extracting soluble compounds into your cup. This method is celebrated for its ability to produce a clean, bright, and highly aromatic coffee that highlights the unique characteristics of the beans. It's a method that values clarity in flavor, allowing delicate notes of fruit, chocolate, or floral essences to shine through without the muddiness often associated with other brewing techniques. The controlled process is what makes learning how to make pour over coffee step by step so appealing to those seeking a deeper connection with their brew.

Essential Equipment for the Perfect Pour Over
To truly master how to make pour over coffee step by step, having the right tools is paramount. Each piece plays a critical role in controlling the variables that impact extraction and flavor.
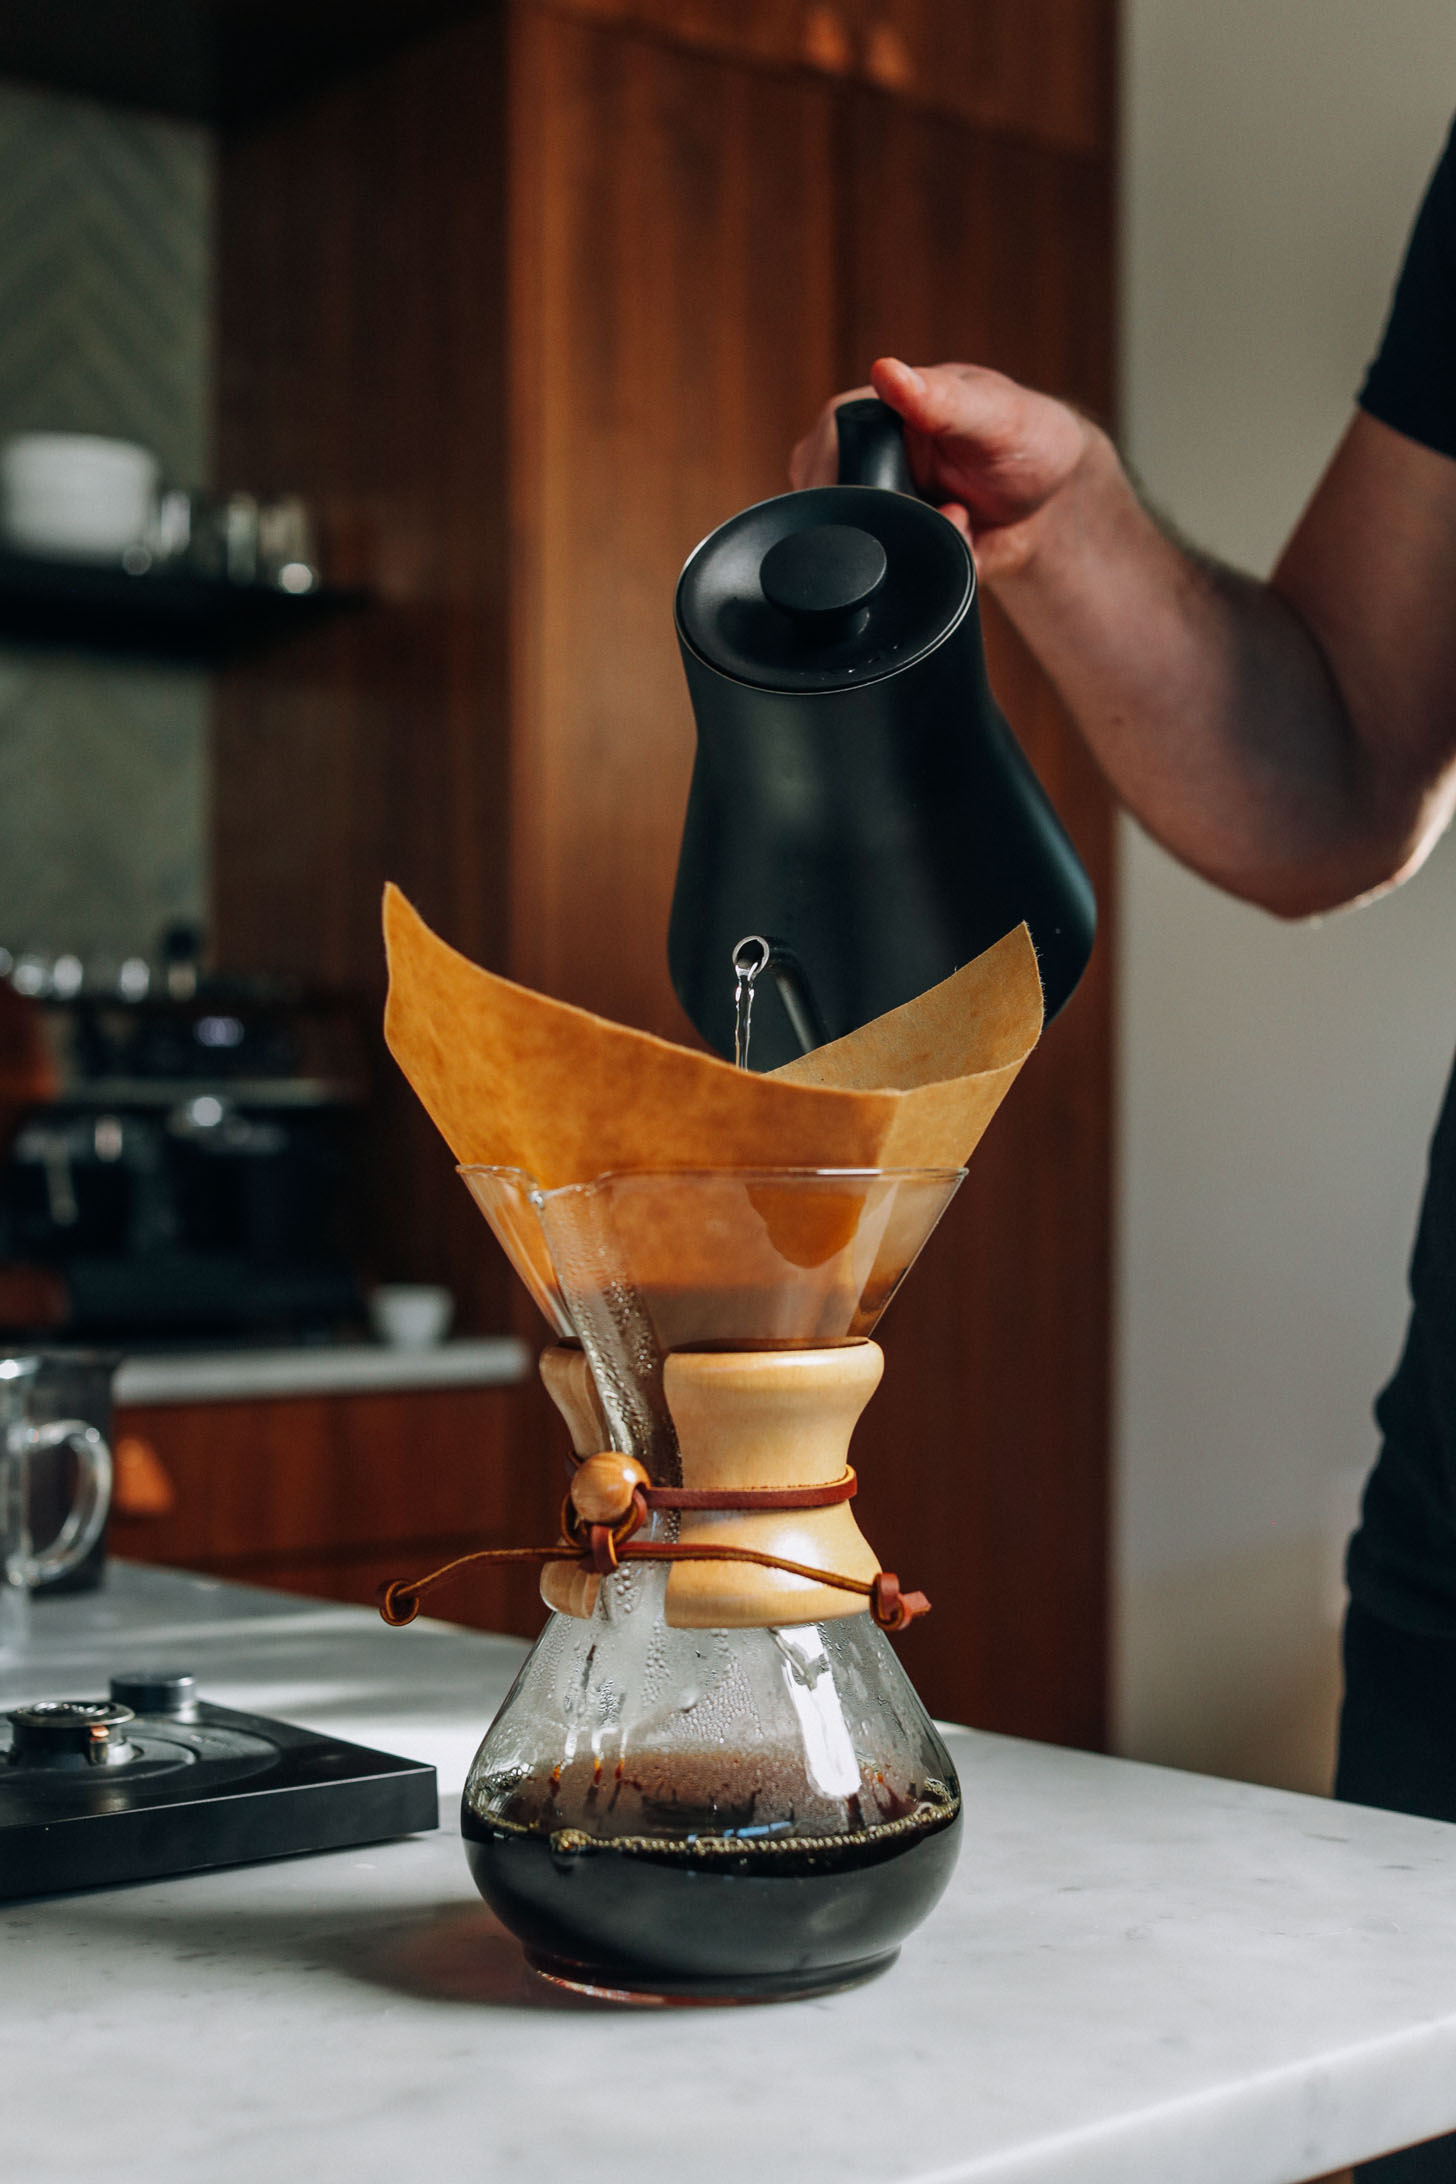
- Pour-Over Dripper: This is the cone-shaped device that holds the coffee filter and grounds. Popular options include the Hario V60 (known for its large hole and ridged interior promoting fast flow), the Chemex (a beautiful, hourglass-shaped brewer that uses thicker filters for an extra-clean cup), and the Kalita Wave (featuring a flat-bottomed design and three holes for more even extraction). Each dripper type imparts subtle differences in the final brew.
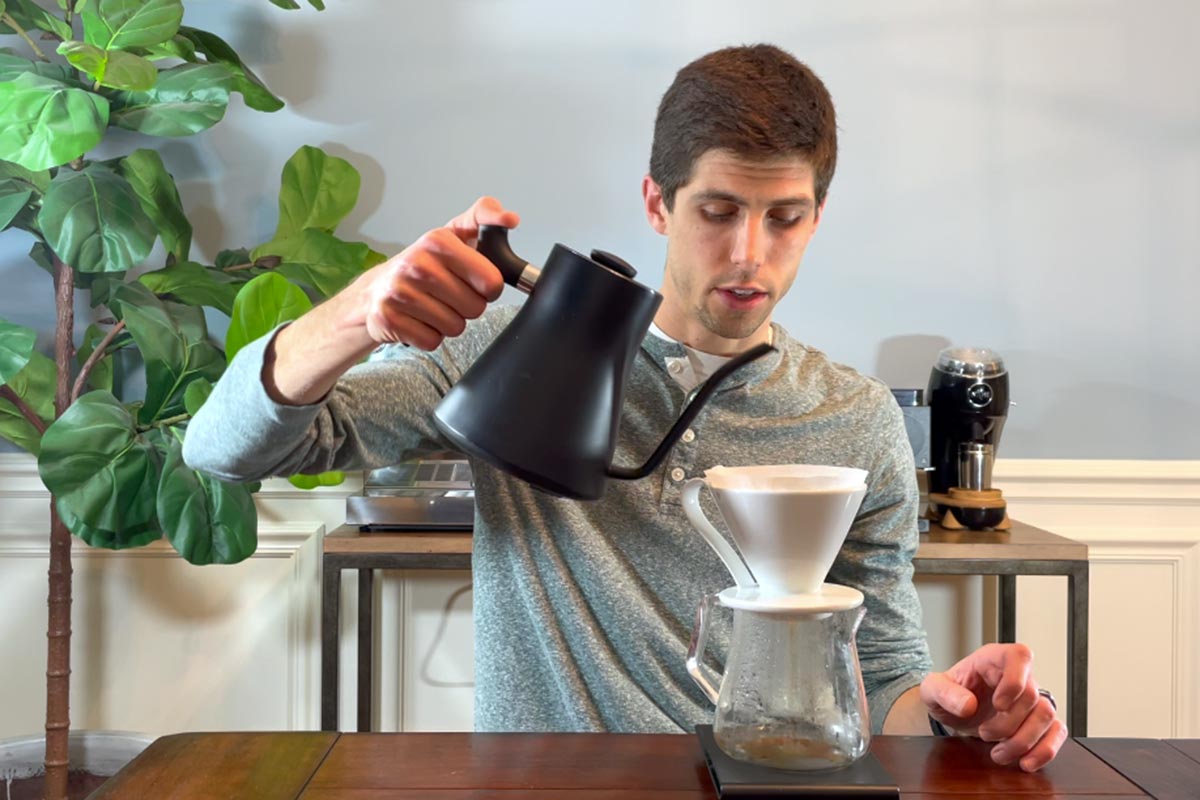
- Gooseneck Kettle: Essential for precise water delivery. Its long, slender spout allows for a slow, controlled, and even pour, which is crucial for saturating the coffee grounds consistently and avoiding channeling.
- Coffee Grinder: A burr grinder is non-negotiable for consistent grind size. Blade grinders chop beans unevenly, leading to a mix of fine particles (over-extracted bitterness) and coarse chunks (under-extracted sourness). Consistency is key to unlocking the true potential of your beans.
- Digital Scale with Timer: Precision is everything in pour over. A scale ensures you're using the correct coffee-to-water ratio, while the integrated timer helps you monitor brewing duration, guiding your pours for optimal extraction.
- Fresh Coffee Beans: The foundation of any great cup. Opt for freshly roasted, whole beans and grind them just before brewing for maximum flavor and aroma.
- Paper Filters: Designed to fit your specific dripper, these remove sediment and oils, contributing to the clean taste profile of pour over.
- Serving Vessel/Mug: A pre-heated mug or carafe will keep your freshly brewed coffee warm, preserving its delicate flavors.
Selecting Your Beans and Grind Size
The journey of how to make pour over coffee step by step begins with choosing your raw materials and preparing them correctly. High-quality, freshly roasted coffee beans are indispensable; stale beans will never yield a vibrant cup, regardless of brewing precision. Look for roast dates, ideally within two weeks of purchase, and consider the origin and processing methods to anticipate flavor notes.
Once you have your beans, the next critical factor is grind size. For pour over, a medium-fine grind, resembling sea salt or coarse sand, is generally ideal. If the grind is too fine, water will struggle to pass through, leading to over-extraction, bitterness, and a muddy brew. Conversely, a grind that is too coarse allows water to flow too quickly, resulting in under-extraction, a weak body, and sour, undeveloped flavors. Achieving the correct grind consistency, which a good burr grinder facilitates, ensures uniform contact between water and coffee, promoting an even and balanced extraction. In my personal experience, a slight adjustment to the grind size can dramatically transform the cup, turning a decent brew into an extraordinary one.

Step-by-Step Guide: How to Make Pour Over Coffee
Learning how to make pour over coffee step by step is a rewarding process that prioritizes precision and technique. Follow these steps for an exceptional cup every time.
Step 1: Gather Your Equipment
Ensure all your essential tools—dripper, gooseneck kettle, scale, grinder, fresh beans, filter, and mug—are clean and ready. Having everything within reach streamlines the brewing process and allows for better focus on technique.
Step 2: Heat Your Water
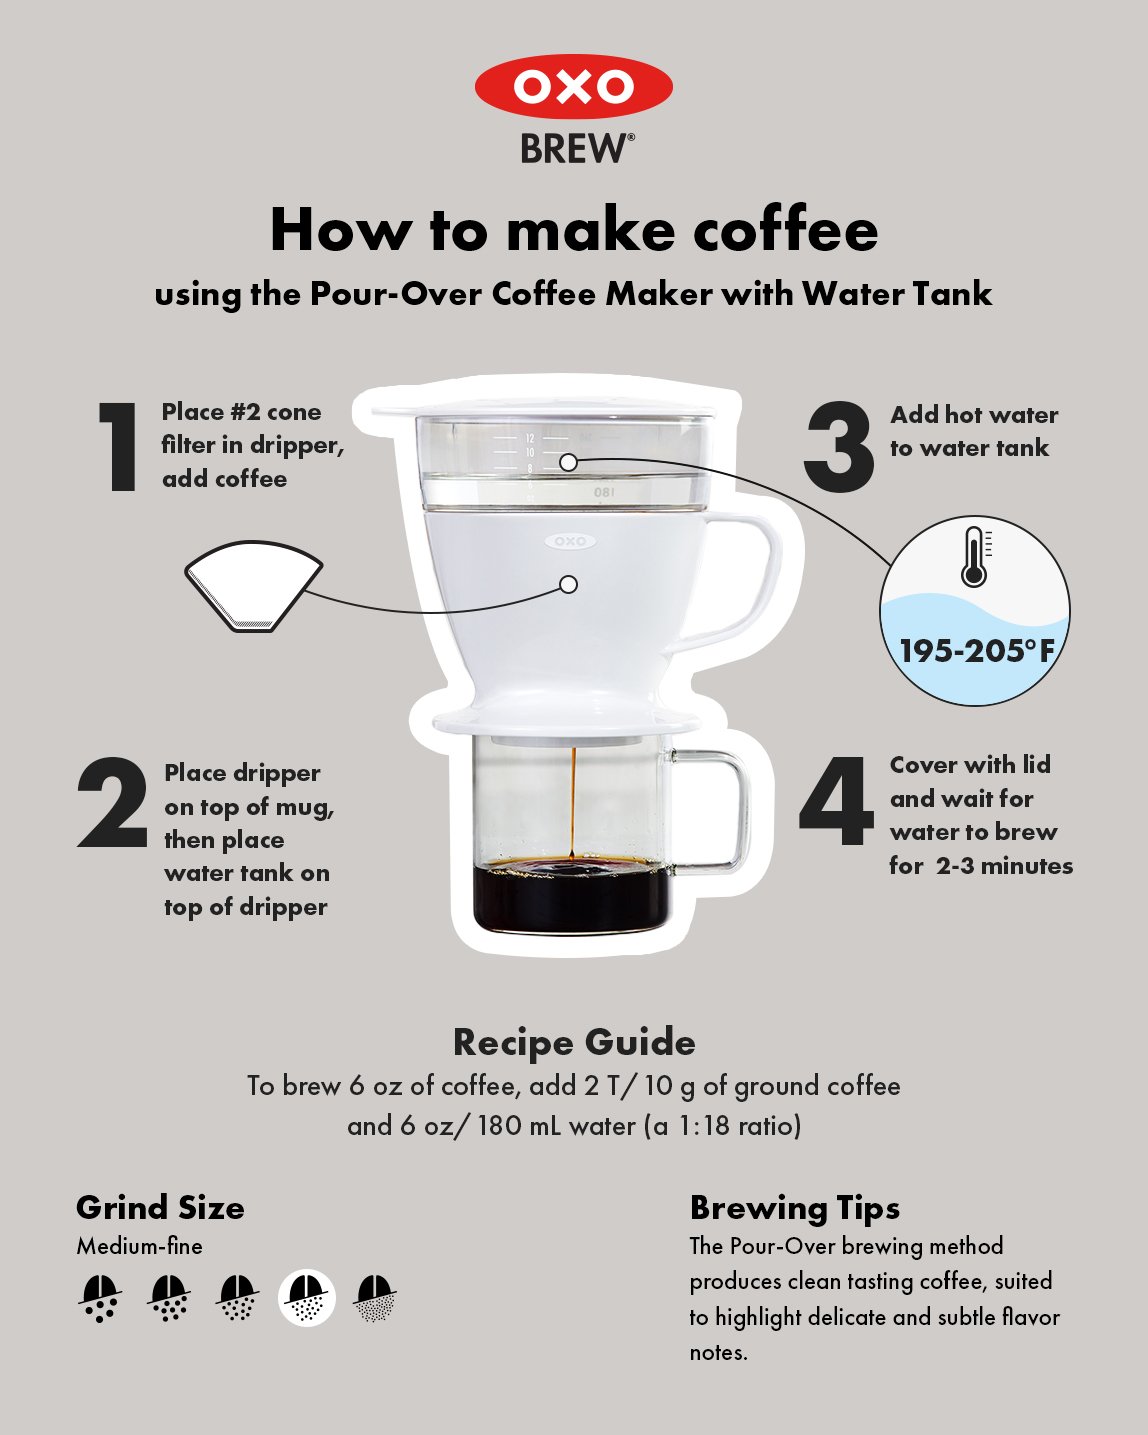
Fill your gooseneck kettle with fresh, filtered water and heat it to the ideal brewing temperature, typically between 200-205°F (93-96°C). This temperature range ensures optimal extraction without scorching the grounds.
Step 3: Prepare the Filter and Dripper
Place the paper filter into your pour-over dripper. Carefully rinse the filter with hot water, ensuring the entire surface is wet. This crucial step not only eliminates any papery taste that could taint your coffee but also pre-heats the dripper and your serving mug or carafe, maintaining a consistent brewing temperature. I've found that skipping this step can noticeably diminish the clarity of the coffee's flavor. Discard the rinse water before adding your coffee grounds.
Step 4: Measure and Grind Your Coffee
Weigh your whole coffee beans using your digital scale. A common starting point is a 1:15 or 1:16 coffee-to-water ratio; for example, if you want 300g of coffee, use 20g of beans (300/15). Grind your beans to a medium-fine consistency just before brewing to preserve their delicate aromas and flavors.
Step 5: Add Coffee Grounds to the Dripper
Transfer the freshly ground coffee to the rinsed filter in the dripper. Gently shake the dripper to level the coffee bed, ensuring an even surface for the water to penetrate. Place the dripper and mug/carafe on your digital scale and tare it to zero.
Step 6: The Bloom (Pre-Infusion)
This is a vital first pour in how to make pour over coffee step by step. Start your timer and slowly pour about twice the weight of your coffee grounds in hot water (e.g., 40g of water for 20g of coffee) evenly over the coffee bed. Ensure all grounds are saturated. Observe the coffee "bloom" as it degasses, releasing trapped carbon dioxide. This process allows for more even extraction during subsequent pours. Let it bloom for 30-45 seconds.
Step 7: The Main Pour
After the bloom, continue pouring the remaining water in slow, controlled pulses, working your way up to your target water weight (e.g., 300g total water for 20g of coffee). Pour in a slow, circular motion from the center outwards, avoiding direct contact with the filter walls, which can cause channeling and uneven extraction. Maintain a consistent water level and aim to complete your pour within 2:30 to 3:30 minutes total brew time, including the bloom. This slow and steady approach is what truly defines how to make pour over coffee step by step effectively.
Step 8: Remove Dripper and Serve
Once all the water has passed through the coffee bed, remove the dripper from your mug or carafe. Give the coffee a gentle stir to homogenize the flavors, then pour and enjoy your perfectly brewed pour-over coffee immediately.
Troubleshooting Common Pour Over Issues
Even with a detailed guide on how to make pour over coffee step by step, challenges can arise. Identifying and correcting common issues is key to continuous improvement.
- Brew Time Too Fast (Under 2:30 minutes): If your coffee drains too quickly, it's likely under-extracted, tasting sour or watery. The grind might be too coarse, or your pouring technique might be too aggressive. Try a finer grind or pour more slowly.
- Brew Time Too Slow (Over 3:30 minutes): A sluggish brew often indicates over-extraction, resulting in a bitter or astringent cup. Your grind might be too fine, or there could be channeling where water finds isolated paths through the coffee bed. Try a coarser grind or ensure an even bloom and consistent pouring.
- Bitter Coffee: Bitterness is a hallmark of over-extraction, often caused by too fine a grind, too hot water, or too long a brew time. Adjust your grind coarser, lower your water temperature slightly, or refine your pouring to achieve a faster, yet controlled, brew.
- Sour Coffee: Sourness points to under-extraction, usually from too coarse a grind, insufficient water temperature, or too short a brew time. Try a finer grind, ensure your water is hot enough, or extend the brew time slightly through slower pours.
- Weak Coffee: If your coffee lacks body and flavor, it might be due to too little coffee for the water ratio, or the grind is too coarse, leading to poor extraction. Increase your coffee dose or fine-tune your grind.
Through countless hours of refining my own pour-over technique, I’ve learned that troubleshooting is an iterative process. Each cup offers clues, and subtle adjustments, like a minor tweak to grind size, can make a world of difference in the quest for the perfect brew.
Advanced Tips for Mastering Your Pour Over
Once you've grasped the fundamentals of how to make pour over coffee step by step, you can begin to refine your technique and experiment with variables to elevate your brewing game.
- Experiment with Different Beans and Drippers: Each coffee bean has a unique origin and roast profile, offering distinct flavor notes. Similarly, different drippers (V60, Chemex, Kalita Wave) have varying geometries that influence flow rate and extraction. Don't be afraid to try various combinations to discover new favorites.
- Water Quality is Paramount: Coffee is over 98% water, so its quality profoundly impacts taste. Filtered water free from harsh minerals or chlorine will allow the true flavors of your coffee to shine. Some enthusiasts even use specially formulated water for brewing.
- Grind Consistency is King: Invest in the best burr grinder you can afford. Uniform particle size ensures even extraction, preventing simultaneous over and under-extraction. Regular cleaning of your grinder also prevents old coffee oils from tainting fresh grounds.
- Understand Agitation: The way you pour water affects agitation, which in turn influences extraction. More aggressive pouring or stirring can increase extraction, while gentler pours promote a cleaner cup. Experiment to see what works best for your specific beans and dripper.
- Beyond the Basic Ratio: While 1:15 or 1:16 is a great starting point, different beans may benefit from slightly different ratios. Lighter roasts might shine with a 1:17 ratio for enhanced clarity, while darker roasts could benefit from a 1:14 to cut through bitterness.

Frequently Asked Questions
What is the best coffee-to-water ratio for pour over?
A widely accepted and excellent starting point is a 1:15 or 1:16 coffee-to-water ratio. This means for every 1 gram of coffee, you use 15 or 16 grams of water.
How long should a pour over brew take?
The ideal total brew time for a pour over, including the bloom phase, typically ranges from 2 minutes 30 seconds to 3 minutes 30 seconds, depending on the dripper and coffee volume.
Why is my pour over coffee bitter?
Bitterness in pour over coffee often indicates over-extraction, which can be caused by a grind that is too fine, water that is too hot, or a brew time that is too long. Adjusting these variables usually resolves the issue.
Do I really need a gooseneck kettle?
While not strictly mandatory, a gooseneck kettle is highly recommended for pour over coffee. Its precise spout allows for controlled, even water distribution, which is crucial for uniform saturation and optimal extraction.
Can I reuse my pour over filter?
No, pour over filters are designed for single use. Reusing them can lead to off-flavors, as residual coffee oils and particles can impart staleness and reduce the cleanliness of subsequent brews.
Conclusion
Embarking on the journey of how to make pour over coffee step by step is more than just brewing a beverage; it's an art form that rewards patience, precision, and an appreciation for detail. By understanding the essential equipment, mastering grind size, and meticulously following each pouring phase, you gain unparalleled control over your coffee's flavor profile, transforming a simple routine into a sophisticated ritual. The ability to consistently produce a clean, vibrant, and aromatic cup of coffee is a testament to the brewer's dedication and skill. I encourage you to apply these insights, experiment with different variables, and savor the distinct characteristics of each bean. Share your pour-over experiences in the comments below, or explore our other guides for more ways to enhance your coffee journey.

- How to Fix a Portafilter: Size, Locking Mechanism, and Troubleshooting Guide - October 22, 2026
- 35 Coffee Machine Parts and Functions: Complete Guide With Names and Uses - October 22, 2026
- 25 Espresso Machine Parts Names and Their Functions Explained - October 22, 2026