
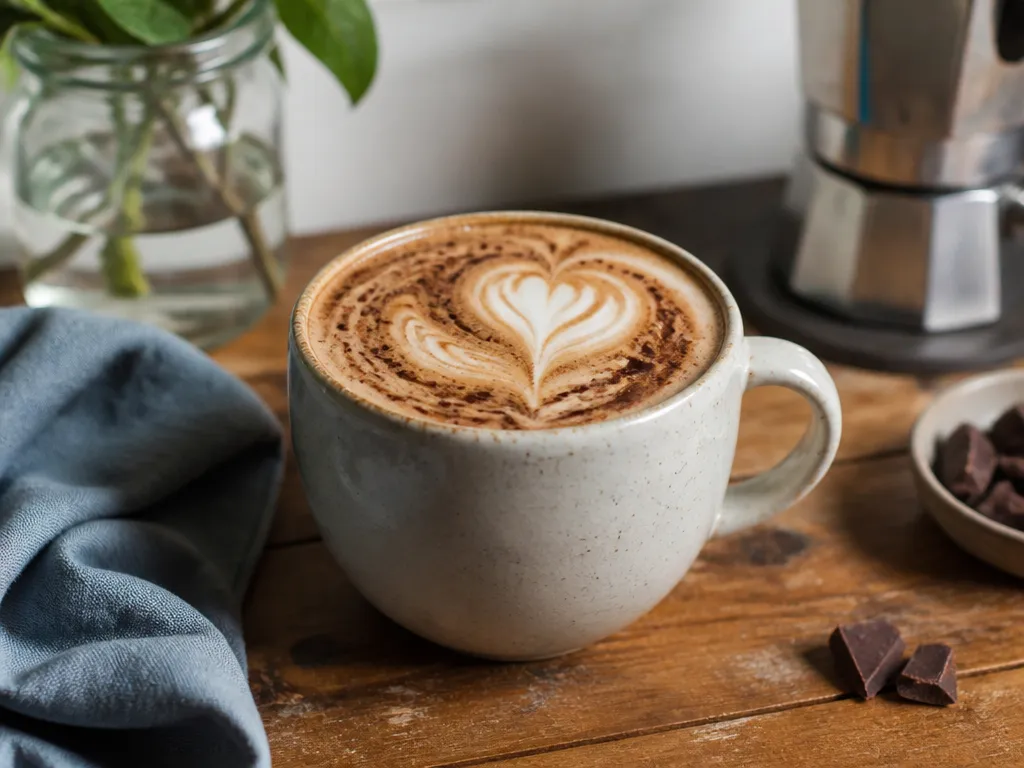
For a reliable mocha latte, use 2 shots (about 2 oz / 60 ml) of espresso or very strong coffee for each 1 serving, then aim for 8 oz (about 240 ml) of steamed milk to finish. That ratio keeps the chocolate flavor present without turning the drink into hot cocoa.
Make it by brewing espresso/strong coffee first, stirring in your chocolate base until fully smooth, then topping with milk that’s textured to glossy microfoam and poured in a slow swirl. If you do not have espresso, use 2 oz (about 60 ml) of strong brewed coffee and add chocolate in the same way, then adjust sweetness to taste (start small, because cocoa and syrup vary a lot).
Exact Ingredients And Amounts For One Serving

For one consistent mocha latte, plan on 2 shots (about 2 oz / 60 ml) of espresso or very strong coffee, topped up with about 8 oz (about 240 ml) of steamed milk, and enough chocolate to stay clearly mocha-flavored. This is the balance that keeps the coffee and chocolate present without turning the drink into sweet hot milk.
Ingredient List (1 Serving)
Use the amounts below as your baseline, then adjust only one variable at a time (usually sweetness) so you can learn what changes the flavor most for your taste and your beans.
If you choose cocoa powder, start at 1 tsp for a drier, more cocoa-forward mocha. If you choose chocolate syrup, start at 1 tbsp for smoother sweetness with less bitterness. If you choose melted chocolate, use about 1.5 tbsp for a richer, thicker mocha body, and expect it to take a bit more mixing time to fully disperse.
For milk, use whatever you like, but whole milk tends to give the most stable, velvety texture when steamed. Keep the final milk volume close to 8 oz (about 240 ml), since reducing the milk volume makes the drink taste stronger and more intense, and increasing it makes chocolate flavor feel lighter.
Scaling To 2 Servings (Without Changing Balance)
Double every ingredient. That means 4 shots (about 4 oz / 120 ml) espresso or very strong coffee, and about 16 oz (about 480 ml) of steamed milk. Keep the same chocolate range per serving (for example, 2 to 4 tsp cocoa powder, or 2 to 4 tbsp syrup, or about 3 tbsp melted chocolate total), then aim for the same overall flavor strength in the finished two cups.
When you scale up, the only practical change is how you mix: stir or whisk the chocolate into the hot coffee base thoroughly before you start combining with milk, so clumps do not get harder to break once everything is hot.
Espresso Base And Its Role In A Mocha Latte
The espresso base is what keeps a mocha from tasting like sweet chocolate milk, because it brings concentrated coffee bitterness and aroma that the chocolate would otherwise dull. For a single drink, build that base around 2 shots (about 2 oz / 60 ml) of espresso (or very strong coffee) so the chocolate has something sturdy to sit on.
Judgment call: If you can only get one knob right at first, prioritize getting the espresso flavor balanced (sweet, not sour, not harsh). Chocolate syrup and cocoa can hide minor texture issues, but they do not fix a coffee base that is fundamentally off.
After you pull the shots, treat the espresso base as “hot water plus flavor,” ready to mix with your chocolate before the milk goes in. Keep it consistent, because the mocha’s final taste is the sum of how you extracted the espresso plus how much chocolate you add, and those two variables should not keep moving together.
Dissolving Chocolate For Smooth Mocha

Smooth mocha comes down to getting chocolate solids fully hydrated or melted before they meet hot milk, so they do not clump. Use the right chocolate form for the temperature and mixing method you have, then control sequence so the texture stays glossy and even.
If you are getting grainy mocha, the cause is usually cocoa not fully wetted or melted chocolate not fully liquefied. Fix it by whisking the chocolate into the hot espresso base longer, then strain the drink through a fine mesh if you still see specks.
Milk Texture And Layering Explained
Microfoam is what gives a mocha latte its “café” feel, glossy look, and clean separation when you swirl chocolate through the cup.
Standard Step-by-step Assembly For One Serving
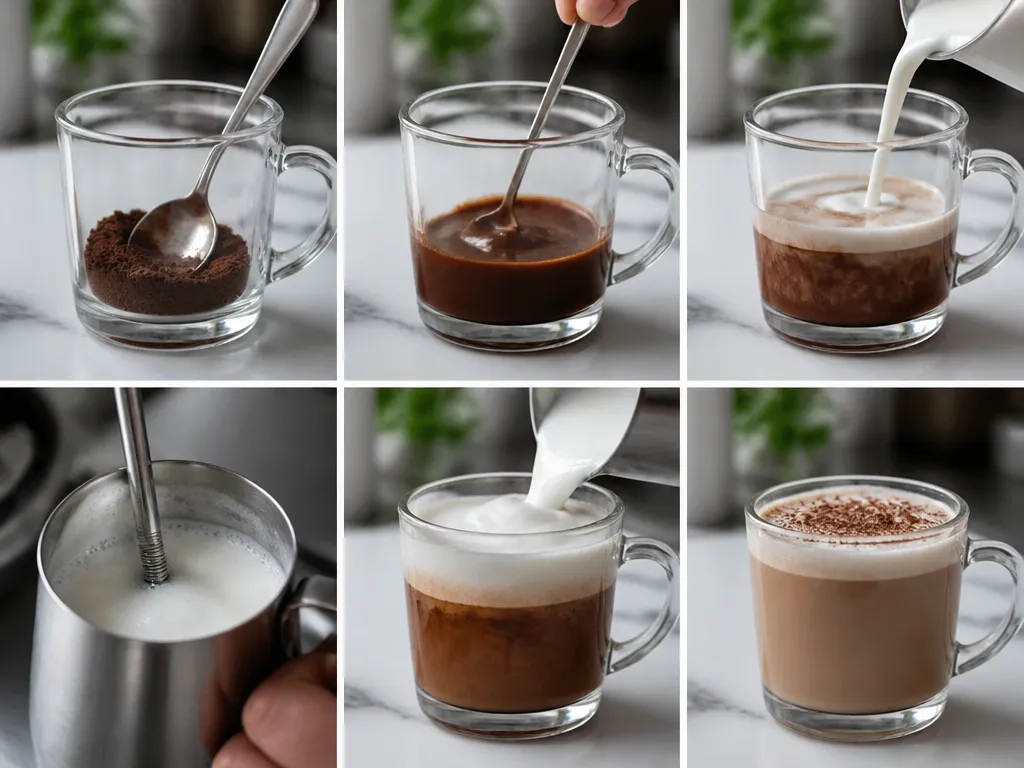
Assemble your mocha latte in a tight order so the chocolate fully dissolves, the coffee stays strong, and the milk ends up silky with microfoam. Follow the sequence exactly, then adjust only if your equipment limits you.
If you are using cocoa powder instead of syrup, reduce stirring time only if it becomes fully smooth quickly; graininess means it needs more agitation. If the milk looks foamy (large bubbles) instead of glossy (fine microfoam), stop and correct your steaming technique before you pour, otherwise the swirl will look marbled instead of layered.
Mocha Latte Without An Espresso Machine
You can make a café-style mocha latte at home without espresso by using a strong brewed coffee base, then dissolving chocolate into it, and finishing with frothed milk that’s as smooth as you can get. Keep the same overall balance you already set, 2 oz (about 60 ml) of coffee strength feeding into about 8 oz (240 ml) total milk.
Strong Coffee Base + Chocolate (No Espresso)
Use coffee that tastes close to espresso intensity, not drip-level weakness. Brew a small amount extra-strong so the flavor holds up against chocolate. If you brew with a coffee maker, use a higher coffee-to-water ratio than normal and shorten the brew length if your method allows it, then measure the output you need.
Build the mocha in your cup first so chocolate doesn’t settle. Add chocolate to your 2 oz (about 60 ml) strong coffee, stir until fully uniform, then proceed immediately to milk. If you are using cocoa powder, stir longer and keep whisking until no specks remain.
Frothing Milk Without A Steam Wand
For texture, you are aiming for foam that looks glossy and creamy, not dry and airy. Warm milk first (until hot to the touch, not boiling), then froth using one of these: a French press, a jar with a lid, or a handheld milk frother. Shake or pump aggressively for about 20-40 seconds, then let the biggest bubbles settle for 10 seconds so you get a smoother pour.
If you have a French press, pump steadily, then tap it lightly and pour from closer to the surface to reduce large bubble “clumps.” With a jar, vigorously shake, then pour carefully, stopping just before the very thick foam layer reaches the spout.
Assemble like the standard method you already use, but adapt for your frothing. Pour hot chocolate coffee first, then add milk, then do one final swirl to blend the chocolate ribbons through the drink. If your milk is too foamy, pour in stages, stopping before the driest foam layer.
Chocolate Selection Guide And Flavor Impact
Your chocolate choice sets the ceiling on how good the drink can get, more than the coffee does. Unsweetened cocoa powder gives the most chocolate flavor and the most control over sweetness, syrup gives the most consistency with the least effort, and melted bar chocolate gives the most body. Pick by which of those three you actually need.
Reading Quality Before You Buy
The ingredient list tells you more than the front of the package. If sugar is listed first, you are buying syrup behavior in a solid form and should expect a sweeter, thinner drink. Look for cocoa as the leading ingredient, no hydrogenated oils in the fat, and nothing described as “chocolate flavored” rather than chocolate.
Specific brand comparisons were not something I could verify against sources here, so treat any brand recommendation you see elsewhere as a taste preference, not a documented ranking. The cues above hold regardless of label.
If you want the richest mocha without oversweetening, start with unsweetened cocoa and control the sugar yourself, then stir in a spoonful of melted dark chocolate only if the cocoa version tastes thin. That combination beats syrup on every axis except convenience, and it is the version worth building your habit around.
Troubleshooting Common Failures And Fixes
Home mochas fail in one of four places: the coffee is too weak to cut through chocolate, the chocolate clumps instead of dissolving, the milk lands as dry foam or no foam at all, or the milk gets hot enough to scorch itself and the chocolate with it. Each has a distinct cause, and each fix is small if you catch it at the right step.
Weak, Watery Coffee Flavor
Symptom: the drink reads as sweetened chocolate milk with a coffee smell floating over it. Cause: too few coffee solids for the volume of milk and chocolate, usually from a long under-extracted brew or a shot that ran too fast.
Fix: tighten the base before you touch anything else. Pull a shorter, more concentrated shot, grind finer, or if you are working from brewed coffee, cut the water and raise the grounds so the same volume carries more flavor. Adding more chocolate or sweetener makes this worse, because both push the coffee further back.
Cocoa Clumps And Graininess
Symptom: grit settled at the bottom of the cup, or dry pockets floating on the surface. Cause: cocoa powder meeting hot liquid without enough agitation, or chocolate added late, after the base has already cooled.
Fix: make a paste first. Whisk the cocoa with a small splash of hot coffee or hot milk in the cup until it is completely smooth, then add the rest of the liquid. Powder needs contact time and shear; a spoon alone will not break a clump once it has formed. If lumps are already there, strain the drink through a fine mesh sieve and re-whisk the captured solids with more hot liquid.
Milk Too Foamy, Or No Foam At All
Symptom: stiff dry foam that sits on top and refuses to incorporate, or flat milk with nothing on the surface. Cause: over-aerating at the start, or never introducing air at all. Foam volume is set in the first few seconds.
Fix: for too much foam, hold the pitcher lower and let the steam or frother run without pulling in new air, which breaks large bubbles down. For no foam, aerate briefly at the surface before submerging the tip. With no frother, shake hot milk in a sealed jar for about 20 seconds, then rest it for 30 seconds so the bubbles tighten before pouring. Plant milks behave differently from dairy; a barista-style version holds texture where a standard one collapses.
Milk Overheated Or Chocolate Scorched
Symptom: a burnt, flat, faintly bitter note, or chocolate that seized into a grainy paste. Cause: milk pushed past scalding, or chocolate melted over direct heat in a dry pan.
Fix: stop heating milk while the pitcher is still too hot to hold comfortably for more than a second or two. Never let it boil, since scalded milk loses sweetness and stops foaming. Melt chocolate over low heat or in the residual heat of the hot coffee. If it has seized, whisking in a small amount of hot liquid can rescue it, but starting over is usually faster.
Edge Cases And Substitutions
Dairy-free milk, sugar-free sweeteners, decaf coffee, and batch preparation can all work, but each changes the drink’s body, sweetness, or foam. The most reliable approach is to change one element at a time, then adjust chocolate or coffee after tasting rather than compensating for every substitution at once.
Plant Milk And Sugar-free Options
Choose an unsweetened barista-style oat milk when you want the fullest body and easiest foam. Unsweetened soy milk can also produce a fairly stable, creamy texture, while almond milk usually gives a lighter drink with less foam and a more noticeable nut flavor. Coconut milk adds its own flavor, so use it only if that profile suits the chocolate.
Plant milks vary substantially by brand, so do not assume an equal result from every carton. Heat the milk gently and stop before it becomes scalding; excessive heat can flatten the flavor and make foam collapse. Taste before adding sweetener, especially with oat milk or any carton labeled sweetened.
Sugar-free syrup is the simplest sweetener for a low-sugar version because it blends directly into the coffee and chocolate. Powdered or granulated alternatives can leave a slight aftertaste or graininess if they do not dissolve fully. Add a small amount to the hot coffee-chocolate base, stir completely, and increase it only after tasting.
Decaf And Two-serving Preparation
Decaffeinated espresso or strong decaf coffee can replace the regular coffee without changing the assembly order. Decaf often tastes gentler, so choose a darker, more developed roast or use a little less milk if the finished drink tastes washed out. Keep the chocolate moderate at first; adding more chocolate can hide weak coffee rather than fix it.
For two servings, use about 4 oz (120 ml) of espresso or strong coffee and about 16 oz (480 ml) of milk, while doubling the chocolate from the one-serving formula. Prepare the coffee and chocolate together in a larger heatproof pitcher, then divide the mixture between two warmed cups. Froth the milk in batches if your pitcher cannot hold the full volume comfortably.
Serving And Finishing
Serve the mocha immediately after pouring, while the foam is still glossy. A light dusting of cocoa, finely grated chocolate, or a few chocolate curls adds aroma without changing the drink’s balance much; whipped cream makes it sweeter and heavier, so treat it as an optional dessert-style finish rather than a default.
Quick Summary
Make the standard drink with 2 shots of espresso, about 2 oz / 60 ml, mixed with chocolate and finished with about 8 oz / 240 ml of silky steamed milk.
Keep the coffee and chocolate together before adding milk, then pour the milk slowly so the drink stays smooth rather than separating into coffee, chocolate, and foam. If the first cup tastes weak, change the coffee strength before adding more chocolate.
Next action: Gather the coffee, chocolate, milk, and one mixing tool, then make one serving using the standard ratio before experimenting with substitutions.
Frequently Asked Questions
How Much Does A Homemade Mocha Latte Cost?
There is no reliable single price because coffee, milk, chocolate, and equipment costs vary by brand and location. Calculate the drink cost by dividing each ingredient’s purchase price by the amount used, then add those portions together.
Keep equipment separate from the per-drink calculation. A machine or frother may reduce the cost of later drinks, but it can make the first homemade cup more expensive than a café purchase.
Can I Prepare A Mocha Latte Ahead Of Time?
The drink is best assembled close to serving. Stored milk loses its freshly frothed texture, and the coffee-chocolate mixture can taste flatter after sitting.
If preparation ahead is necessary, keep the coffee-chocolate base and milk separate, then reheat and combine them gently. Do not expect the original foam or layering to return fully.
Does “Mocha Latte” Have One Official Recipe?
No fixed formula applies everywhere. Cafés differ in their coffee strength, chocolate product, milk volume, and sweetness, so two drinks with the same name can taste quite different.
Judge a recipe by its balance rather than its label: the coffee should remain recognizable, the chocolate should be clear, and the milk should soften both without burying them.
Can I Make This Drink If I Have Very Limited Kitchen Equipment?
You can make a drinkable version with only a way to brew coffee, a saucepan or microwave-safe vessel for warming milk, and a spoon or whisk. The missing steam wand changes the foam and finish, not the basic coffee-chocolate combination.
Skip attempts to create pressure or steam with improvised sealed containers. Use an open vessel and a controlled heating method instead.
When Should I Stop Troubleshooting And Have My Coffee Equipment Checked?
Arrange service or follow the manufacturer’s repair guidance if a machine repeatedly leaks, trips power, produces an unusual electrical smell, or cannot heat water or milk normally after basic cleaning and setup checks.
Do not open an electrically powered machine to investigate it yourself unless you are qualified to do so. A recipe adjustment cannot correct a mechanical or electrical fault.
How Can I Verify Whether A Mocha Recipe’s Chocolate Claim Is Accurate?
Check the product label and record whether the chocolate is unsweetened cocoa, syrup, or solid chocolate. Those forms differ in added sugar and cocoa content, so “more chocolate” does not necessarily mean a stronger or less sweet drink.
Make the recipe once without changing the coffee or milk, then adjust only the chocolate amount. That controlled comparison tells you more about the recipe’s balance than judging several changed ingredients at once.

- Espresso Bar Wedding: Ideas, Setup, Costs, and Tips for a Memorable Coffee Experience - November 11, 2026
- How Many Grams of Espresso Beans for a Double Shot? A Complete Brewing Guide - November 11, 2026
- Brasilia Espresso Machine: Features, Performance, Models, and Buying Guide - November 11, 2026