

Yes, you can make cold foam with whole milk, but it comes out thicker and creamier, with less airy “microfoam” than skim or low-fat milk. The trick is temperature and speed: chill the milk to about 1 – 4°C and whip it briefly until it looks satiny, pale, and evenly bubbly.
Whole milk can produce usable cold foam in about 15 – 25 seconds if you start with milk at 1 – 4°C and aerate at high speed in a tall, narrow cup. Expect smaller, creamier bubbles and a richer texture than skim. Stop when the foam turns pale and lightly thickens, then rest 5 – 10 seconds to stabilize.
Can You Make Cold Foam With Whole Milk?
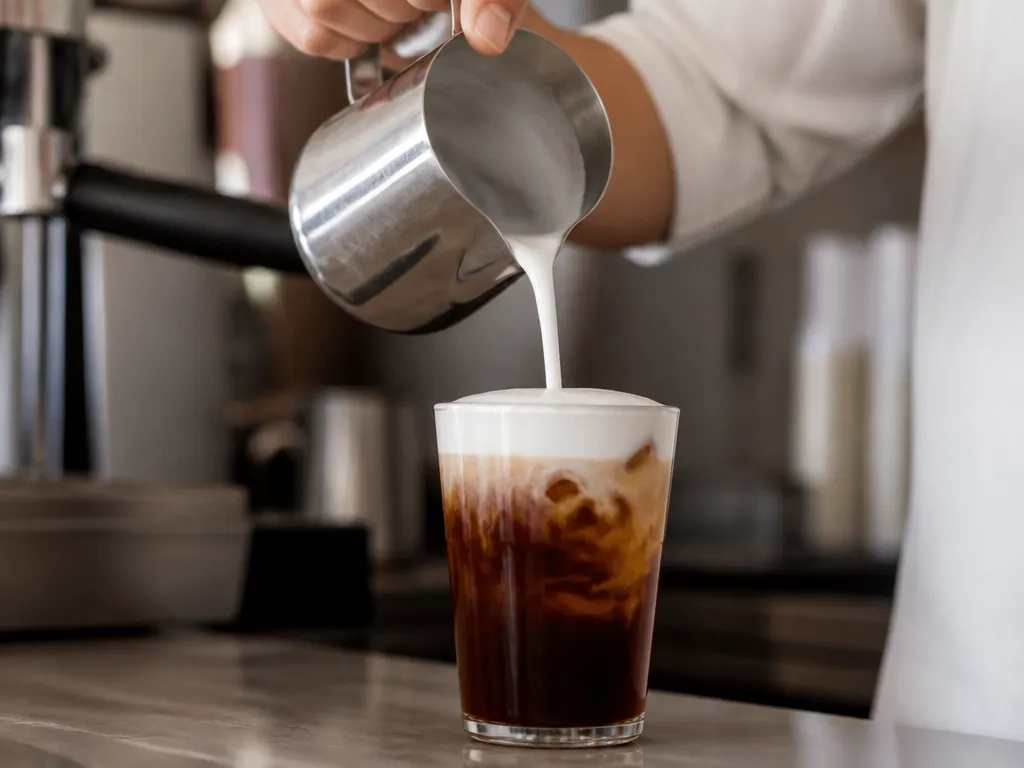
Cold foam is doable with whole milk, and it usually feels creamier than foam made from low-fat milk. Whole milk can also retain a substantial foam for longer because its fat-rich structure slows drainage, although texture still declines as the drink warms or the foam is disturbed.
Whole milk gives you a richer mouthfeel because fat helps carry a smoother foam texture. For best results, treat this like a “make it and serve it” foam, not a “make it early and wait” foam.
What To Expect With Whole Milk
Whole milk foam typically forms readily, but it is sensitive to warm mixing, over-aeration, and timing. The biggest swing factors are starting temperature and how much air you whip in.
Use this expectation table to decide whether whole milk is the right move for your drink:
| Whole milk outcome | What you’ll notice | Why it happens (practical) |
|---|---|---|
| Creamier texture | Silkier foam, less “dry” head | Higher fat content improves smoothness during whipping |
| Lower stability | Foam looks fine, then thins sooner | Fat-rich bubbles can merge and collapse faster over time |
| Timing matters | Best in the first few minutes | Temperature drift and bubble collapse start immediately after aeration |
How To Make It (Equipment-agnostic Workflow)
Cold foam needs two things: cold milk and enough aeration to build microfoam. Skip heat, because warming makes the foam less stable and can change how the milk proteins behave.
Judgment call: with whole milk, aim for “good foam now” and prioritize immediate serving over long hold times.
For troubleshooting, treat stability as a timing problem and a temperature problem. Whole milk foam tends to thin once the drink warms the foam or once bubbles have time to merge, so your best fix is colder milk and faster assembly.
Whole milk is also more forgiving for taste, but less forgiving for patience. If you need a foam that holds longer, the next section will cover what changes when you use different milk types and how that affects the foam structure.
How Whole Milk Foams
Whole milk can foam cold because its fat and milk proteins (mainly casein) can trap air and form a thin, elastic film that slows drainage. Cold foam also stays thick longer when you keep the dispersion fine, so the trapped air cells merge less readily and the fat globules help stabilize the interface.
Fat Content And Emulsification Role
Whole milk has enough milk fat to create a stable “emulsion” around air bubbles during aeration. When you whip or froth, fat globules and milk solids migrate to the bubble surface, making it harder for bubbles to coalesce (merge) and collapse. Higher fat content generally gives richer, more cushioning foam, but it can also make foam creamier than “spun” if you over-aerate or shake too long.
In practice, the foam quality depends on how well you emulsify while you keep the milk cold. If you are too gentle, there is not enough surface activity to hold the air; if you are too aggressive, you break the protective films and end up with thinner foam that collapses faster.
Casein/protein Structure And Air Capture
Casein proteins are flexible enough to unfold at the air-water interface during whipping and form a viscoelastic layer. That layer helps the bubble resist rupture, which is the difference between “foamy” and “frothy.” Whole milk also contains minerals and other proteins that change how casein packs at the interface, affecting how fine the microfoam becomes.
For good cold foam, you want small bubbles and a consistent protein film. Small bubbles rise more slowly and drain less, so the foam looks stable even when the temperature stays low.
Judgment call: if the foam goes from glossy microfoam to dry, grainy bubbles within seconds, your aeration is likely producing coarser bubbles or breaking the protein films.
Impact Of Freshness And Acidity On Stability
Freshness affects protein structure and enzymatic activity, which in turn changes how casein organizes at the air surface. More acidity (for example, from souring or repeated warming and cooling) can shift protein behavior, and foams often become less elastic and more prone to drainage. Even if the milk still looks normal, small changes in protein interactions can shorten foam life.
Stability is also sensitive to time. Cold foam relies on a balance: proteins and fat films form during aeration, then gravity and liquid drainage start immediately afterward, so the “best” look is usually right after you texture it.
| Milk condition | Likely foam effect |
|---|---|
| Fresher whole milk | More consistent microfoam and slower drainage. |
| More acidic or slightly soured milk | Foam can turn thin sooner, with less elastic “hold.” |
| Warm milk then chilled | Texture can degrade because proteins and fat emulsions are altered by heat cycles. |
Foam Variables And Numbers

Whole milk cold foam depends on three numbers you can control: fat (about 3.25% to 3.5%), protein (about 3.2% to 3.4%), and temperature (targeting 1 to 4°C, 34 to 39°F) to keep bubbles tight. If your milk is outside those fat and protein expectations, you will still be able to foam, but the foam will be thinner or collapse faster under the same whipping conditions.
| Variable | Typical target for whole milk | What it changes in cold foam | Practical effect |
|---|---|---|---|
| Fat content | ~3.25% to 3.5% | Fat supports bubble films and slows collapse | Higher end gives thicker, longer-lasting foam |
| Protein content | ~3.2% to 3.4% | Protein helps stabilize foam structure during aeration | Lower end makes foam look airy then break quickly |
| Temperature | 1 to 4°C (34 to 39°F) | Colder milk thickens slightly and helps hold bubbles | Warm milk foams faster but breaks sooner |
Whole milk consistency is the silent variable. Label fat and protein matter because two “whole milk” brands can drift enough to change foam texture under the same whisking or aeration intensity.
For example, if you pour milk that has been sitting warm at the counter, the foam often looks fine for 30 to 60 seconds and then thins rapidly as the bubble films drain. Cold foam holds longer when the drink and the milk are already close to fridge temperature.
Temperature And Device Effects You Can Feel
Temperature control is the most direct lever you can adjust without changing equipment. Chilling milk to 1 to 4°C (34 to 39°F) helps produce smaller, tighter bubbles that resist coalescing, while warmer milk tends to generate larger bubbles that merge and collapse sooner.
Device choice changes bubble size and stability because it controls shear and airflow. High-shear methods (certain frothers and immersion-style tools) often create finer foam that feels creamier, while gentle aeration (a bowl whisk) tends to make bigger bubbles that look frothier but separate faster in a cold drink.
Judgment call: if your milk is near the low end for fat or protein and your first batch collapses quickly, reduce aeration intensity and keep everything at fridge temperature rather than trying to “whip longer.”
Step-by-step Whole Milk Method
Cold foam works with whole milk if you start cold and aerate briefly at high speed until the surface turns pale and slightly thick. Whole milk is forgiving, but over-aerating makes foam that collapses faster.
For example, if you only have a container and no thermometer, keep the milk refrigerated until the last moment, then foam in under 30 seconds from removal. If you see large bubbles, shorten aeration by 5 to 10 seconds and re-test after the 5 to 10 second rest.
| Variable | Target | Effect on cold foam |
|---|---|---|
| Milk temperature | 1 – 4°C (34 – 39°F) | Cold milk helps foam hold shape; warmer milk makes it collapse sooner. |
| Container shape | Tall and narrow | More controlled aeration and less spill. |
| Aeration time | 15 – 25 seconds | Too short is thin foam; too long can create unstable, dry foam. |
| Rest time | 5 – 10 seconds | Lets foam texture stabilize before you pour. |
My judgment call: when you are unsure, start with 1 – 4°C milk and the low end of aeration (15 seconds), then adjust in short bursts after the 5 – 10 second rest.
Foam Texture Cues
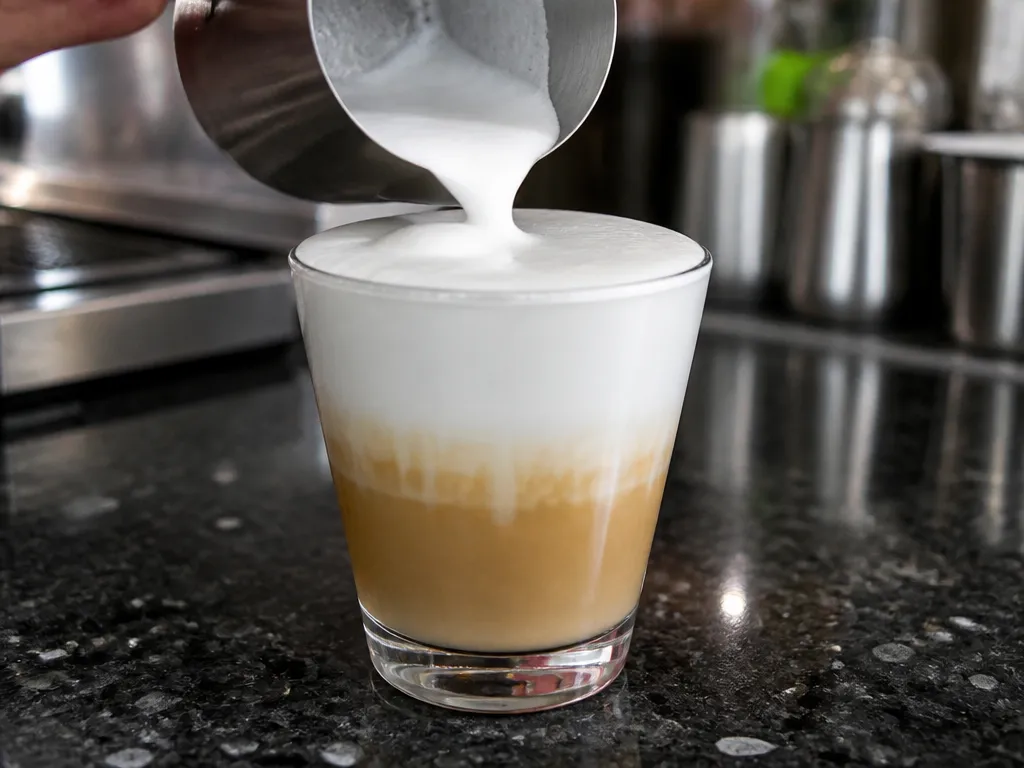
Properly aerated whole milk reads as pale, glossy microfoam with bubbles too small to see individually, and it should mound on the surface of the drink instead of sinking into a milky slick. You have the texture right when that surface looks smooth and slightly damp, not dry or cratered with visible holes. Most home setups land somewhere between 1.5 and 2 times the starting liquid volume, though that range depends on your frother and how long you run it, so treat it as approximate rather than a target to hit.
Appearance And Bubble Size
Bubble size is the most useful cue you have, because it tells you what happened during aeration before you ever taste the result. Watch the surface as the frother runs: the foam should tighten and brighten rather than grow taller and coarser. If it keeps expanding but the bubbles stay visible, you are adding air faster than you are breaking it down.
Color shifts slightly as well. Whole milk foam looks faintly ivory rather than bright white, because fat scatters light less sharply than the protein in skim milk does. That tint is normal and not a sign that anything went wrong.
Mouthfeel
Whole milk foam feels creamy and satin-like, with a light coating on the tongue that skim-based foam does not produce. Fat is the variable doing the work here; check your carton, since whole milk is standardized around 3 to 4 percent fat depending on region and brand, and plant milks labeled “whole” vary widely. Within that range, more fat generally reads richer and smoother in the mouth.
For example, a barista-style whole milk at the higher end of that range tastes noticeably rounder than a budget carton, even when the two look identical in the glass. Skim milk foam, by contrast, feels watery and slightly squeaky and leaves a drier finish. You can feel the difference in the first sip, without looking at either one.
Chase fine, uniform bubbles rather than maximum height. Foam that grew tall but shows large visible bubbles coats the tongue like soap suds instead of cream.
Serving And Stability For Cold Foam
Cold foam made with whole milk is best used soon after making, because it starts settling once it hits the drink.
In practice, aim to serve within the first few minutes for the thick, spoonable look you want, and treat anything beyond that as “texture may thin.”
Whole-milk foam holds longer when the base beverage is cold and you minimize agitation after topping. Warmer drinks accelerate fat softening and drainage, so the foam collapses sooner even if the initial texture looked great.
Best Serving Temperatures And Timing
Keep both the milk and the iced drink cold before you aerate and pour. For iced beverages, the sweet spot is “very cold to cold,” because the foam stays thicker while the fat phase remains more stable.
| Condition | What you’ll see | What to do |
|---|---|---|
| Very cold base drink | Foam stays denser at the surface | Top and serve right away |
| Warmer drink or slow serving | Foam thins, bubbles merge, surface smooths | Re-whip or re-aerate the foam before using |
| Stirred after topping | Foam collapses faster, less visual “cap” | Do not stir once topped |
If The Foam Settles: Re-whipping And Rescue Moves
Foam that has flattened still has usable structure if you address it quickly. The most reliable fix is to re-aerate, because you are rebuilding the bubble network that gravity breaks down.
If the foam has fully separated and looks watery, re-whipping will be less effective. In that case, make a fresh batch and keep everything colder next time.
Whole milk vs other milks changes stability, but the practical takeaway is temperature and aeration control. Lower-fat milks usually need extra care to avoid fast collapse, while higher-fat milk tends to produce a creamier foam that can hold longer, which is why whole milk is a good starting point.
Quick Summary
You can make cold foam with whole milk, but it is thicker and creamier and produces less airy microfoam than skim or low-fat. The outcome hinges on starting conditions and how you whip. Let it rest briefly to stabilize and avoid judging too early, because foam can look right before it thins.
Expect whole milk foam to change if you let it sit, so the practical decision is to make it and serve it rather than topping early. Foam quality depends most on starting temperature and air intake, and it is sensitive to warm mixing and over-aeration. Skip heat, use a frother or whisk to build air, stop before the texture turns glossy-watery, and serve on a cold drink. If it is under-whipped you get big bubbles, and if it is too warm or over-whipped it turns runny.
Frequently Asked Questions
Is Making Cold Foam With Whole Milk Cheaper Than Using Heavy Cream Or Half-and-half?
In most kitchens, whole milk usually costs less than heavy cream, so it is often the budget-friendly route. If your main goal is thicker foam, heavy cream tends to win, but whole milk can still work well depending on your frothing method.
How Fast Can I Make Cold Foam With Whole Milk, And When Should I Use It?
You can usually make it in a few minutes using a milk frother or shaking method, then use it right away. Cold foam is best when fresh, so plan to pour it onto your drink within the first few minutes of finishing.
Does Cold Foam With Whole Milk Work The Same For Everyone, Or Are There Exceptions?
Not exactly. If your whole milk is very low-fat, very old, or has been sitting warm, foam can be thin or collapse faster, even if your technique is right. Also, some people get better results with a colder starting temperature and a frothing tool.
What Happens If I Do Nothing Differently And My Foam Won’t Form Or Collapses?
If you do nothing, you will likely end up with a bubbly layer that dissipates quickly instead of stable foam. Fixes that often matter are chilling the milk first and using consistent frothing until you see a thicker texture.
When Should I Stop Troubleshooting And Get Professional Help Or Advice?
Get help if you are dealing with a food-safety concern, like sour or spoiled milk smells, or if you are repeatedly seeing curdling that you suspect could be from refrigeration issues. Otherwise, treat foam failures as technique or milk-quality problems before assuming anything else.
How Can I Verify Whether The “Whole Milk Cold Foam” Method Really Worked, Without Trusting The Recipe Claims?
Do a quick test: look for a dense, creamy foam texture rather than only small bubbles on top, and check how long it stays afloat. If it thins out within a couple minutes, your result is not “stable cold foam,” even if it looks foamy at first.

- Espresso Bar Wedding: Ideas, Setup, Costs, and Tips for a Memorable Coffee Experience - November 11, 2026
- How Many Grams of Espresso Beans for a Double Shot? A Complete Brewing Guide - November 11, 2026
- Brasilia Espresso Machine: Features, Performance, Models, and Buying Guide - November 11, 2026