
An AeroPress recipe for beginners is a straightforward brewing method using simple tools and steps to produce delicious coffee quickly, ideal for those new to specialty coffee.
Embarking on your coffee journey with an AeroPress can feel like discovering a secret handshake into the world of exceptional home brewing. Having personally experimented with countless methods over the years, I can confidently say the AeroPress stands out for its simplicity, versatility, and the consistently clean, flavorful cup it delivers. This guide is crafted to demystify the process, providing you with a foundational AeroPress recipe for beginners that will empower you to brew like a seasoned barista from your very first attempt. We'll dive deep into the nuances, ensuring you not only follow steps but understand the 'why' behind them, turning everyday coffee into an extraordinary experience.

Understanding the AeroPress: Why It's Great for Beginners
The AeroPress, invented by Alan Adler, is a deceptively simple coffee maker renowned for its ability to brew incredibly smooth, rich coffee without bitterness. Its design, comprising a plunger and a chamber, allows for total immersion brewing followed by a swift press, extracting maximum flavor with minimal effort. For anyone seeking an approachable AeroPress recipe for beginners, this device is a game-changer because it’s incredibly forgiving. Unlike pour-overs that demand precise pouring techniques or espresso machines with steep learning curves, the AeroPress tolerates minor variations in grind size, water temperature, and steep time, still yielding a fantastic cup.
One of its most appealing attributes for a novice is its rapid brewing time, typically under two minutes from start to finish. This efficiency, combined with easy cleanup, makes it perfect for busy mornings or quick coffee breaks. From my own early days of coffee exploration, the AeroPress was the device that truly clicked, offering consistent results when other methods felt intimidating. It’s also incredibly durable and portable, making it a reliable companion for home, office, or travel.

Essential Gear for Your Beginner AeroPress Recipe
Before diving into your first AeroPress recipe for beginners, gathering the right tools is crucial. While the AeroPress itself is minimalist, a few accessories will significantly elevate your brewing experience and consistency. Think of these as your basic building blocks for delicious coffee.
Here's what you'll need:
- AeroPress Coffee Maker: This includes the plunger, chamber, filter cap, and stir paddle.
- AeroPress Paper Filters: These are small, disc-shaped filters that fit perfectly into the filter cap, ensuring a clean cup.
- Freshly Roasted Coffee Beans: The quality of your beans profoundly impacts the final taste. Opt for whole beans and grind them just before brewing.
- Burr Grinder: A consistent grind is vital for optimal extraction. A burr grinder offers uniformity, unlike blade grinders that chop inconsistently. For an AeroPress recipe for beginners, a medium-fine grind is generally recommended.
- Kettle with Temperature Control (or Thermometer): Precise water temperature is a key variable. Ideally, water between 175°F and 205°F (80°C to 96°C) is best, depending on your roast level.
- Scale: Measuring your coffee beans and water by weight, rather than volume, ensures repeatable results and allows you to fine-tune your AeroPress recipe for beginners. I always recommend starting with a 1:15 coffee-to-water ratio.
- Mug or Server: To brew directly into.
Having these items on hand streamlines the process, transforming what could be a guessing game into a precise, enjoyable ritual. I recall my initial attempts using pre-ground coffee and eyeballing measurements; the results were wildly inconsistent. Investing in a grinder and scale was the turning point for truly mastering any AeroPress recipe for beginners.

The Classic AeroPress Recipe for Beginners: Standard Method
The standard method is arguably the most common and an excellent starting point for any AeroPress recipe for beginners. It involves placing the AeroPress directly onto your mug, adding coffee and water, then pressing. This approach is straightforward and yields a clean, bright cup.
Here’s a step-by-step guide for this quintessential AeroPress recipe for beginners:
- Heat Water: Bring your water to the desired temperature, ideally around 195°F (90°C) for medium roasts.
- Prepare Filter: Place one paper filter into the filter cap and rinse it with hot water. This removes any papery taste and preheats the cap. Attach the cap to the AeroPress chamber.
- Measure and Grind Coffee: Grind 17 grams of fresh coffee beans to a medium-fine consistency, similar to table salt.
- Add Coffee: Place the AeroPress chamber directly onto your mug. Pour the ground coffee into the chamber.
- Add Water: Start a timer. Pour 250 grams (ml) of hot water into the chamber, ensuring all the grounds are saturated.
- Stir Gently: Use the included stir paddle to gently stir the coffee and water for about 10 seconds to ensure even extraction.
- Steep: Let the coffee steep for 60 to 90 seconds. Adjust this time based on your preferred strength and the coffee you’re using.
- Press: Slowly and steadily press the plunger down. This should take about 20-30 seconds. Stop pressing once you hear a hissing sound, indicating all the liquid has passed through.
- Serve and Enjoy: Remove the AeroPress from your mug. You now have a concentrated shot of coffee, which you can drink as is or dilute with hot water to your preferred strength for an Americano-style drink.
This AeroPress recipe for beginners emphasizes simplicity and control, providing a solid foundation before you explore more advanced techniques. My first successful brew with this method was a revelation—the clarity of flavor was unlike anything I had tasted from a standard drip machine.
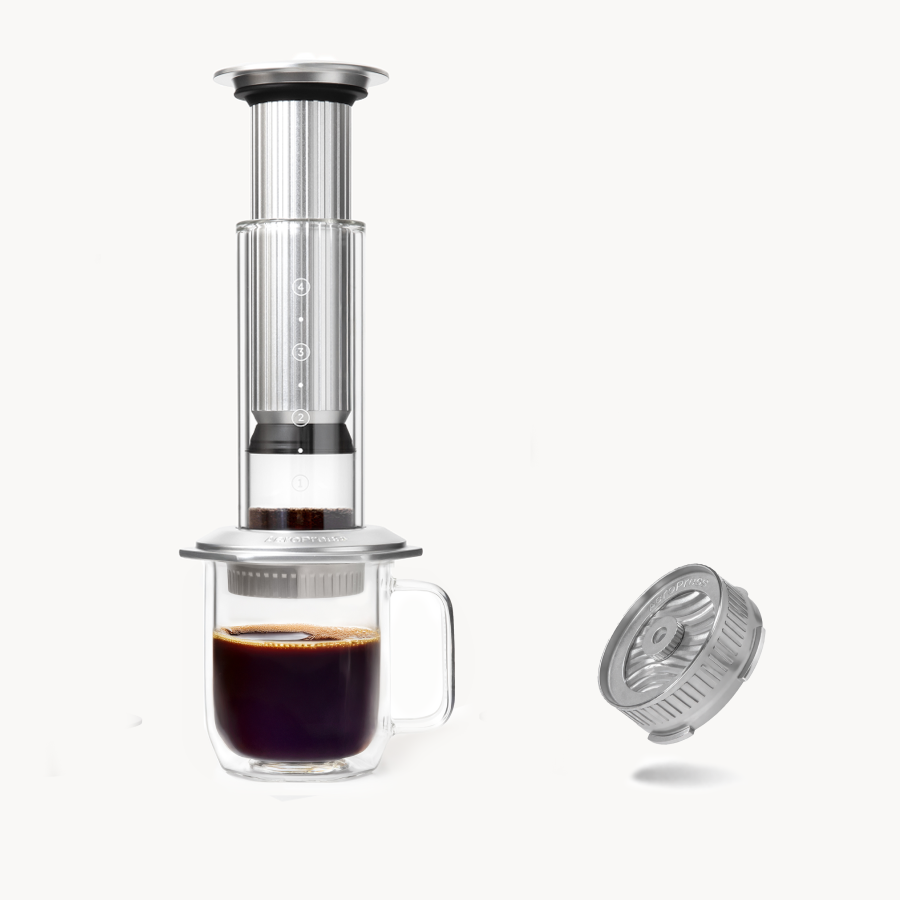
The Inverted AeroPress Recipe for Beginners: A Popular Alternative
The inverted method is another highly favored AeroPress recipe for beginners, especially for those who want to experiment with longer steep times without worrying about drips. By flipping the AeroPress upside down, you create a sealed chamber, preventing premature dripping. This method offers greater control over immersion time and can produce a slightly richer, fuller-bodied cup.
Here’s how to execute the inverted AeroPress recipe for beginners:
- Prepare AeroPress: Insert the plunger into the AeroPress chamber from below, so the black rubber stopper is about an inch or so from the top opening. This creates a stable base. Place the AeroPress on a sturdy surface with the open end facing upwards.
- Heat Water: Heat your water to around 185-195°F (85-90°C).
- Measure and Grind Coffee: Grind 17 grams of fresh coffee beans to a medium-fine consistency.
- Add Coffee: Pour the ground coffee into the inverted AeroPress chamber.
- Add Water: Start a timer. Pour 250 grams (ml) of hot water into the chamber, ensuring all grounds are saturated.
- Stir Gently: Use the stir paddle to gently stir the coffee for 10-15 seconds.
- Steep: Let the coffee steep for 1 to 2 minutes. The inverted method allows for longer steep times without coffee dripping through.
- Prepare Filter Cap: Place a paper filter into the filter cap and rinse it with hot water. Screw the filter cap onto the top of the AeroPress (which is currently the bottom).
- Flip and Press: Carefully flip the AeroPress over onto your mug. Slowly and steadily press the plunger down, aiming for 20-30 seconds. Stop pressing once you hear a hiss.
- Serve and Enjoy: Your concentrated coffee is ready. Dilute with hot water to taste, if desired.
When I first tried this inverted AeroPress recipe for beginners, I was skeptical, but the control it offered for extended steeping quickly won me over. It's particularly useful for lighter roasts where you might want to extract more flavor.
Mastering Your AeroPress: Tips for Perfecting Your Brew
Achieving consistent, delicious coffee with your AeroPress recipe for beginners goes beyond simply following steps; it involves understanding and manipulating key variables. With a little practice and attention to detail, you can elevate your brewing game significantly.
Here are some personal tips I've gathered over years of brewing:
- Grind Consistency is King: This is arguably the most crucial factor. An inconsistent grind leads to uneven extraction, resulting in sour or bitter notes. Invest in a good burr grinder. For most AeroPress recipes for beginners, a grind size similar to table salt (medium-fine) is a great starting point, but feel free to experiment slightly finer or coarser based on your results.
- Water Quality Matters: Coffee is 98% water, so the quality of your water directly impacts taste. Filtered water free from strong odors or tastes is ideal. Avoid distilled water, as it lacks the minerals needed for good extraction.
- Temperature Control: While the AeroPress is forgiving, precise water temperature yields better results. For darker roasts, cooler water (around 175-185°F / 80-85°C) can reduce bitterness. For lighter roasts, slightly hotter water (195-205°F / 90-96°C) can help extract more complex flavors.
- Pre-Wet Your Filter: Always rinse your paper filter with hot water before adding coffee. This eliminates any papery taste and helps preheat the brewing chamber.
- Experiment with Coffee-to-Water Ratios: A common starting point for an AeroPress recipe for beginners is 1:15 (e.g., 17g coffee to 250g water). However, don't be afraid to adjust this. For a stronger brew, use more coffee or less water (e.g., 1:12); for a milder cup, use less coffee or more water (e.g., 1:17).
- Stirring Technique: Gentle stirring ensures all grounds are saturated and promotes even extraction. Over-stirring can sometimes lead to fines escaping into your cup.
- Pressing Speed: A slow, steady press over 20-30 seconds is ideal. Pressing too fast can lead to channeling and underextraction, while pressing too slowly might over-extract.
- Cleanliness: Always clean your AeroPress immediately after use. Residual coffee oils can turn rancid and impart off-flavors to future brews.
By paying attention to these details, you'll find that your AeroPress recipe for beginners quickly transforms into a finely tuned instrument for crafting exceptional coffee. I once struggled with bitterness, only to realize my grind was too fine for the temperature I was using. Adjusting both instantly improved the cup.

Troubleshooting Common AeroPress Beginner Issues
Even with a detailed AeroPress recipe for beginners, you might encounter a few hurdles. Don't worry, these are common and usually easy to fix. My own journey was filled with minor hiccups that taught me valuable lessons about the brewing process.
Here are some frequent issues and their straightforward solutions:
- Bitter Coffee: Bitterness often indicates over-extraction.
- Solution: Try a coarser grind, reduce your steep time, use slightly cooler water, or press less aggressively.
- Sour/Weak Coffee: Sourness or a weak taste points to under-extraction.
- Solution: Opt for a finer grind, extend your steep time, use hotter water, or ensure you're using enough coffee for your AeroPress recipe for beginners.
- Too Much Sediment in Your Cup: While the AeroPress produces a very clean cup, some sediment can occur.
- Solution: Ensure your filter cap is tightly secured. Double-check your grind size; if it's too fine, more fines might pass through. Some users even use two paper filters for extra clarity.
- Difficulty Pressing: If the plunger is very hard to push down, your grind might be too fine or you're pressing too hard.
- Solution: Try a coarser grind. Ensure you're pressing slowly and steadily. If using the inverted method, make sure the plunger is not inserted too far down before adding coffee.
- Coffee Leaking from the Standard Method: If coffee drips through before you're ready to press.
- Solution: This is the primary reason many prefer the inverted method. For the standard method, ensure you insert the plunger slightly into the chamber as soon as you add water, creating a vacuum that reduces drips.
- Plunger Getting Stuck/Loose: If the plunger feels too tight or too loose.
- Solution: Ensure the rubber seal is clean and free of coffee grounds. Occasionally, lubricating the seal with a tiny bit of mineral oil can help it move smoothly.
Learning to diagnose and fix these issues is part of the fun and builds your expertise beyond just following an AeroPress recipe for beginners. It transforms you from a recipe-follower to a true coffee craftsman.
AeroPress Recipe for Beginners: Customization and Experimentation
Once you've mastered the basic AeroPress recipe for beginners, the real adventure begins: customization and experimentation. The AeroPress is incredibly versatile, allowing for endless variations to suit your taste preferences and even specific coffee beans. This adaptability is one of its greatest strengths and why it remains a favorite for many, including myself.
Consider these avenues for exploration:
- Grind Size Exploration: Don't stick rigidly to "medium-fine." A slightly coarser grind with a longer steep can yield a different body and sweetness. A finer grind might require a shorter steep to avoid bitterness.
- Water Temperature Ranges: As mentioned, different roast levels benefit from different temperatures. Light roasts often shine with hotter water (195-205°F), while dark roasts might prefer cooler water (175-185°F) to mellow out bitterness. Experiment with a range to find what extracts the best from your specific beans.
- Steep Time Variations: Short steep times (30-60 seconds) produce a lighter, brighter cup, while longer steeps (2-3 minutes) can result in a more intense, full-bodied coffee. The inverted AeroPress recipe for beginners is particularly good for longer steeps.
- Coffee-to-Water Ratios: Beyond the standard 1:15, play with ratios like 1:10 for a stronger concentrate or 1:17 for a lighter, more delicate brew. This dramatically changes the strength and mouthfeel.
- Using Different Filters: While paper filters are standard, you can also experiment with metal filters for a fuller-bodied cup with more oils and fine sediments, akin to French press. Some even use two paper filters for an exceptionally clean brew.
- Bloom Phase: Introduce a bloom phase by adding just enough hot water to saturate the grounds, stirring briefly, and letting it sit for 30 seconds before adding the rest of the water. This allows CO2 to escape and can improve extraction.
- Cold Brew Concentrate: The AeroPress can also make a fantastic cold brew concentrate. Use a coarser grind, a higher coffee-to-water ratio (e.g., 1:4), and steep in cold water for 12-24 hours before pressing.
My personal preference often gravitates towards a slightly finer grind, hotter water, and a 1.5-minute steep for a bright, flavorful cup with Ethiopian beans. This level of control and the consistent results make exploring each AeroPress recipe for beginners an exciting endeavor. Don't be afraid to try something new each day; that's where the real joy of home brewing lies!

Frequently Asked Questions
What is the ideal grind size for AeroPress?
The ideal grind size for AeroPress is typically medium-fine, resembling table salt. This allows for efficient extraction in the short brewing time of the AeroPress recipe for beginners, balancing body and clarity. However, you can experiment with slightly finer or coarser grinds based on your coffee and desired taste profile.
How much coffee should I use for an AeroPress?
For a standard AeroPress recipe for beginners, a good starting point is 15-17 grams of coffee. This usually yields enough concentrate for a single serving, which can be diluted with hot water to make a full cup. You can adjust this ratio to taste.
What is the best water temperature for AeroPress?
The best water temperature for AeroPress typically ranges from 175°F to 205°F (80°C to 96°C). For darker roasts, cooler water around 180°F can reduce bitterness, while lighter roasts often benefit from hotter water around 200°F to extract more nuanced flavors.
Can I make espresso with an AeroPress?
While the AeroPress can produce a concentrated coffee that resembles espresso in strength and intensity, it technically cannot create true espresso because it doesn't achieve the necessary high pressure (9 bars) required for authentic espresso. However, it's an excellent substitute for espresso-like drinks in an AeroPress recipe for beginners.
How do I clean my AeroPress?
Cleaning your AeroPress is incredibly simple. After pressing, unscrew the filter cap, push the plunger completely through to eject the compressed coffee puck and filter directly into the trash or compost. Then, just rinse the plunger and chamber with water, and let them air dry.
Conclusion
Mastering the AeroPress recipe for beginners is a rewarding journey, opening up a world of delightful coffee experiences right in your own kitchen. We've explored everything from the fundamental gear to the classic and inverted brewing methods, along with crucial tips for troubleshooting and customizing your brews. The AeroPress stands out not just for its simplicity and speed, but for its remarkable consistency and versatility, making it an indispensable tool for anyone passionate about quality coffee.
Don't let the initial steps intimidate you; the beauty of the AeroPress lies in its forgiving nature. Each brew is an opportunity to learn, to fine-tune, and to discover your perfect cup. I encourage you to grab your AeroPress, experiment with the techniques outlined here, and start crafting your own exceptional coffee today. Share your discoveries, ask questions, and continue exploring the vast possibilities this ingenious device offers. Your journey to brewing incredible coffee has just begun, and it's going to be a delicious one.

- Are Pod Coffee Machines Healthy? The Unfiltered Truth About Your Daily Cup - September 27, 2026
- Does Gatorade Have Caffeine? Here’s What’s in Each Type - September 26, 2026
- Does Powerade Have Caffeine, or Is That a Myth? - September 26, 2026