
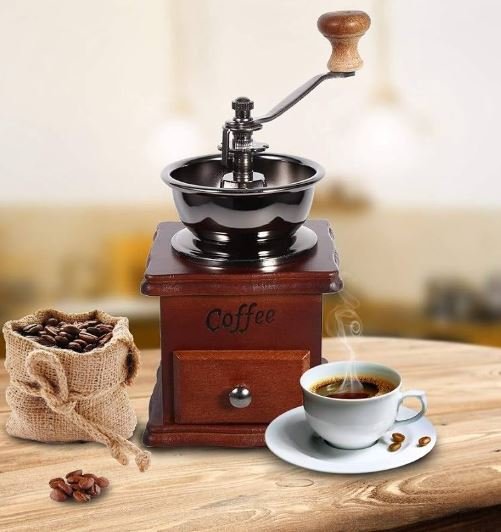
A coffee grinder plays an essential role in producing consistent, flavorful coffee. Even high-quality coffee beans can deliver disappointing results when the grinder is incorrectly adjusted or produces uneven particles. Proper calibration helps establish reliable grind settings, improve extraction consistency, and give you greater control over your brewing process.
Learning how to calibrate a coffee grinder involves more than selecting a number on the adjustment dial. You need to understand the grinder’s burr mechanism, reference settings, particle distribution, and how grind size affects extraction.
Whether you prepare espresso, pour-over, drip coffee, or French press, a properly adjusted grinder makes it easier to achieve repeatable brewing results.
In this guide, you will learn how to prepare your grinder, establish a reliable reference point, check burr alignment, adjust grind settings, and maintain consistent grinding performance.
What Does Coffee Grinder Calibration Mean?
Coffee grinder calibration is the process of establishing or verifying the grinder’s mechanical reference settings so that its adjustments produce predictable results.
It helps you understand how your grinder behaves at different settings and provides a consistent starting point for preparing different brewing methods.
Calibration vs. Dialing In
Although these terms are closely related, they describe different processes.
- Grinder calibration: Establishes or verifies the mechanical reference and adjustment range of the grinder.
- Grind adjustment: Changes the particle size by moving the grinder’s adjustment mechanism.
- Dialing in: Fine-tunes the grind setting and brewing recipe to achieve the desired flavor with a particular coffee.
For example, you may calibrate your grinder according to the manufacturer’s instructions and then dial it in separately for espresso and pour-over brewing.
Not every grinder requires manual mechanical calibration. Many modern grinders are factory-calibrated and only need routine grind adjustments.
Why Grinder Calibration Matters
A grinder’s particle distribution influences how water moves through coffee grounds and extracts soluble compounds.
An unsuitable grind setting can create several brewing problems:
- Grind too coarse: May allow water to flow too quickly, resulting in weak or under-extracted coffee.
- Grind too fine: May increase resistance to water flow and contribute to excessive or uneven extraction.
- Uneven particles: Can produce a mixture of under-extracted and over-extracted flavors.
- Inconsistent settings: Make it difficult to reproduce a successful brewing recipe.
A reliable grinder reference makes it easier to identify and correct these problems.
Signs Your Coffee Grinder Needs Calibration

Your grinder may need inspection or calibration when its normal performance changes unexpectedly.
Look for these common signs:
- Inconsistent grind size: Grounds appear noticeably different even when the grinder setting remains unchanged.
- Unpredictable brewing time: Your usual recipe suddenly drains much faster or slower.
- Difficulty dialing in espresso: You struggle to achieve a suitable grind setting despite making small adjustments.
- Changes after cleaning: The grinder behaves differently after burr removal, cleaning, or reassembly.
- Unusual grinding behavior: The adjustment mechanism feels different or produces unexpected results.
- Inconsistent extraction: Coffee tastes noticeably different even when the beans and brewing recipe remain the same.
These symptoms do not automatically indicate a calibration problem. Bean freshness, burr wear, grinder retention, water quality, and brewing technique can also affect the results.
How to Prepare Your Coffee Grinder for Calibration
Before changing any settings, prepare the grinder and inspect its components. This helps prevent old coffee residue, incorrect assembly, or mechanical problems from affecting the calibration process.
1. Clean the Grinder Thoroughly
Coffee grounds and oils can accumulate inside the burr chamber, grinding chute, and other internal components.
Follow these preparation steps:
- Remove leftover coffee grounds from the hopper and grinding chamber.
- Clean the burr area according to the manufacturer’s instructions.
- Check the grinding chute for retained particles.
- Remove accumulated coffee residue.
- Allow washable components to dry completely before reassembly.
Avoid using water on electrical or mechanical components that are not designed to be washed.
A clean grinder provides a more reliable starting point for evaluating its performance.
2. Inspect the Burrs and Adjustment Mechanism
The burrs are responsible for breaking coffee beans into smaller particles. Their condition directly influences grind consistency.
Check the following:
- Look for visible burr damage or excessive wear.
- Inspect the burr surfaces for accumulated coffee residue.
- Confirm that removable burrs are correctly seated.
- Check whether the adjustment ring moves smoothly.
- Look for loose or incorrectly installed components.
If the burrs are damaged or worn, cleaning alone may not restore consistent grinding performance.
3. Establish a Consistent Testing Environment
For reliable calibration, keep your brewing conditions as consistent as possible.
Use:
- The same coffee beans.
- The same coffee dose.
- The same water quantity.
- The same brewing equipment.
- The same brewing technique.
- A digital scale and timer.
Changing several variables simultaneously makes it difficult to identify which adjustment improved or worsened the coffee.
Step-by-Step: How to Calibrate a Coffee Grinder

Once the grinder is clean and inspected, establish a reliable reference and begin testing its performance.
Step 1: Choose Your Coffee Beans
Start with one type of coffee instead of switching between different beans during calibration.
Coffee characteristics can influence grinding and extraction.
Consider these factors:
- Roast level.
- Bean freshness.
- Coffee density.
- Processing method.
- Bean origin.
Use properly stored beans and record their roast information. Once you establish a reliable grinder setting, you can use it as a starting point when switching to other coffees.
Step 2: Establish the Grinder’s Reference Point
The grinder’s reference point helps you understand its adjustment range.
Some grinders have numbered adjustment dials, while others use stepped or stepless mechanisms.
Check the manufacturer’s instructions to determine:
- The intended adjustment range.
- The reference or zero-point position.
- The direction for finer and coarser adjustments.
- Whether the grinder requires any user calibration.
The zero point does not necessarily correspond to the number zero printed on the dial.
Important: Do not force the adjustment mechanism beyond its intended range or deliberately force the burrs together. Some grinders use a manufacturer-defined reference rather than a user-adjustable burr-contact point.
If the manufacturer provides a specific zero-point identification procedure, follow it exactly. Otherwise, use the factory reference and avoid attempting mechanical adjustments.
Step 3: Check Burr Alignment
Burr alignment describes how accurately the two grinding surfaces are positioned relative to one another.
Proper alignment supports consistent grinding and helps the grinder produce a suitable particle distribution.
Signs that may justify further inspection include:
- Unusually inconsistent grind particles.
- Unexpected grinding behavior.
- Difficulty achieving repeatable settings.
- Changes following burr replacement or reassembly.
However, these symptoms can also have other causes.
Not every grinder supports user-adjustable burr alignment. If your grinder requires alignment correction, follow its service documentation or consult a qualified technician.
Avoid generic alignment procedures that involve forcing burr contact, removing components without instructions, or modifying mechanical parts unnecessarily.
Step 4: Select the Correct Starting Grind Size
Different brewing methods require different grind sizes because they use different extraction conditions.
Use this table as a starting reference:
| Brewing method | Starting grind size |
|---|---|
| Espresso | Fine |
| Pour-over | Medium-fine |
| Drip coffee | Medium |
| French press | Coarse |
| Immersion brewing | Medium-coarse to coarse |
These are general starting points rather than universal settings. Your ideal grind size depends on the grinder, beans, roast level, recipe, and brewing equipment.
For more detailed guidance, read our article on How to Choose the Right Coffee Grind Size.
Step 5: Measure Your Coffee and Establish a Brewing Baseline
Accurate measurements are essential for repeatable results.
Before making adjustments:
- Weigh the coffee beans.
- Measure the brewing water.
- Record the grinder setting.
- Prepare the coffee using your normal recipe.
- Record the brewing time.
- Evaluate the flavor and mouthfeel.
For example, you might begin with 20 grams of coffee and 320 ml of water for a 1:16 brewing ratio.
Keep the same dose and water quantity throughout your initial grind-size tests.
A baseline helps you understand whether an adjustment actually improves the result.
Step 6: Adjust Grind Size According to Taste
Taste is one of the most useful indicators when dialing in a grinder.
Evaluate the coffee after each adjustment.
| Coffee characteristic | Possible issue | Suggested adjustment |
|---|---|---|
| Sour or sharp | Under-extraction | Try slightly finer grinding |
| Weak or thin | Low strength or extraction | Check the ratio and grind setting |
| Bitter or harsh | Excessive or uneven extraction | Try slightly coarser grinding |
| Dry aftertaste | Possible excessive extraction or astringency | Adjust grind and contact time |
| Balanced and sweet | Suitable extraction | Record the setting |
These are diagnostic starting points, not absolute rules. Roast characteristics, brewing technique, and water quality can also influence flavor.
Make one small adjustment, prepare another brew, and compare the results.
The objective is to achieve a balanced cup with appropriate sweetness, body, acidity, and finish.
Step 7: Fine-Tune Using Brewing Time and Flow Rate
Brewing time provides additional information about how your grinder adjustment affects extraction.
In general:
- Finer grind: Creates greater resistance to water movement.
- Coarser grind: Generally allows water to flow more freely.
- Uneven particles: May create unpredictable extraction and flow.
- Consistent grind distribution: Supports more repeatable brewing behavior.
For pour-over coffee, observe how quickly water passes through the coffee bed.
For espresso, monitor shot flow and extraction time alongside flavor.
For French press, maintain a consistent steeping time while adjusting the grind.
Do not chase a universal brewing time. Different coffees and recipes can produce excellent results at different times.
How to Calibrate a Grinder for Different Brewing Methods

One grinder setting rarely works equally well for every brewing method. Establish separate reference settings for the coffee styles you regularly prepare.
Espresso Grinder Calibration
Espresso requires particularly precise grind adjustments because water passes through a compact coffee bed under pressure.
Follow these guidelines:
- Start with a fine grind.
- Maintain a consistent coffee dose.
- Monitor shot time and flow.
- Evaluate the flavor alongside extraction behavior.
- Make small adjustments between shots.
If the espresso flows too quickly and tastes sour, try grinding slightly finer.
If it flows too slowly and tastes excessively harsh, consider grinding slightly coarser.
Keep the dose and other recipe variables stable while dialing in.
Pour-Over and Drip Coffee Calibration
Pour-over and drip brewing generally use medium to medium-fine grind sizes.
For more consistent results:
- Begin with a suitable medium or medium-fine setting.
- Keep the pouring technique consistent.
- Observe the drainage time.
- Evaluate sweetness, acidity, and body.
- Adjust the grind gradually.
If the coffee drains too quickly and tastes weak or sharp, a slightly finer grind may help.
If it drains too slowly and tastes harsh, try a slightly coarser setting.
French Press and Immersion Brewing Calibration
French press and other immersion methods generally benefit from a relatively coarse grind.
Consider these adjustments:
- Start with a coarse setting.
- Maintain a consistent coffee-to-water ratio.
- Use the same steeping time during testing.
- Evaluate sediment, bitterness, and mouthfeel.
- Adjust the grind gradually.
A very fine grind can increase sediment in the finished cup and may contribute to an excessively heavy or muddy texture.
How to Improve Coffee Grind Consistency
Calibration establishes a useful reference setting, but consistent grinding also depends on burr condition, grinder design, and particle distribution.
Understand Fines and Boulders
Ground coffee naturally contains particles of different sizes.
Two important terms are:
- Fines: Very small coffee particles that extract relatively quickly.
- Boulders: Unusually large coffee particles that generally extract more slowly.
An excessive amount of either can make extraction more difficult to control.
Fine particles may contribute to bitterness or dryness, while larger particles may remain under-extracted.
The goal is not to eliminate every particle-size difference. It is to achieve a distribution suitable for your brewing method.
Reduce Coffee Grind Retention
Grind retention occurs when coffee particles remain inside the grinder instead of leaving the grinding chamber immediately.
Retained coffee can affect the freshness and consistency of subsequent doses.
To manage retention:
- Clean the grinder regularly.
- Check the grinding chute for accumulated grounds.
- Follow the manufacturer’s cleaning recommendations.
- Avoid unnecessary disassembly.
- Weigh your coffee dose consistently.
Reducing retention is particularly useful when switching between different coffee beans.
Maintain Burr Condition
Burr wear can gradually affect grinding performance.
To maintain consistent results:
- Clean the burrs according to the recommended maintenance schedule.
- Inspect them for visible damage.
- Replace worn burrs when necessary.
- Ensure removable components are correctly installed.
- Avoid unnecessary mechanical adjustments.
A properly maintained grinder provides a more dependable foundation for consistent brewing.
When Should You Recalibrate Your Coffee Grinder?
Calibration is not necessarily a one-time task. Changes in burr condition, grinder maintenance, and mechanical assembly can affect its performance.
Consider checking calibration when:
- Brewing time changes unexpectedly.
- The grinder produces inconsistent results.
- Burrs have been removed or replaced.
- The grinder has undergone maintenance.
- The adjustment mechanism behaves differently.
- You notice unusual grinding performance.
Changing coffee beans does not automatically require mechanical recalibration. Usually, you only need to dial in a new grind setting for the particular beans and brewing method.
How to Maintain a Grinder Calibration Log
A simple calibration log makes it easier to reproduce successful brewing results.
Record these details:
| Information | Example |
|---|---|
| Coffee name | Single-origin Arabica |
| Roast level | Medium |
| Grinder setting | Your recorded dial position |
| Coffee dose | 20 g |
| Water quantity | 320 ml |
| Brewing method | Pour-over |
| Brewing time | Actual measured time |
| Flavor | Sweet, balanced, low bitterness |
Over time, these records become a useful reference for different coffees and brewing recipes.
Common Coffee Grinder Calibration Mistakes
Avoid these mistakes when adjusting your grinder:
- Changing multiple variables: Adjusting grind size, dose, temperature, and brewing time simultaneously makes results difficult to evaluate.
- Using generic grinder settings: A setting of 10 on one grinder may produce a completely different grind size on another.
- Ignoring burr condition: Worn or damaged burrs can affect consistency even when the adjustment dial is correctly positioned.
- Forcing the zero point: Forcing the burrs together or exceeding the adjustment range can damage the grinder.
- Ignoring coffee freshness: Different beans can require different dialing-in adjustments.
- Relying only on brewing time: A particular brewing time does not guarantee balanced extraction.
- Neglecting cleaning: Accumulated coffee residue can affect the taste and consistency of subsequent brews.
Frequently Asked Questions
What does calibrating a coffee grinder mean?
Calibrating a coffee grinder means establishing or verifying its mechanical reference settings and adjustment range. It helps you make repeatable grind adjustments and achieve more consistent brewing results.
How do I know if my coffee grinder is properly calibrated?
A properly functioning and calibrated grinder should provide predictable adjustments within its intended operating range. You should be able to reproduce useful settings and achieve reasonably consistent grinding results when the beans and other brewing variables remain unchanged.
What is the zero point on a coffee grinder?
The zero point is a reference position used to understand the grinder’s adjustment range. It does not always correspond to the zero printed on the adjustment dial.
Its exact definition and identification procedure depend on the grinder model. Always follow the manufacturer’s instructions.
How often should I calibrate my coffee grinder?
There is no universal calibration schedule. Check the grinder when its performance changes, after major maintenance, or when burrs are removed or replaced.
Routine cleaning and occasional inspection are more important than repeatedly adjusting a grinder that is already performing correctly.
Does burr alignment affect coffee grind consistency?
Yes. Burr alignment can influence how evenly the grinding surfaces interact and affect particle distribution.
However, not all grinders support user-adjustable burr alignment. Follow the manufacturer’s service instructions before attempting mechanical adjustments.
What grind size should I use for espresso and French press?
Espresso generally requires a fine grind, while French press typically uses a coarse grind.
These are starting points. The ideal setting depends on the coffee beans, grinder, recipe, and brewing equipment.
Why does my coffee taste different even when I use the same grinder setting?
Several factors can cause inconsistent flavor, including bean freshness, changes in roast characteristics, grinder retention, burr wear, water temperature, brewing time, and coffee-to-water ratio.
Check these variables before assuming that your grinder needs mechanical recalibration.
Can I calibrate a coffee grinder without professional equipment?
Yes. You can establish a practical brewing reference using your grinder’s adjustment mechanism, a digital scale, a timer, and consistent coffee beans.
However, mechanical burr alignment and internal calibration may require manufacturer-specific tools or professional servicing.
Final Thoughts
Learning how to calibrate a coffee grinder helps you understand the relationship between grind size, particle consistency, and coffee extraction.
Start by cleaning and inspecting the grinder, establishing its reference settings, and selecting an appropriate grind size for your brewing method. Then use consistent measurements, controlled adjustments, and taste evaluations to fine-tune the results.
Remember that calibration and dialing in are not the same process. Calibration establishes a reliable reference, while dialing in helps you find the best grind setting for a particular coffee.
With proper maintenance and a systematic approach, you can achieve more predictable grinding performance and enjoy better-tasting coffee across different brewing methods.

- Espresso Bar Wedding: Ideas, Setup, Costs, and Tips for a Memorable Coffee Experience - November 11, 2026
- How Many Grams of Espresso Beans for a Double Shot? A Complete Brewing Guide - November 11, 2026
- Brasilia Espresso Machine: Features, Performance, Models, and Buying Guide - November 11, 2026
1 thought on “How to Calibrate Your Coffee Grinder for Precision Brewing”