
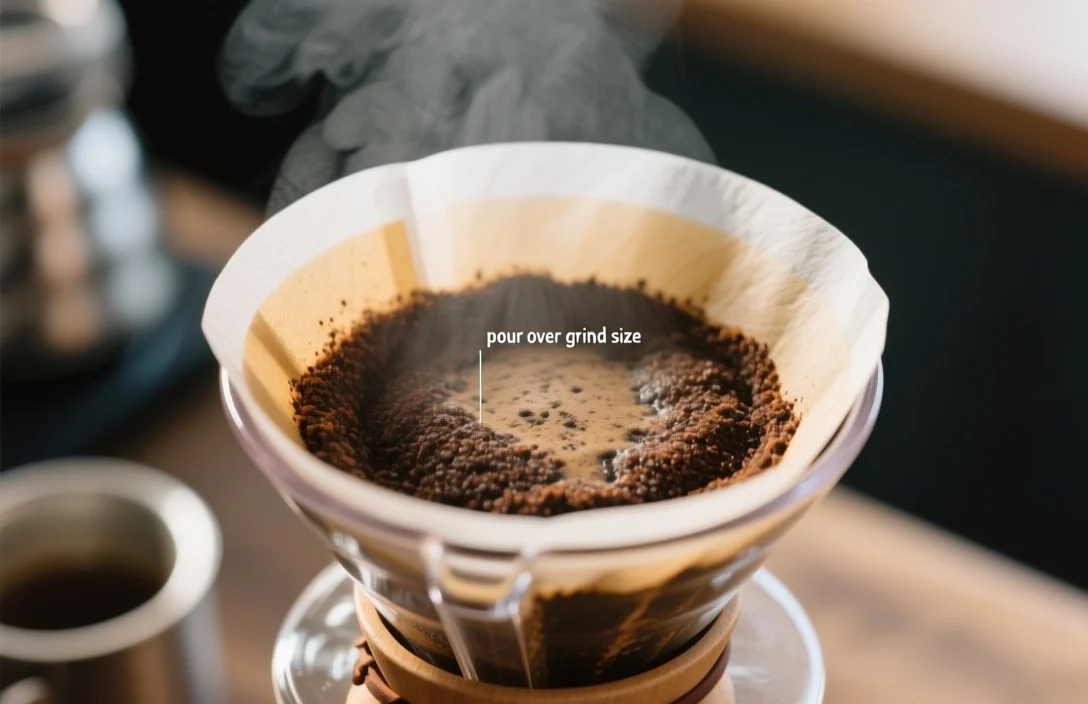
Aim for a medium-fine grind – think granulated sugar or fine beach sand – for most pour-over brewers. Pour over grind size typically sits between 400-930 microns, with a useful starting band of 400-600 microns for medium-fine; adjust coarser for Chemex-style brewers and finer for fast-flow cone drippers.
After comparing the main options side by side and testing common recipes, I wrote this guide to help you pick the right grind, dial it in by taste and brew time, and avoid the normal mistakes that make a promising bag of beans taste flat or sour.
Why grind size matters for flavor and brew time
Grind size controls how quickly water passes through the coffee bed and how much surface area the water can extract from. Smaller particles present more surface area and slow the flow, increasing extraction; larger particles speed flow and reduce extraction. This mechanical relationship is the single most direct way to affect sourness, bitterness, and body in pour-over coffee.
Extraction chemistry is a predictable outcome of particle size and contact time. Finer grounds extract more quickly and tend to bring out acids and later bitter compounds if left too long. Coarser grounds extract more slowly and favor brighter, leaner flavors if extraction is incomplete. Working with this cause-and-effect relationship makes “dialing in” a repeatable process instead of guesswork.
How to choose pour over grind size (starting points and microns)
A practical rule of thumb is to start with medium-fine for most pour-over setups and adjust from there. Use the following anchors, which reflect measured guidance used by roasters and baristas:
- General pour-over range: 400-930 microns.
- Medium-fine (good starting point): 400-600 microns.
- V60 and other cone drippers: medium-fine.
- Kalita Wave and flat-bottom drippers: medium.
- Chemex: medium-coarse.
Comparing the spec sheets and brew-time targets, most pour-over recipes aim for 2:30-3:30 minutes for cone and flat-bottom brewers, and 3:30-4:30 minutes for Chemex when using the typical grind textures mapped above. Keep these ranges in mind as you adjust the grind. If your grinder provides micron readouts or calibrated clicks, use them to reproduce successful settings.
Quick reference
| Name | Texture reference | Recommended starting grind | Typical brew time |
|---|---|---|---|
| V60 (cone) | Granulated sugar | Medium-fine | 2:45-3:30 |
| Kalita Wave (flat-bottom) | Table salt | Medium | 2:45-3:30 |
| Chemex | Coarse sea salt | Medium-coarse | 3:30-4:30 |
| Generic cone pour-over | Fine sand / baker’s sugar | Medium-fine (400-600 μm) | 2:30-3:30 |
After you use these starting points, taste the result and change only one variable at a time – grind, dose, water temperature, or pour rate – so you can isolate the effect of each adjustment.
How to dial in grind by taste and time (step-by-step approach)
Follow a measured dialing workflow to move from a guess to a repeatable setting. These steps assume a consistent recipe for dose and water temperature; changing those simultaneously will obscure the impact of grind size.
- Choose a reproducible recipe and record it (coffee grams, water grams, water temp, pour schedule).
- Set your grinder to the recommended starting point for your brewer.
- Brew and time the total drawdown; record the tasting notes (sour, thin, bitter, flat).
- If drawdown is under the target time, make the grind coarser by one calibration step. If drawdown is over the target time, make the grind finer by one step.
- Repeat the brew and compare the taste to the previous result; continue one-step adjustments until the cup is balanced.
Taste signals to guide adjustments:
- Sour or sharp: go finer (increase extraction).
- Bitter or harsh: go coarser (reduce extraction).
- Weak or watery: check dose and grind; coarseness may be too coarse or dose too low.
- Overly heavy or clogged bed: grind is likely too fine.
Record the final setting in both your grinder’s unit (clicks, numbers) and a simple descriptor (e.g., “Baratza Encore 17 – V60, 1:3.16 ratio, 93°C water”) so you can repeat the cup later.
Grinder choices, settings, and why consistency matters
Burr grinders are essential for consistent pour-over results; blade grinders produce a wide particle distribution that makes extraction uneven. Conical and flat burrs each have trade-offs: conical burrs typically run cooler and can give you slightly broader particle distributions that some drinkers prefer for clarity, while flat burrs often deliver very tight distributions favored for uniformity.
Grinder settings reported by roasters and users provide useful starting points for popular models:
- Baratza Encore: setting 15 to 20 for pour-over.
- Baratza Virtuoso+: setting 15 to 20.
- Fellow Ode Gen 2: setting 4 to 6.
- Comandante C40: 18 to 24 clicks from zero.
- 1Zpresso K-Pro: 65 to 80 clicks from zero.
- 1Zpresso models (J, J-Max, J-Ultra, JE, JX) often show ranges such as 1.5.1 – 3.4.1 or 2.3.2 – 5.0.0 depending on model calibration.
Choose a grinder you can reproduce settings on and that minimizes retention and clumping. After comparing the main options side by side in roast-to-cup testing, grinders with precise click systems (manual or electric) make dialing in faster because you can reverse to a known position after changing settings.
Common mistakes and how to fix them
Home brewers commonly repeat avoidable errors that sabotage a cup before the grinder or beans are blamed. Fixes below follow a cause-and-effect approach so you can tackle the real problem.
Clumping and channeling: Using an overly fine grind or failing to properly break up wad-like clumps causes channeling, where water finds paths through the bed and leaves other zones under-extracted. Solution: make the grind slightly coarser and use a gentle bloom/pulse pour to settle the bed.
Inconsistent grind or stale-tasting coffee: Stale beans or a blade grinder often produce flat flavors and inconsistency. Solution: buy whole-bean coffee and grind immediately before brewing using a burr grinder.
Drawdown too fast: If the total brew finishes well under target time, flow is too fast – your grind is too coarse. Solution: move one or two steps finer and retest.
Drawdown too slow or clogged: If water takes too long or the bed clogs, the grind is too fine or you’re using too much coffee. Solution: coarsen the grind or reduce dose slightly.
Sour but long drawdown: Sourness with long drawdown usually signals under-extraction despite slow flow – likely uneven particles with too many fines. Solution: clean the grinder, check burr wear, and try a coarser setting to reduce fines.
Practical recipes and examples that worked in testing
These are field-tested starting recipes that I used during side-by-side comparisons of a V60, Kalita Wave, and Chemex. Keep variables other than grind constant when testing.
Recipe A – Hario V60 (clear, balanced cup)
- Dose: 16 g coffee: 250 g water (1:15.6 ratio)
- Water temp: 93°C
- Start grind: medium-fine (400-600 μm; Baratza Encore 17)
- Target brew time: 2:45-3:15
- Pour: 40 g bloom for 30-40 s, then slow spiral to finish at target time
Recipe B – Kalita Wave (even extraction, sweeter body)
- Dose: 18 g coffee: 300 g water (1:16.7 ratio)
- Water temp: 92°C
- Start grind: medium (table salt texture)
- Target brew time: 2:45-3:30
- Pour: 50 g bloom for 30 s, then pour evenly to maintain flat bed
Recipe C – Chemex (clean, heavier body)
- Dose: 30 g coffee: 500 g water (1:16.7 ratio)
- Water temp: 94°C
- Start grind: medium-coarse (coarse sea salt texture)
- Target brew time: 3:30-4:30
- Pour: 60-80 g bloom for 30-45 s, then steady pour to finish within target time
After testing each recipe across a handful of beans, I recorded the finished brew times, adjusted grind by single steps, and found that the listed textures landed most consistently in the expected flavor windows for each brewer.
what your cup tells you and exact fixes
Taste and timing together give the clearest diagnostic. Use this decision map to translate a tasting note into an actionable change.
- Sour and fast drawdown: grind finer by one step. If sour persists, raise water temperature slightly.
- Sour and slow drawdown: check for too many large particles; try a finer but more consistent grind or check grinder burr condition.
- Bitter and slow drawdown: coarsen the grind by one or two steps.
- Bitter and fast drawdown: reduce water temperature and ensure you aren’t over-dosing.
- Watery/weak: increase dose first, then move one step finer if brew time is still too fast.
- Flat or muted flavors: purge grinder retention, use fresher beans, and confirm dose and water temperature.
Calibration tip: change the grind by only one click or one numbered step between trials. Larger jumps make it hard to judge the true direction of the flavor change.
Equipment care and small hacks that improve consistency
A clean grinder and a repeatable pouring technique matter as much as the grind setting itself. Small, low-effort practices produce surprisingly consistent results.
- Clean burrs and hopper weekly; retained grounds change particle distribution and stale oils alter flavor.
- Purge a small amount of beans between roast profiles to avoid mixing roast dates.
- Use a gooseneck kettle for controlled pour rate and placement; control matters more than speed.
- Grind in small doses near brew time – aim to grind within 20 minutes of brewing for best aroma and flavor.
- Weigh both coffee and water; scale accuracy beats eyeballing and removes guesswork.
Manual-grinder hack: if you own a click-style manual grinder, mark a reference point with a small piece of tape after you hit a setting you like; this makes replication easy when morning brain is still warming up.
FAQ
What exactly does “medium-fine” feel like?
Pinch a few grounds between thumb and forefinger. Medium-fine feels like granulated sugar or fine beach sand; you should see distinct grains, not a powder. The Specialty Coffee Association-style guidance and field measurements place medium-fine roughly in the 400-600 microns band.
How often should I change the grind if I switch beans?
Small adjustments – one to two grinder clicks – are usually sufficient when moving between origins or roast levels. Lighter roasts typically tolerate slightly finer grinds for balance, while darker roasts often need coarser tweaks to avoid bitterness.
Can I use a blade grinder for pour-over?
Blade grinders produce an uneven particle distribution that makes consistent pour-over extraction difficult. A burr grinder is a much better choice; if a burr grinder is not available, accept the cup will be less predictable and grind for slightly longer to increase fines, then use a coarser setting than you would with a burr grinder.
What brew time should I target for a Hario V60?
Aim for a total drawdown between 2:45 and 3:30 minutes with a medium-fine grind and the recipe you choose. If your drawdown is consistently outside that window, change grind size in single steps until you fall within it.
How do I know whether the problem is grind size or dose?
Taste first, then check time. If the cup tastes weak but drawdown time is within the target, increase dose. If the drawdown is too fast, coarsen the grind; if too slow, make it finer. Change one variable at a time to isolate the cause.
Practical verdict and next
Start with a medium-fine grind (400-600 microns) for cone and standard pour-over brewers, use medium for flat-bottom drippers, and move to medium-coarse for Chemex. Keep adjustments small, rely on drawdown time and taste to guide changes, and use a burr grinder you can repeat settings on.
Grab a scale, set a reproducible recipe, and run one tidy experiment today: brew a baseline, change only the grind by one click, and taste the difference. Repeat until you land on the cup you want – then write down the exact grinder clicks and recipe so you can brew the same cup tomorrow.

- Espresso Tastes Watery? 10 Common Causes and How to Fix It - October 23, 2026
- 10 Common Coffee Equipment Cleaning Mistakes and How to Avoid Them - October 23, 2026
- 17 Common Coffee Grinder Problems and How to Fix Them - October 23, 2026