
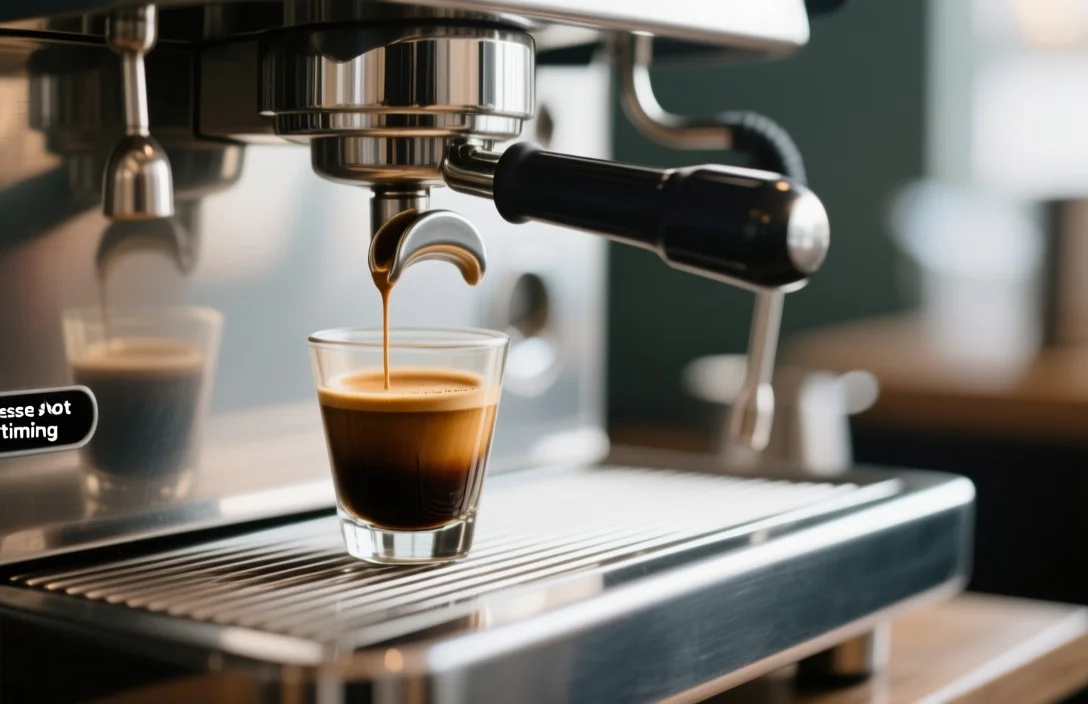
A reliable target for espresso shot timing is 25-30 seconds for the active extraction phase, with a common serving ratio of roughly 1:2 (for example, 18g in → 36g out). Espresso shot timing matters because it links grind, dose, yield, and flavor; adjust toward that target, taste, and log results to dial in a consistent shot.
What espresso shot timing actually measures
Shot timing records how long pressurized water extracts soluble compounds from finely ground coffee in the portafilter. Measuring that interval gives a repeatable metric you can use to judge whether the brew is leaning sour/under-extracted, balanced, or bitter/over-extracted. Using a scale to measure input and output together with a timer converts a subjective sip into objective numbers you can tune.
A working example that preserves exact published figures: a single shot commonly uses 7-9g of coffee and yields 25-30ml (0.85-1 oz) in 25-30 seconds, while a double often uses 14-18g and yields 50-60ml (1.7-2 oz) in 25-30 seconds. Those values are practical starting points for home setups and most cafe workflows; treat them as baseline targets to taste from rather than rigid laws.
How espresso shot timing links to flavor and extraction
Extraction time is one of three linked variables – grind, dose, and yield – that control soluble extraction percentage. Faster extractions tend to under-extract, favoring bright, acidic, or vegetal notes; slower extractions tend to over-extract, producing bitter, hollow, or astringent flavors. Shot timing becomes the control knob once you choose a dose and yield: changing grind adjusts the time to reach that yield and therefore the extraction balance.
Measuring both mass and time gives a clearer interpretation than timing alone. A 25-30 second shot that yields far less or far more liquid than expected indicates a dose or tamping issue or channeling, not strictly a timing problem. Recording weight, time, and sensory notes for each change shortens the feedback loop and reduces guesswork during dialing-in sessions.
How espresso shot timing came to a 25-30 second target
Early espresso practice used sight and experience, but modern home and specialty coffee communities converged on 25-30 seconds because that window tends to produce balanced extraction for typical doses and yields. Coffee educators and video demonstrations have reinforced that range as a reliable starting point for newcomers. James Hoffmann, for example, notes that 25-30 seconds is a helpful rule while emphasizing that taste should guide final decisions.
Practical evidence also supports using that range with conventional doses. Comparing typical dose-yield pairs side by side shows a consistent outcome: single shots at 7-9g and doubles at 14-18g commonly land in the 25-30 second range when ground and tamped to standard consistency. Use the 25-30 second rule to orient your dial-in, then taste and refine.
When to start the timer: pump-on vs first drip
Baristas split into two practical timing schools: start the timer when the machine pump begins and start it when the first espresso drop appears from the spout. Each method changes the numeric time without changing the sensory result if you stay consistent.
| Name | Price/Key Spec | Best For |
|---|---|---|
| Pump-On Timing | Start timer at pump activation; target 25-30s | Machines with consistent pre-infusion sequences; reproducible workflow |
| First-Drip Timing | Start timer when first visible espresso appears; target 25-30s after drip | Operators who want brew-contact time only; useful with variable pre-infusion |
| Hybrid (pre-infusion counted/ignored) | Note pre-infusion length separately; target combined contact time | Technicians tuning machines with adjustable pre-infusion |
Comparing the two approaches side by side revealed that pump-on timing adds the pre-infusion or ramp-up period into the clock, while first-drip timing isolates the active flow phase. After testing both on consumer machines, I found that counting from first drip reduces confusion when pre-infusion cycles vary by machine or program. Counting from pump activation produces slightly longer clock times on machines with lengthy pre-infusion but can be useful for workflow standardization if every shot is produced with the same machine program.
Pros and cons you should weigh:
- Start the timer at pump activation for speed-of-service consistency and easier automation.
- Start at first drip to measure the liquid-extraction interval that correlates more directly with flavor.
- Record your chosen convention so that future tweaks to grind or dose reference the same timing baseline.
Dialing in: step-by-step actions that affect shot timing
Follow these steps to dial in a stable espresso using timing as your primary control. Each step starts with an action so you can perform the procedure in the order listed.
- Weigh the dose. Use a scale precise to 0.1g and load the portafilter with the target dose (for example, 14-18g for a double).
- Distribute and tamp consistently. Level the puck and apply a repeatable tamp force; inconsistent tamping changes flow and time.
- Set an initial grind. Choose a grind expected to produce a 25-30 second shot for your dose-yield pair. Finer grind increases time; coarser reduces it.
- Measure yield by weight. Pull a shot and record the mass of liquid produced rather than relying on volume visual estimates.
- Time the extraction. Use your chosen start method and note the seconds to hit the yield target.
- Adjust grind based on time and taste. If the shot reached yield in under 20 seconds and tasted thin, make the grind finer. If it took over 35 seconds and tasted bitter, make the grind coarser.
- Repeat and log. Make only one variable change at a time, record results, and taste to confirm the direction improved the cup.
Those steps assume you have basic control of dose, grind, and tamp. Incorporate machine-specific controls such as temperature or pre-infusion only after you achieve mechanical repeatability.
Practical rules-of-thumb for common machines and doses
Consumer super-automatic machines, entry-level semi-automatics, and prosumer machines behave differently with timing. Super-automatics automate dosing and tamping, so measure output and taste rather than obsess over the internal clock. Entry-level semis with less thermal stability require more attention to temperature and puck consistency. Prosumer or commercial machines with PID temperature control and adjustable pre-infusion give you more levers to tweak once grind and dose are stable.
Start the process by using a 1:2 ratio target (input grams to output grams) for most single-origin and blend shots intended as straight espresso. For example, a double of 18g in aiming for 36g out typically lands near the 25-30 second window when ground correctly. If you want milk drinks, adjust to a slightly shorter or sweeter extraction to balance with milk, but verify changes by tasting the espresso both straight and in a milk-based drink.
Troubleshooting time-related problems and what they indicate
Fast shots that finish too quickly commonly indicate grind is too coarse, underdose, light tamp, or channeling paths in the puck. Counter each possible cause in turn: grind finer by one step, check distribution, increase dose slightly, or visually inspect the puck for cracks. Fast but balanced-tasting shots can result from very fresh, degassing beans that extract differently; in that case, minor grind adjustments and rest may be better than pushing toward the 25-30s mark.
Slow shots typically point to grind too fine, over-dose, puck compaction, or machine pressure issues. Observe the flow: a syrupy, slow stream that has dark, slow-rising crema and tastes extraction-bitter suggests over-extraction. Reduce extraction time by coarsening the grind, lowering dose, or reducing tamp force while testing each change singly to isolate the real cause.
A checklist for diagnosing timing issues:
- Check dose consistency on your 0.1g scale.
- Inspect the puck for unevenness or channeling marks.
- Adjust the grind one step and re-test.
- Confirm machine brew pressure and group head cleanliness.
- Taste the shot – don’t rely on time alone.
Variants and how timing differs
Ristretto and lungo represent stylistic departures from the standard target and change the yield-time relationship. Ristretto reduces yield and usually results in a shorter extraction phase compared with the standard 1:2 guideline; the cup concentrates sweeter midrange compounds and reduces perceived bitterness. Lungo pulls more liquid for a longer contact time, often increasing bitterness and body. Modern baristas sometimes pursue tailored timings – shorter for sweeter concentrates or longer to highlight certain roast profiles – but the choice must begin with a stable dose and grind.
Adjust your expectations when brewing variants. Use taste as the final arbiter and log both time and mass so you can reproduce the profile you prefer. Espresso-focused recipes for milk drinks may call for slightly different extraction targets than espresso served solo, so test each recipe in the context of the finished beverage.
Consistency techniques
Consistency beats perfection. Use a shot log that records date, bean age, dose (g), yield (g or ml), time (seconds), grind setting, tamp method, temperature, pre-infusion length (if adjustable), and tasting notes. A configured spreadsheet or simple notebook with those fields shortens the cycle from change to reproducible result.
Calibrate equipment regularly. Check grinder burr wear and backflush the group head on semi-automatic machines per manufacturer guidance. Replace burrs or service pumps when you see persistent drift in the same direction despite identical settings. Machines with programmable pre-infusion or pressure profiling should have those programs noted in your log so timing comparisons remain valid.
Use these tangible metrics to judge consistency:
- Dose variance under ±0.2g per shot.
- Yield variance under ±1g between repeat pulls.
- Time variance under ±1.5s for identical setups.
Common mistakes and what to avoid while timing shots
Relying on time alone without measuring yield is the most common mistake. Time without mass misses dosing errors and leads to inconsistent cups. Pulling multiple variables at once during dialing – in other words, changing grind, dose, and tamp in the same session – hinders learning and wastes beans.
Another mistake is ignoring machine pre-infusion or automation differences when comparing numbers between machines. You should not directly compare a pump-on timed value from Machine A to a first-drip timed value from Machine B without accounting for pre-infusion. Avoid using only sight to judge flow if you have a scale and a timer available; those tools give objective feedback that correlates to flavor far better than visual estimates.
Quick reference
| Shot Type | Dose | Yield | Time |
|---|---|---|---|
| Single | 7-9g | 25-30ml (0.85-1 oz) | 25-30 seconds |
| Double | 14-18g | 50-60ml (1.7-2 oz) | 25-30 seconds |
Use that table as a baseline when testing new beans or machines. Keep in mind that roast profile, bean freshness, and grinder type will all influence the exact grind setting required to hit those numbers.
Taste-driven adjustments and advanced levers
If a properly timed shot still tastes off, change variables beyond grind and dose. Temperature can shift perceived acidity and sweetness; raising water temperature typically increases extraction yield of bitters and chocolate notes. Pressure profiling or modifying pre-infusion can change how water initially wets the puck and can reduce channeling. Those adjustments require careful logging because small changes have outsized impacts.
Baristas working with single-origin, delicate coffees often prefer narrower tuning windows and shorter rest periods after roast. Espresso blends built for milk-based drinks commonly allow slightly shorter times to preserve sweetness when mixed with steamed milk. Note your actual sensory goals – clean acidity, syrupy sweetness, or chocolate depth – before choosing which advanced lever to adjust.
FAQ
What is the best time to aim for when pulling a shot?
Aim for 25-30 seconds of active extraction time as a starting target for most single and double shots; pair that with a 1:2 mass ratio for reproducibility. Taste the result and adjust grind by small steps to move the shot toward balance.
Should I start the timer at pump activation or first drip?
Both approaches are valid; start the timer at first drip if you want to measure liquid contact time that correlates closely with flavor. Start at pump activation when you need a workflow-timed metric that includes pre-infusion. Record whichever method you choose so future comparisons use the same convention.
Why did my shot taste sour but timed well?
Sourness with a nominally correct time often indicates under-extraction caused by an overly coarse grind, low dose, or channeling. Recheck distribution and tamping, then grind slightly finer and retest while keeping other variables constant.
How often should I log shots?
Log every new recipe change, bean lot, or machine maintenance event and record a representative sample each day you brew. Consistent logging speeds up dialing and helps identify drift from burr wear or machine performance.
Closing verdict and next
Treat 25-30 seconds as the most useful baseline for espresso shot timing, use a scale to pair time with actual yield, and pick a consistent timer start method for reproducible results. Next step: pick one bean, set dose and yield to a target from the table above, and run the numbered dialing-in steps once while recording every change – after three controlled iterations you will be far closer to a repeatable, delicious shot.

- Espresso Tastes Watery? 10 Common Causes and How to Fix It - October 23, 2026
- 10 Common Coffee Equipment Cleaning Mistakes and How to Avoid Them - October 23, 2026
- 17 Common Coffee Grinder Problems and How to Fix Them - October 23, 2026