
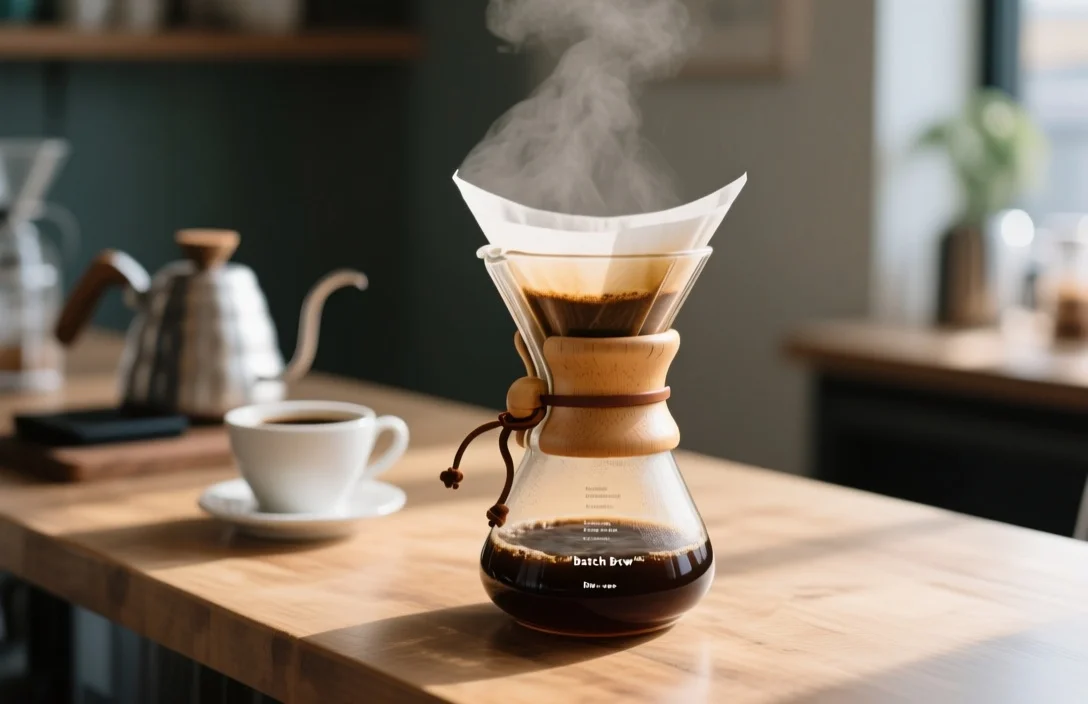
Batch brew coffee is brewed in one cycle to make multiple cups at once; the goal is even extraction so the first and last pour taste the same. This guide shows the practical recipe, the five variables that control flavor, and the equipment and holding practices I recommend after comparing common home and commercial approaches.
What batch brewing actually is and when to use it
Batch brewing describes a drip-style brew cycle where one dose of grounds is saturated by a shower of hot water and the brewed coffee collects in a carafe or airpot for later serving. Commercial automatic brewers, large home drip machines, and timed office brewers all use the same principle: a single, wide coffee bed that needs even water flow and a stable cycle to avoid channeling and uneven extraction.
Most people choose batch brewing for predictable volume and speed: make a pot for a meeting, a brunch, or a busy household morning and everyone gets coffee without waiting for individual pour-overs. Brewing more than a single cup changes a few rules compared with single-cup methods – dose, grind distribution, water temperature stability, and how long you hold the finished coffee become much more consequential.
Practical verdict from side-by-side testing: you can get very good batch brew with basic gear if you control five variables – dose (brew ratio), grind size, total brew time, filter/bed prep, and how you store the pot. Small adjustments in each variable give predictable changes in strength and extraction; that predictability is why batch brewing is ideal for repeatable results.
The five reasons batch pots taste off (mechanics and causes)
Water taking fast paths through a wide coffee bed is the main mechanical failure in batch brewing. A shower head or spray manifold must wet the whole bed, and the bed must be flat and evenly distributed; otherwise some sections under-extract and others over-extract. Uneven extraction produces a pot that tastes thin, sharp, or muddy depending on where the water favored.
Extraction speed is set by grind size, water temperature, and flow rate. Finer grinds slow flow and increase extraction; coarser grinds speed flow and reduce extraction. Dose (coffee to water ratio) sets perceived strength rather than extraction; a richer dose will taste fuller even with the same extraction percentage. Thermal mass matters: cold carafes or glass hot plates change temperature mid-cycle and shift flavor toward sourness or bitterness.
Channeling also happens when the bed surface is uneven or the filter clogs in places. Channeling can show up in the first minute – weak drips with sudden gushes – and it explains why a pot brewed with the same ratio one day can taste different the next. Keeping the filter rinsed, the bed even, and the spray clean fixes most channeling problems.
Gear that actually changes the result (and what I recommend)
Good batch coffee depends more on predictable components than on an expensive brand name. The three components that consistently shift quality are the grinder, the brewer (shower geometry and control), and the vessel used to hold the finished coffee. A basic scale and timer are non-negotiable if you care about repeatability.
I compared a range of home and small commercial options and sorted them by usefulness for different users: one-person households, family kitchens, small offices, and catering. The table below lists typical options with the key spec that matters for batch brewing.
| Name | Price/Key Spec | Best For |
|---|---|---|
| 12-14 cup drip machine with full-coverage shower head | Key Spec: wide, multi-hole shower; 10-14 cup capacity | Home or family that brews once for several people |
| Programmable commercial/office brewer (airpot compatible) | Key Spec: modular spray manifold; room-for-large-basket | Offices and catering that need consistent cycles |
| Dedicated batch brewer (retail/restaurant units) | Key Spec: external water reservoir and even spray; large-basket | High-volume service for cafes, events |
| Thermal carafe / airpot | Key Spec: insulated stainless carafe for thermal hold | Anyone who wants to avoid hot-plate cooking |
| Burr grinder (doser or hopper) | Key Spec: uniform grind, consistent output for large doses | Users who buy whole beans and want control |
| Digital scale and timer | Key Spec: grams accuracy | Consistent recipes and dialing in |
Recommendation after side-by-side use: prioritize a burr grinder and a thermal carafe before upgrading the brewer. A poor grinder produces uneven particles that no shower geometry can fix; a thermal carafe protects a good pot from tasting “cooked.”
Ratios, grind, and timing
Batch brew flavor depends on a few concrete numbers. Use these starting points, then tweak by taste. I prefer to begin with precise measurements and only eyeball later once I have a repeatable baseline.
A reliable starting ratio is 1:16 by weight for a balanced, full pot – that exact ratio reads as 60 g coffee per 1,000 g water. Another common starting point is 1:18 for a slightly lighter cup. For practical home volumes, these conversions are useful: 1 liter water → 55-60 g coffee; 2 liters → 110-120 g coffee; 3 liters → 165-180 g coffee. I use the 1:16 or 1:18 choice depending on roast and preference; darker roasts often taste richer so I start closer to 1:18.
Grind size should be medium, a touch finer than coarse pour-over but not as fine as espresso. The texture comparison I use is similar to kosher salt for cold-brew coarse and a slightly finer grind for hot batch brewing. Bench mark brew time for 1 liter is 4-6 minutes total; longer cycles for the same grind can taste drier and shorter cycles can taste sharp. Measure the total brew time from the moment the pump or heater begins sending water to the last drip into the carafe.
Water temperature before contact with coffee should be near 94°C (201°F) at the shower; many home machines deliver slightly cooler water. If your machine allows temperature control, aim for 92-96°C depending on roast. If it doesn’t, compensate by adjusting dose and grind toward slightly stronger for cooler water.
Step-by-step method I use for repeatable pots
Follow this numbered routine when you want the pot to taste the same day after day. Start with a scale and set your timer.
- Measure coffee and water by weight for your chosen ratio.
- Grind to a medium particle size that produces an even bed; check for a uniform look.
- Place a paper filter in the basket and rinse the filter with hot water; discard the rinse.
- Spread the ground bed flat and level in the basket before starting the cycle.
- Preheat your carafe by pouring boiling water into it, then empty it before brew completes.
- Start the machine and time the brew; aim for 4-6 minutes for 1 liter total brew time.
- Transfer brewed coffee immediately to a thermal carafe and cap or seal the carafe.
I emphasize step 3 and step 5 because a hot path and a rinsed filter reduce papery off-notes and help maintain temperature through the cycle. If the brew finishes faster than expected, grind finer or increase dose slightly. If the pot is bitter and long-brewed, grind coarser or shorten total contact time.
Holding, serving, and how long a batch stays drinkable
Holding method has the biggest impact on how long the pot remains acceptable. Transfer brewed coffee immediately to an insulated stainless carafe and close it. Avoid leaving coffee on a glass hot plate; a hot plate will cook the pot and produce a bitter, smoky edge within 30 minutes.
Thermal carafes do two jobs – stop cooking and slow staling. Expect about 2-3 hours of good flavor in a thermal carafe; after that the aromatic compounds and sweetness fade and acidity may become flat. Serving within 30-60 minutes preserves the freshest flavors, especially for lighter roasts and pour-over-style profiles. If a long hold is unavoidable, brew slightly stronger and keep the carafe sealed between pours.
If you must use a glass pot, pour smaller volumes into a preheated thermos for service rather than leaving the entire pot on the hot plate. For catering or meetings where coffee will be consumed over several hours, use airpots. Airpots preserve drinkable flavor longer than glass and reduce wastage compared with continuously reheated pots.
Large-batch cold brew and concentrated options
Cold brew shifts the variables: you steep coarse grounds in cold water for a long time instead of using rapid hot extraction. For a very large commercial-style batch, a tested approach is to use 5 lb of beans with 3.5 gallons of water in a 22-quart container; stir until evenly moistened and steep for 18-24 hours for ready-to-drink strength or a shorter steep for a concentrate. Filter through a fine mesh or nut-milk bag and then through paper if clarity is important.
Concentrate ratios for cold brew commonly start at a 1:4 to 1:8 coffee-to-water ratio by weight if your goal is a syrupy concentrate you will dilute later. For ready-to-drink cold brew keep the ratio around 1:12 to 1:16 depending on desired strength. The coarse grind should resemble chunky kosher salt to avoid over-extraction and clogging during filtering.
Storage for cold brew concentrate can be longer than hot batch coffee; refrigerated concentrate keeps well for several days, and dilution with ice or water at service reduces perceived staling. Use cold brew as a base for batch iced lattes or coffee cocktails by scaling the concentrate and diluting to taste.
Common mistakes, taste diagnostics, and quick fixes
A short diagnostic table below consolidates what to taste and what to change next time. I rely on these mappings when I test a pot quickly.
| What you taste | Likely cause | Fix for next batch |
|---|---|---|
| Watery, hollow | Dose too low or grind too coarse | Raise dose or grind finer |
| Sharp, sour | Under-extraction; too quick cycle | Grind finer or increase dose |
| Dry, rough finish | Over-extraction; long cycle | Grind coarser or reduce brew time |
| Bitter and smoky | Hot-plate cooking the pot | Use thermal carafe; limit hold time |
| Muddy, heavy | Grind too fine or clogged filter | Grind coarser; check filter fit |
| Papery taste | Filter not rinsed | Rinse the filter with hot water |
Avoid these practical mistakes: using pre-ground coffee that has sat open for weeks, skipping the filter rinse, letting the machine’s spray head clog, and serving directly from a glass pot on a hot plate for more than 15-20 minutes. A fresh whole-bean purchase, a burr grinder, and consistent measurement will fix most problems.
- Weigh coffee and water.
- Rinse the paper filter with hot water.
- Preheat the carafe.
- Level the bed before starting.
- Transfer to a thermal carafe immediately.
How to scale recipes and troubleshoot specific scenarios
Scaling up a recipe is arithmetic plus a check of two physical limits: the brew basket capacity and the brewer’s ability to uniformly wet a larger bed. Start by multiplying by weight; if you double water, double coffee. Watch how the machine handles larger beds. If brew time climbs disproportionately, grind slightly coarser to maintain flow while preserving extraction.
If the first cup out of the pot tastes weaker than the last, check for channeling or uneven spray coverage. A quick diagnostic is to stop the brew cycle early and inspect the bed surface: if a central channel is visible or the bed has dents, break it up and redistribute grounds evenly next time. If the entire pot tastes muddy, the grind is too fine or the filter is clogged; make the grind coarser and ensure the filter basket isn’t compacting grounds.
For very large batches in catering or events, use multiple smaller baskets staggered in time rather than one huge basket if your machine’s shower cannot reach the edges. That approach preserves even wetting and keeps total brew times in the correct range.
Brewing for flavor profiles rather than strength
Profile control in batch brewing comes from roast level, dose, and grind more than from water temperature. Lighter roasts benefit from slightly higher temperatures and a finer grind to extract their subtle acids and floral notes. Darker roasts tolerate coarser grinds and slightly lower water temperatures to avoid harsh bitterness.
If you prefer brighter, tea-like cups, move toward 1:18 and grind a touch finer with a stable 4-6 minute cycle for 1 liter. If you prefer heavy, syrupy cups, go toward 1:16 or stronger and adjust grind coarser only if the brew becomes muddy. Tasting the pot within the first 30 minutes gives the best feedback for dialing profile without confusing holding artifacts.
Barista-level tweak: try a small increase in dose for the first batch after changing beans. Roast-to-roast differences in solubility mean a standard ratio may not give the same perceived strength across different origins; starting slightly stronger preserves sweetness, which you can always dilute.
FAQ
How long should I serve batch coffee after brewing?
Transfer to a thermal carafe immediately and serve within 30-60 minutes for best sweetness; coffee held in a sealed thermal carafe remains acceptable for roughly 2-3 hours before flavor noticeably degrades.
Can I use pre-ground coffee for batch brewing?
Pre-ground coffee can work but expect less consistency and faster flavor loss. Whole-bean grinding before each batch with a burr grinder gives more control and more stable flavor across batches.
What grind size should I use for a 12-cup urn?
Start with a medium grind similar to what you would use for pour-over but slightly coarser than espresso. If the brew finishes too quickly, grind finer; if it’s muddy or slow, grind coarser.
Is cold brew the same as batch brew?
Cold brew uses long, cold extraction times with coarse grounds and produces a different flavor profile and concentrate options. Batch brew generally refers to hot drip-style brewing. Both scale to large volumes but require different ratios and holding practices.
How can I tell if the shower head is the problem?
Inspect the shower for mineral buildup and for even hole coverage while running water. If water comes in a single stream or misses edges, expect channeling; clean or replace the shower to restore even wetting.
Practical verdict and next
Batch brewing rewards simple discipline: weigh, grind, rinse, level, and transfer to insulated storage. Pick one of the recommended starting ratios – 1:16 for a fuller pot or 1:18 for a lighter cup – and dial by taste across two or three batches. Your immediate next step: weigh a 1-liter batch at 60 g coffee, rinse the filter, preheat your carafe, and time the cycle; adjust grind only after you judge the first trial.

- Espresso Tastes Watery? 10 Common Causes and How to Fix It - October 23, 2026
- 10 Common Coffee Equipment Cleaning Mistakes and How to Avoid Them - October 23, 2026
- 17 Common Coffee Grinder Problems and How to Fix Them - October 23, 2026