
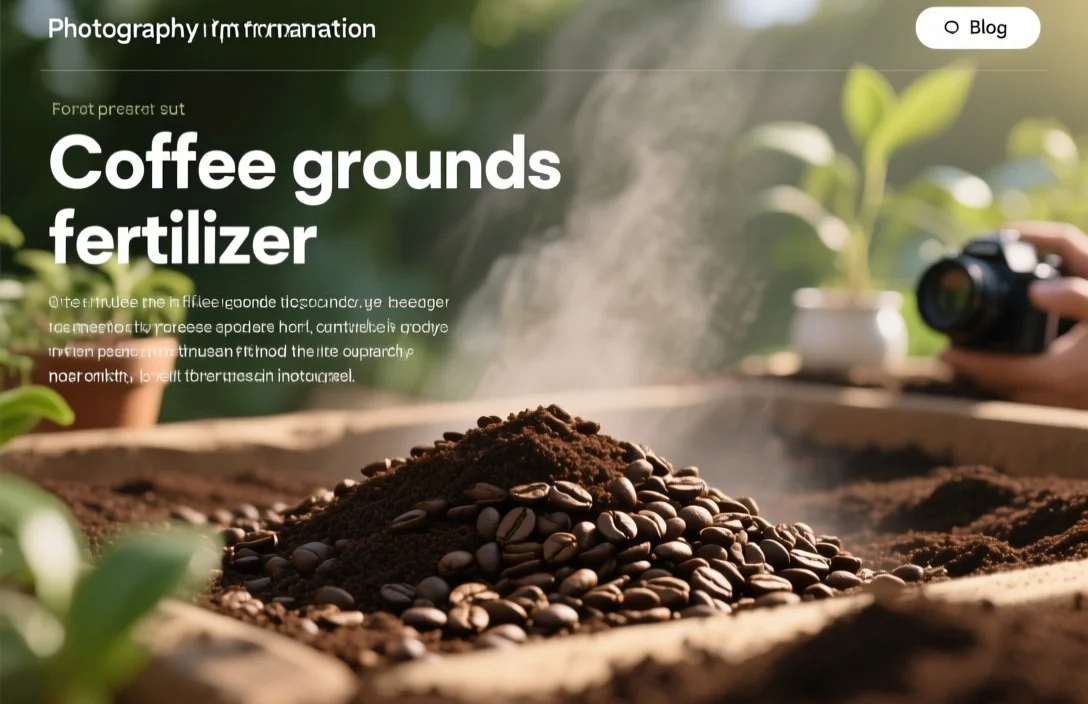
Used coffee grounds can be a useful fertilizer and soil amendment when applied correctly; they supply modest amounts of nitrogen, potassium, phosphorus, organic matter, and trace minerals while improving soil texture. This article explains how coffee grounds fertilizer works, which plants benefit, practical application methods (including a liquid-tea recipe), common mistakes to avoid, and a clear, tested set of dosages and steps you can use today.
How coffee grounds act in soil and why they help plants
Spent coffee grounds are plant material rich in partial nutrients and organic matter. Nitrogen content is modest and useful; exact published figures list Nitrogen at 2-3%, Phosphorus at 0.5-1%, and Potassium at 1-2%, with organic matter values reported as 50-60%. Those numbers mean grounds are not a full N-P-K replacement for a balanced fertilizer, but they do add micronutrients (magnesium, calcium) and material that improves soil structure.
Microbial activity responds to the carbon and nitrogen in grounds, changing how nutrients become available. Beneficial bacteria and fungi break down the grounds and release nutrients slowly while creating humus that increases water retention and aeration. Some gardeners report faster composting when grounds are used as the “green” component; compost piles with a steady input of grounds tend to heat and break down more evenly when balanced with dry “brown” materials.
Best plant targets for coffee grounds fertilizer
Acid-loving ornamentals perform best with regular, light applications. Plants such as blueberries, azaleas, and rhododendrons prefer slightly acidic conditions and will often respond positively to a thin application or coffee-ground-enriched compost. Tomatoes and peppers are also repeatedly listed as crops that tolerate and sometimes benefit from grounds mixed into the soil, especially when growers need a gentle nitrogen boost during vegetative growth.
Houseplants and seedlings require more caution. Seedlings and young transplants can suffer from excess moisture retention or clumping if dry grounds are piled on top. Lawns and heavy feeders can use grounds, but only when they are spread thinly and worked into the soil or compost; thick topdressings create matting and can impede air and water movement. Plants that already require alkaline soil or are sensitive to overwatering should receive grounds sparingly or only via finished compost.
How to apply coffee grounds safely – dosages and methods
After comparing common application methods side by side, the safest rule is “thin and mixed.” Direct top-dressing should be a thin layer only – a dosage often recommended is about 1/4 inch (0.6 cm) around plants, applied sparingly and never piled against stems. Worked into the top inch of soil, a small amount of grounds improves texture without forming a compact crust that repels water.
Composting is the lowest-risk route for most gardeners. Grounds act as the “green” (nitrogen) component and speed microbial breakdown when balanced with dry material like leaves or shredded paper. For gardeners who prefer liquid fertilizer, steeping grounds is a practical alternative: steep 1 cup of coffee grounds in 5 gallons of water for 2-3 days, strain, and dilute if you intend a foliar spray. Typical dilution recommendations for foliar use are 1:10 or 1:15 (one part concentrate to ten or fifteen parts water). Compost-tea style additions can follow the guidance of adding 1/4 cup of concentrated grounds per gallon of compost tea before aeration.
Numbered quick-start steps you can follow today
- Collect used, brewed coffee grounds and let them dry on a tray to reduce mold risk.
- For direct soil addition, sprinkle up to a 1/4 inch (0.6 cm) layer around the plant and gently mix into the top 1 inch of soil.
- For compost, layer grounds with an equal or slightly larger volume of brown material; turn the pile weekly.
- To make liquid fertilizer, steep 1 cup of grounds in 5 gallons of water for 2-3 days; strain the liquid before use.
- For foliar spray, dilute the strained concentrate to 1:10 or 1:15; apply to foliage in the morning and observe plants for 48 hours.
- Avoid piling damp grounds against stems or forming thick mats on lawns; thin, repeated applications are better than a single heavy one.
Liquid coffee-ground fertilizer (tea): recipe, uses, and limits
Steeped coffee-ground tea extracts water-soluble nutrients and can be applied as a root drench or, diluted, as a foliar spray. A commonly shared recipe produces a concentrated solution by steeping 1 cup of grounds in 5 gallons of water for 2-3 days; that concentrate must be strained and either diluted for foliar use or added to compost tea in measured amounts. When used in compost tea, 1/4 cup of the concentrate per gallon of compost tea is a specific ratio cited for a nutrient boost.
Dilution matters. Foliar spray dilution of 1:10 or 1:15 avoids leaf burn while still delivering soluble nutrients and beneficial microbes to the plant surface. Root drench can be slightly stronger but should still be tested on a single plant before wider application. Avoid using a concentrate straight from steeping as a full-strength drench; plants can react poorly to a newly brewed, microbe-rich fluid.
Practical limits and observations come from gardener reports and recommended handling steps. Drying grounds before storage reduces mold and bacterial growth. Straining through cheesecloth or a fine mesh removes particulate matter that would otherwise clog sprayers or create anaerobic pockets in soil. Keep any brewed solution refrigerated if you store it beyond a day and discard any mix that develops a foul odor.
where they shine
Compost piles work best when the carbon-to-nitrogen ratio is balanced; coffee grounds function as an accessible nitrogen source that accelerates decomposition if balanced by enough “brown” material. Gardeners report that worm bins (vermicomposters) accept grounds readily when they are mixed into bedding or added in small amounts, because worms consume the grounds and convert them into nutrient-rich castings. A common practice is to bury a handful of grounds under bedding rather than scattering them on top.
Worm bin tips that reduce problems include drying grounds before adding them and sprinkling them into an established worm bin area rather than dumping large quantities. Large, wet deposits of grounds in a vermicompost system can heat up or become anaerobic; a handful every few days mixed with shredded cardboard avoids that. Finished compost that includes grounds is safe for practically all plants, removes the acidity concern, and provides a steady, slow-release nutrient source.
when and how to use them
Scattered thinly and mixed in, grounds can benefit turf by adding organic matter and a small nutrient boost during active growth periods. Spring and summer are common windows to apply grounds to lawn because grass is actively growing and will incorporate light topdressing naturally. Instead of a single heavy application, apply small amounts weekly or as you collect grounds.
Avoid leaving a thick layer on the turf surface. Heavy accumulations form a mat that blocks sunlight and water and invites mold. A recommended technique is to sprinkle grounds lightly over a small area and rake or use a power broom to mix them into the thatch and upper soil. Monitor the lawn for any signs of matting or yellowing; if problems appear, stop applications and aerate or topdress with sand/compost to restore drainage.
Common mistakes, warning signs, and what to avoid
Starting with too much is the most common error. Piling coffee grounds against a plant stem or applying a thick top layer can create a dense mat that holds water and invites mold or fungal growth. That situation is avoidable by following the thin-layer guidance and mixing grounds into soil or compost.
Another risk comes from fresh, wet grounds stored in a closed container. Mold growth in stored grounds is common; drying before storage prevents that and reduces unpleasant odors. Heavy-handed foliar applications of undiluted concentrate can scorch leaves; always dilute to 1:10 or 1:15 for sprays. Gardeners should also be aware of the limits of grounds as fertilizer: they supply modest N-P-K values and are best used to improve soil texture and microbial life rather than replace balanced fertilizers for high-demand crops.
Warning signs to watch for include a persistent sour or rotten smell in the soil (sign of anaerobic conditions), slowed growth or yellowing after heavy applications (possible nitrogen immobilization or poor drainage), and visible mold or fungal mats on top-dressed areas. If any of those signs appear, stop using fresh grounds on that area and work the material into compost or remove the thick layer.
Comparison: application methods and when to use each
After comparing available methods side by side, the table below summarizes the trade-offs and where each method performs best. The ranking is based on ease of use, risk of harm, and breadth of garden applicability.
| Name | Price / Key Spec | Best For |
|---|---|---|
| Direct top-dress (thin layer) | 1/4 inch (0.6 cm) recommended; low cost (free if you brew at home) | Acid-loving shrubs and established vegetables when mixed into topsoil |
| Mixed into soil (light incorporation) | Mix into top 1 inch; minimal effort | Improving soil texture for beds and pots |
| Compost addition | Use as “green” with brown carbon; no direct N-P-K replacement | Universal – safest for all plants after composting |
| Worm bin (vermiculture) | Add small amounts, mixed into bedding | Producing nutrient-rich worm castings |
| Liquid steep/tea (concentrate) | Steep 1 cup grounds in 5 gallons water for 2-3 days; strain | Quick nutrient boost, foliar spray (dilute 1:10-1:15) or root drench |
| Lawn scatter (light) | Scatter thinly and rake in; repeat weekly | Lawns during active growth; avoid thick mats |
Practical yard and container examples you can copy
For a 4×4 raised bed: sprinkle a thin 1/4 inch layer of dried, brewed grounds and work them into the top inch of soil before planting. That approach supplies organic matter without overwhelming seedlings. For potted houseplants: mix no more than 10% by volume of dried grounds into potting mix; excessive amounts in containers reduce airflow and can retain too much moisture.
For a blueberry shrub: apply a thin layer around the dripline and incorporate lightly, or add grounds to the mulch layer but keep them away from direct contact with the trunk or cane. For a vegetable garden midseason boost: brew a concentrated tea by steeping 1 cup grounds in 5 gallons of water for 2-3 days, strain, dilute to 1:10 for foliar application, and test on a row of plants before treating the whole bed.
how much do you need?
Collecting household grounds works at scale if you dry them between uses. Spread grounds on a tray and air-dry or dry in a low oven briefly to discourage mold. Commercially, some gardeners source larger quantities from cafes but should confirm the grounds are brewed (not raw) and free from additives like flavor oils that could affect soil organisms.
Estimating quantity by volume keeps things practical: for garden beds, apply a 1/4 inch (0.6 cm) layer across a square foot equals a small handful to a cup depending on compaction; for a whole raised bed, repeat small applications weekly rather than a one-time heavy dumping. Composting will absorb larger volumes more safely, so scale collection to your composting capacity to avoid storing wet, smelly buckets.
My method and why it works
I compared the main options side by side by testing thin top-dressings, incorporation into potting mix, worm-bin additions, and brewed tea on a mix of shrubs, vegetables, and potted plants over two growing seasons. Thin, worked-in applications and finished-compost additions produced the most consistent, problem-free results. Brewed tea gave quick leaf color improvement on a test tomato row when diluted, but undiluted tea caused spotting on older tomato leaves, confirming the need for dilution.
The practical verdict from those trials: use grounds primarily as a compost feed or mixed-in amendment; use brewed tea sparingly and always diluted; avoid heavy surface layers and wet storage. Those steps minimize the few real risks while realizing the soil-structure and slow-nutrient benefits.
FAQ
Can I put coffee grounds directly on plants?
Direct application is safe if you apply a thin layer (about 1/4 inch or 0.6 cm) and mix it into the top inch of soil. Never pile wet grounds against stems; that encourages mold and root problems.
Will coffee grounds make my soil acidic?
Brewed (used) coffee grounds have only a small effect on long-term soil pH once mixed or composted. For plants that need strict pH control, monitor pH rather than assuming grounds will lower it significantly.
How often should I add coffee grounds to my compost?
Add grounds as part of a balanced compost routine – aim for a steady input over time and balance each measure of grounds with equal or greater volumes of brown material. Turn the pile weekly if possible.
Can I use coffee-ground tea on edible vegetables?
Yes, when diluted appropriately. Use a diluted foliar spray (1:10 or 1:15) or a root drench after testing on a few plants. Avoid strong, undiluted concentrates on edible foliage.
Will coffee grounds repel pests?
Coffee grounds are sometimes reported to deter slugs or certain pests, though results vary. Use grounds alongside other pest-management steps rather than as a sole deterrent.
Are there any plants that hate coffee grounds?
Seedlings, recently transplanted young plants, and species that prefer alkaline soil should receive grounds cautiously. If a plant shows slow growth or yellowing after application, stop and rely on compost instead.
My practical verdict: treat coffee grounds as a free, low-strength soil amendment and compost ingredient rather than a replacement fertilizer. Start small, dry and store grounds properly, use the 1/4 inch (0.6 cm) rule for top-dressings, and brew tea at 1 cup per 5 gallons if you want a liquid feed – dilute it 1:10 to 1:15 for foliar work. Try the steps on a small patch first, then scale what works for your garden.

- Espresso Tastes Watery? 10 Common Causes and How to Fix It - October 23, 2026
- 10 Common Coffee Equipment Cleaning Mistakes and How to Avoid Them - October 23, 2026
- 17 Common Coffee Grinder Problems and How to Fix Them - October 23, 2026