
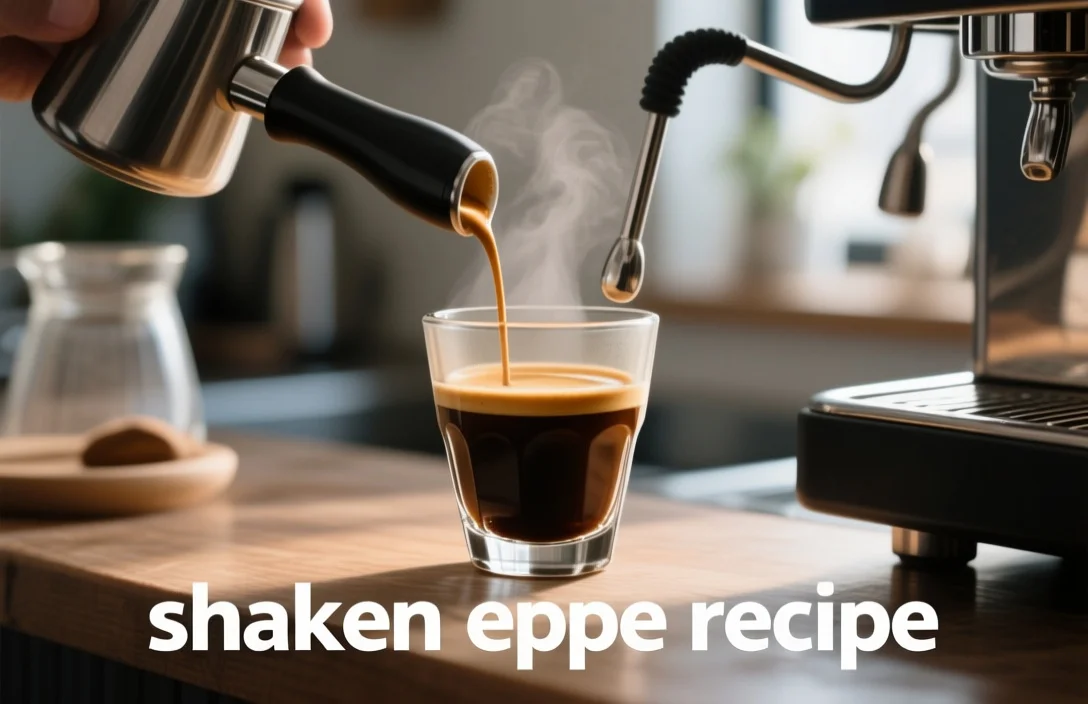
Chilling hot espresso over ice without creating a watery drink requires combining rapid thermal shock with aggressive physical agitation. Forcefully shaking fresh espresso with liquid sweetener and dense ice emulsifies coffee lipids and dissolves sugars, creating a velvety, aerated micro-foam and locking in volatile aromatic compounds before oxidation occurs.
What Is a Shaken Espresso and What to Expect
A shaken espresso is a cold coffee beverage produced by rapidly agitating freshly extracted espresso, liquid sweetener, and ice inside a closed vessel. Unlike iced lattes—which rely on high volumes of milk to temper coffee strength—or cold brews—which extract coffee over long hours at room temperature—a shaken espresso preserves the high-acidity punch and aromatics of hot extraction while delivering an ice-cold, aerated mouthfeel.
The Physics of Aeration and Thermal Shock
When hot espresso (extracted at 90°C to 96°C) makes immediate contact with dense ice inside a metal shaker, the liquid undergoes rapid chilling. This thermal shock prevents the evaporation of volatile aromatic esters that give coffee its floral, fruity, or chocolatey top notes.
Agitating the liquid creates intense mechanical shear forces:
-
Lipid Emulsification: The natural coffee oils present in espresso crema break down into micro-droplets and emulsify with the liquid phase.
-
Air Incorporation: Rapid movement forces air into the liquid matrix, creating millions of microscopic bubbles.
-
Foam Stabilization: Dissolved sugars and surfactant compounds in the espresso wrap around air bubbles, building a stable, crema-like head that sits atop the liquid.
-
Controlled Dilution: Ice contact dilutes the concentrated shot by roughly 15% to 25%, softening sharp bitterness while keeping flavor clarity intact.
How Shaken Espresso Compares to Other Iced Drinks
-
Iced Espresso: Simply pouring hot espresso over ice causes rapid, uneven melting, resulting in a lukewarm, watery bottom layer and flat aromatics.
-
Iced Latte: Composed primarily of cold milk (typically a 1:4 or 1:5 coffee-to-milk ratio), which masks delicate espresso nuances under heavy dairy fat.
-
Cold Brew: Low-acidity, highly steeped beverage that lacks the lively, bright top notes and micro-foam structure generated by hot extraction and agitation.
-
Espresso Shake: An ice-cream-based dessert drink that treats coffee as a syrup flavor rather than the structural centerpiece of the beverage.
Sensory Profile and Textural Expectations
Expect a three-layered visual presentation in a clear glass: a dense, persistent micro-foam cap at the top, a translucent amber mid-section, and fresh ice at the bottom. The first sip delivers a cold, velvety mouthfeel, followed by a crisp, bright acidity and a lingering sweet finish.
Essential Ingredients and Equipment Breakdown
Every component in a shaken espresso serves a functional physical or chemical purpose. Substituting tools or ingredients without accounting for temperature and solubility directly impacts drink quality.
Coffee Extraction Options
-
Espresso Machine Shot: The Gold Standard. Provides 9 bars of extraction pressure, producing emulsified lipids (crema) essential for long-lasting foam. Aim for a double shot (18g dry dose yielding 36g liquid espresso).
-
Moka Pot Concentrate: Stovetop extraction yielding a dark, concentrated coffee (~1:3 or 1:4 ratio). Lacks 9-bar crema but offers enough body to withstand ice dilution.
-
AeroPress Concentration: High-dose brew (20g fine coffee to 60g water at 93°C pushed through a paper filter). Creates a clean, highly concentrated base suitable for shaking.
-
Nespresso Pods: Pull two “OriginalLine” espresso capsules (40ml each) directly into your sweetening cup for sufficient volume and concentration.
Roast Levels and Flavor Alignment
-
Light Roast: Delivers vibrant acidity, lemon, floral, and stone-fruit notes. Pairs best with neutral simple syrup, citrus twists, or tonic water.
-
Medium Roast: Offers balanced milk chocolate, caramel, and balanced fruit acidity. Complements classic simple syrup, vanilla, and oat milk floats.
-
Dark Roast: Characterized by dark chocolate, toasted nuts, and bold roastiness. Cuts through heavy brown sugar syrups, molasses, and whole dairy.
Sweetener Chemistry: Liquid vs. Granulated
Granulated sugar does not dissolve efficiently in cold liquids. Adding raw sugar directly to an ice-filled shaker leaves undissolved granules at the bottom of the glass, creating a gritty mouthfeel and an unsweetened beverage.
-
Simple Syrup (1:1 Ratio): Equal parts dissolved water and white sugar. Integrates instantly into hot or warm espresso.
-
Rich Simple Syrup (2:1 Ratio): Higher sugar concentration adding viscosity to the foam layer without introducing excess water.
-
Brown Sugar Syrup: Simple syrup made with dark brown sugar or demerara sugar. Contains molasses, which enhances caramel notes in darker roast espresso.
-
Honey / Agave Syrup: Must be diluted 2:1 with warm water prior to use; otherwise, cold ice contact causes the honey to seize into stringy clumps.
Ice Mass, Density, and Geometry
-
Large, Dense Cubes (25mm to 50mm): Ideal for shaking. High thermal mass chills hot espresso rapidly while resisting instant shattering and over-dilution.
-
Crushed or Dispenser Ice: Fails rapidly. Micro-fractures cause instant melting upon contact with hot espresso, watering down the drink before aeration occurs.
Hardware Selection
-
Stainless Steel Cocktail Shaker (Tin-on-Tin or Cobbler): Metal possesses high thermal conductivity, transferring cold temperatures instantly to your hands to signal when chilling is complete.
-
Lidded Mason Jar: A workable glass alternative, though glass insulates heat longer, slows the chilling rate, and risks thermal shock cracking if low-quality glass is used.
-
Hawthorne & Fine-Mesh Strainer: Captures ice fragments broken off during shaking, preventing them from diluting the serving glass.
| Component | Preferred Selection | Alternative Option | Impact on Final Beverage |
| Coffee Base | Double Shot Espresso (18g in / 36g out) | Moka Pot / AeroPress Concentrate | Defines beverage intensity, acidity, and lipid foam stability. |
| Sweetener | Liquid Simple Syrup / Brown Sugar Syrup | Agave Syrup (2:1 diluted) | Guarantees complete dissolution without gritty sugar sediment. |
| Ice Supply | Large, Solid Square Cubes | Commercial Bagged Ice Cubes | Controls chill speed and prevents watery over-dilution. |
| Shaker Tool | Stainless Steel Boston Shaker | Heavy-Duty Lidded Glass Jar | Delivers rapid thermal transfer and mechanical aeration shear. |
| Strainer | Fine-Mesh Sieve + Hawthorne Strainer | Standard Shaker Lid Slots | Filters micro-ice chips to maintain velvety foam texture. |
| Top Milk | Oat Milk (Barista Blend) | Whole Milk / Almond Milk | Adds creamy visual contrast without collapsing micro-foam. |
The 7-Step Method: Complete Practical Guide
Process Flow:
Step 1: Extract → Step 2: Dissolve → Step 3: Ice Setup → Step 4: Combine → Step 5: Shake → Step 6: Strain → Step 7: Serve
Step 1: Extract the Hot Espresso Shot
Pull a standard double shot of espresso directly into a pre-warmed demitasse or measuring glass.
-
Dose: 18 grams of finely ground coffee.
-
Yield: 36 grams of liquid espresso.
-
Extraction Time: 25 to 30 seconds.
-
Temperature: 90°C to 94°C.
Ensure your puck prep is uniform to avoid channeling, which creates bitter, under-extracted shots that taste harsh once chilled.
Step 2: Dissolve the Liquid Sweetener
Pour 15ml to 20ml (roughly 1 tablespoon) of liquid sweetener directly into the freshly pulled, hot espresso. Stir vigorously with a spoon for 5 seconds.
Mixing sweetener into hot espresso before ice contact allows the thermal energy to break the viscosity of thick syrups (like brown sugar syrup or honey), bonding the sugars directly with liquid espresso solids and coffee oils.
Step 3: Fill the Shaker with Dense Ice
Fill your stainless steel shaker 60% to 70% full with fresh, dense ice cubes (roughly 150g to 200g of ice).
Do not skimp on ice volume. Using too little ice causes the hot espresso to melt the cubes completely, producing a warm, watery drink. High ice volume ensures instant chilling with minimal total melt water.
Step 4: Combine Hot Sweetened Espresso and Ice
Pour the sweetened espresso directly over the ice inside the shaker. Immediately place the top shaker tin or lid on top and seal it securely with a firm tap from the palm of your hand.
Proceed immediately to Step 5. Leaving hot espresso sitting stagnant on ice without shaking causes localized melting and uneven temperature distribution.
Step 5: Agitate Forcefully
Hold the sealed shaker firmly with both hands (one hand securing the lid, the other supporting the base). Lift the shaker over your shoulder and shake vigorously using long, hard, piston-like strokes for 10 to 15 seconds.
Snap your wrists at the end of each motion to force the ice to smash against the metal walls. This mechanical force forces air into the liquid and breaks down espresso crema into micro-foam.
Step 6: Strain Over Fresh Ice
Unseal the shaker. Fill your serving glass (a clear 12oz tumbler or highball glass) with fresh, solid ice cubes. Place a fine-mesh strainer over the rim of the glass and pour the shaken mixture through it.
Double-straining catches tiny, shattered ice chips created during shaking. Removing these micro-ice fragments keeps your serving glass clear and prevents rapid melting that waters down the drink as you sip.
Step 7: Top with Milk and Serve Immediately
Pour a light splash (30ml to 45ml) of cold oat milk, whole milk, or cream down the inside wall of the glass or over the back of a bar spoon.
Pouring gently along the glass edge allows the milk to settle beneath the foam cap, creating a distinct two-toned visual layer. Serve immediately with a metal or glass straw.
Timing, Temperature, and Sensory Cues
Relying on precise second counts can lead to inconsistent results because home kitchen temperatures, ice sizes, and shaker materials vary. Watch for these physical sensory cues instead.
Tactile Temperature Cues
-
The Frost Line: Watch the outer wall of your metal shaker. Within 8 to 12 seconds of forceful shaking, a layer of condensation will form, followed by a light frost line near the ice level.
-
Hand Sensation: Stop shaking when the metal shaker feels uncomfortably cold to your bare hands. This indicates the internal liquid temperature has dropped below 2°C.
Auditory Cues
-
Rattle Shift: At the start of the shake, you will hear hard, sharp impacts as solid ice cubes strike the metal walls.
-
Dull Thud: As the ice rounds off and dense foam builds, the sound shifts from a high-pitched rattle to a muted, cushioned thud. This acoustic change signals that micro-foam has successfully enveloped the liquid.
Visual Cues
-
Opaque Micro-Foam: When you open the shaker, the liquid should no longer look like clear dark coffee. It should appear uniform, pale amber, and viscous, topped with a dense layer of micro-bubbles.
-
Glass Lacing: As you pour the liquid, the foam should cling slightly to the inner walls of the serving glass, similar to the head on a freshly poured nitro cold brew.
Variations, Riffs, and Large-Batch Preparation
Mastering the core shaking technique allows you to adapt the beverage to seasonal profiles or larger serving sizes.
Brown Sugar Oatmilk Shaken Espresso
The definitive cafe classic.
-
Sweetener: 15ml brown sugar simple syrup (1:1 dark brown sugar to water, simmered with a pinch of cinnamon).
-
Agitation: Shake double espresso shot, brown sugar syrup, and ice per standard method.
-
Finish: Top with 45ml barista-grade oat milk and a faint dusting of ground cinnamon over the foam head.
Citrus & Tonic Sparkling Shaken Espresso
A refreshing summer riff featuring bright acidity and carbonation.
-
Sweetener: 15ml neutral simple syrup + 1 strip of fresh lemon or orange peel placed inside the shaker tin.
-
Agitation: Shake espresso, simple syrup, citrus peel, and ice vigorously.
-
Finish: Strain into a glass containing fresh ice, fill 50% with chilled tonic water, and pour the shaken espresso over top. The tonic carbonation lifts the espresso foam, creating a long-lasting head.
Large-Batch Preparation: The 2-Quart Protocol
Addressing the popular search query “2 quart shaken espresso recipe” requires separating the chilling/sweetening process from the shaking process. You cannot pre-shake a 2-quart batch and store it in the fridge, as the micro-foam structure will collapse back into flat liquid within 20 minutes.
To prepare a 2-quart (1.89-liter) entertaining batch ahead of time:
| Component | Volume / Weight |
| Concentrated Coffee / Espresso | 1,200 ml (approx. 30 double shots) |
| Liquid Simple Syrup | 300 ml |
| Filtered Water (Dilution) | 400 ml |
-
Extract Base: Brew 1,200ml of concentrated coffee (via multiple espresso pulls, concentrated Moka pot brews, or heavy AeroPress extractions).
-
Sweeten While Hot: Stir 300ml of simple syrup into the warm coffee base until fully integrated.
-
Dilute & Chill: Add 400ml of cold filtered water. Seal the container and refrigerate for up to 24 hours.
-
Per-Service Execution: When serving guests, pour 120ml of this chilled, pre-sweetened base into a metal shaker filled with fresh ice. Shake forcefully for 10 seconds to generate fresh micro-foam, strain over ice, and top with milk.
Troubleshooting Common Mistakes
Correcting texture or flavor issues requires isolating physical variables like extraction yield, ice quality, or shaker mechanics.
-
Over-Dilution and Watery Body: Caused by shaking with small, soft ice, or pouring piping-hot espresso over insufficient ice volumes. Increase ice volume in the shaker. Use solid, large-format ice cubes straight from the freezer rather than partially melted ice.
-
Absence of Micro-Foam: Caused by weak shaking force, low-pressure espresso extraction, or oil contamination inside the shaker hardware. Shake with greater wrist snap and force. Thoroughly wash shakers with dish soap to remove residual oil films, which act as anti-foaming agents.
-
Grainy Sugar Sediment: Caused by using granulated white sugar or raw turbinado sugar directly in the cold shaker. Pre-make a liquid simple syrup by dissolving equal parts sugar and boiling water. Always mix syrups into warm espresso prior to adding ice.
-
Suction-Locked Shaker Tin: Rapid cooling creates a vacuum inside metal shaker tins, sealing them shut. Do not pull or twist violently. Tap the side of the metal rim against the heel of your palm right at the seam where the two tins join to break the vacuum seal instantly.
-
Rapid Foam Collapse Upon Topping: Caused by pouring heavy, high-fat dairy (such as heavy whipping cream or half-and-half) directly onto the foam head. Dense dairy fats crush micro-bubbles. Switch to barista-blend oat milk or skim milk, and pour slowly down the inside wall of the glass to let the milk settle under the foam.
Storage, Make-Ahead, and Shelf Life Protocols
Maintaining beverage quality requires understanding how temperature and time affect coffee compounds.
-
Simple Syrups: Store 1:1 simple syrups in clean glass bottles inside the refrigerator. Neutral simple syrup lasts 4 weeks; brown sugar and flavored syrups last 2 to 3 weeks.
-
Pre-Sweetened Espresso Base: Stored in a sealed glass bottle in the refrigerator, un-shaken sweetened espresso base retains acceptable flavor for up to 24 hours. Beyond 24 hours, volatile aromatic compounds degrade, resulting in a stale taste.
-
Pre-Shaken Drinks: Never store a fully shaken drink in the refrigerator. Air bubbles inside the micro-foam coalesce and escape within 15 to 30 minutes, leaving behind flat, diluted liquid coffee. Always shake fresh immediately before serving.
Frequently Asked Questions
Can I make this without an espresso machine?
Yes. A Moka pot, AeroPress, or double-shot Nespresso pod works great. Brew as concentrated as possible so the flavor doesn’t wash out during shaking.
How long does homemade syrup keep?
Standard 1:1 simple syrup lasts 2–4 weeks sealed in the fridge. Store-bought syrups with preservatives usually last 6–12 months.
Why does my foam collapse so fast?
Weak shaking or heavy dairy. Agitate forcefully until the shaker feels frosty cold, and top with lighter milk options—heavy cream crushes the delicate micro-foam.
Does shaking ruin traditional espresso crema?
It transforms it. Agitation whips the coffee oils and liquid sugars into a stable, velvety micro-foam that sits on top of the drink rather than preserving delicate crema.

- Espresso Tastes Watery? 10 Common Causes and How to Fix It - October 23, 2026
- 10 Common Coffee Equipment Cleaning Mistakes and How to Avoid Them - October 23, 2026
- 17 Common Coffee Grinder Problems and How to Fix Them - October 23, 2026