
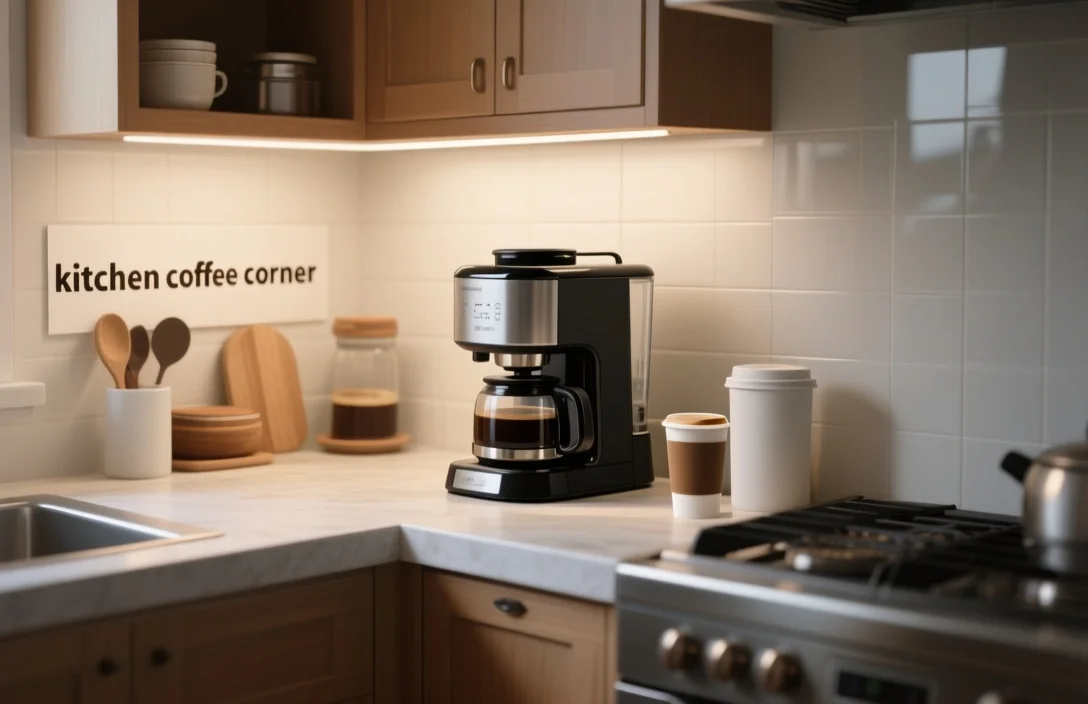
A kitchen coffee corner is a dedicated spot in your kitchen for brewing, storing, and serving coffee. The useful version is simple: keep the machine, grinder, beans, cups, and cleanup tools in one place, then arrange them so the routine feels natural instead of cramped.
What a kitchen coffee corner is, and why it works
A kitchen coffee corner is a compact, intentionally arranged area that holds your coffee maker, grinder, beans, filters, cups, and basic accessories. I would think of it as a small work zone, not a decorative shelf with a machine on it. The point is to keep the steps of making coffee close together and easy to repeat.
That matters more than people expect. When the grinder is in one place, the beans are in another cabinet, and the mugs live across the kitchen, coffee becomes a series of small interruptions. A corner cuts that down. It also makes the space easier to maintain, since you can see what is running low and what needs cleaning.
I also think the separation helps. Wet tasks, such as rinsing and tamping, are easier to manage when they are not mixed into dry storage. If everything is piled together, the setup starts to fight you.
Why build a coffee corner instead of spreading appliances around
A coffee corner reduces friction. The routine becomes linear: grind, brew, pour, clean. That sounds minor, but it is the difference between a setup you use every day and one that slowly turns into countertop clutter.
It also helps with upkeep. When the cleaning tools, filters, and machine live together, you are more likely to descale on time, empty the drip tray, and wipe up spills before they become baked-on residue. My practical rule is this: if a task is annoying to reach, it will happen less often.
There is a visual benefit too. A single coffee zone looks calmer than three separate appliance clusters. That is not a luxury. It is part of why the setup stays usable.
How to choose the right spot in your kitchen
Start with measurements. Counter depth, width, outlet access, and overhead clearance all matter before you buy anything new. A tall espresso machine that fits on paper can still fail in a real kitchen if a cabinet sits too low above it.
I would look first for a spot near an outlet and, if possible, near a sink. That makes brewing and cleanup easier. I would avoid high-traffic areas where someone can bump a hot mug, knock over a carafe, or drag a cord by accident.
One more detail people often skip: avoid placing the corner directly under shelves holding heavy items. That is a poor place for both the machine and your beans. Strong sunlight is also worth thinking about. If you keep beans on the counter, direct light will shorten freshness faster than most people want to admit.
If counter space is tight, a narrow cart, a cabinet shelf, or even a lower cabinet pull-out can work. You are looking for a stable surface, power access, and enough room to move without knocking things over.
Choosing equipment without overbuying
The right equipment depends on your brew method, available space, cleanup tolerance, and whether you need a grinder. I would put the grinder near the top of the list. A good burr grinder does more for taste than most people realize.
Here is a practical comparison of common setup types. Exact retail prices were not found in the available materials, so the price entries below use general ranges instead of current point values.
| Name | Price / Key Spec | Best For |
|---|---|---|
| Drip brewer | Price: entry to higher-end ranges; capacity 4-12 cups; easy cleanup | Households that want consistent, hands-off coffee for several people |
| Single-serve (pod) | Price: budget to premium; minimal cleanup; ongoing pod cost | Users prioritizing speed and low mess; suitable for variety and convenience |
| Manual pour-over | Price: low to moderate; requires kettle and filters; high control | People who enjoy ritual and flavor control; single-serve precision |
| Espresso machine (pump) | Price: wide range; requires grind control and regular maintenance | Espresso lovers and lattes at home; requires space and commitment |
| Bean-to-cup / super-automatic | Price: upper-range; built-in grinder and milk frother options | Daily espresso drinks with minimal manual work; higher maintenance complexity |
| Moka pot / stovetop | Price: low; compact; pressure-based brew | Compact kitchens and stovetop users who want strong coffee without a machine |
Water matters too. Hard water builds scale faster, and temperature affects extraction. If your setup includes a kettle, temperature control is a useful upgrade. If it includes an espresso machine, follow the machine’s temperature settings rather than guessing.
How to lay out the space so it actually works
Before you place anything, map the workflow. I would do this in the order you make coffee, then arrange the tools to match that sequence. Left to right or right to left both work. What matters is that the movement feels natural for your dominant hand.
A useful coffee corner usually has three zones:
- Storage, for beans, filters, and cups
- Brewing, for the machine, kettle, and grinder
- Cleanup, for towels, waste, and rinse tools
Keep the things you use most within easy reach of the machine. If you make milk drinks, keep the frothing pitcher and milk container nearby, but not so close that spills reach electrical parts. Machines should sit on a flat, heat-resistant surface with enough clearance for steam and airflow.
I would also keep the first setup simple. Do not start by filling every inch of the corner. Leave some breathing room so the space can absorb actual use instead of becoming a display.
A simple setup
- Measure the counter depth, width, and overhead clearance.
- Confirm outlet access and plan a power strip if needed.
- Pick your daily brew method and match the equipment to it.
- Choose storage that blocks light and air for beans.
- Use a tray, mat, or small shelf to separate zones.
- Add a towel hook or small bin for used filters and waste.
- Brew one drink and adjust anything that feels awkward.
That last step matters. A layout can look right and still feel clumsy in use. A real brew run will show you where the drawer hits, where steam lands, and whether you are reaching too far for the mug.
What to store, what to hide, and what not to leave out
Beans belong in airtight, opaque containers. If you keep whole bean bags on the counter, use them quickly. I would not treat the counter as long-term storage unless the beans turn over fast.
Filters and paper goods fit better in a drawer, under-shelf bin, or other tucked-away spot. Daily mugs can stay accessible, but specialty cups do not need prime real estate. Keep them higher up if that saves space.
Small tools need a home too. A magnetic strip under a shelf can hold tampers and spoons. A caddy works as well if you want something easier to move. I would also pay attention to cords. A simple organizer behind the machine prevents tangles and keeps the area safer.
How to keep the machine and the coffee tasting right
Maintenance is part of the setup, not an afterthought. Descale according to the manufacturer’s schedule, or sooner if brewing slows down or the taste changes. Espresso machines need regular backflushing with the right cleaning agent. Drip machines need the carafe and grounds area emptied and rinsed after use.
A simple routine works for most households:
- Daily wipe-downs
- Weekly cleaning of removable parts
- Monthly descaling, or as required by the machine
If the coffee starts tasting sour, flat, or stale, do not immediately blame the machine. Check the grind, the water, and the cleanliness of the parts first. Freshness and maintenance often explain more than hardware does.
Lighting, finishes, and the parts people forget
Task lighting makes a difference. Under-cabinet LED strips are useful because they light the work area without heating it up. That is especially helpful in the early morning when you do not want to turn on every light in the kitchen.
For the wall behind the corner, durable materials are the safest choice. Tile, sealed quartz, and stainless steel handle splashes well and are easy to wipe down. A coffee corner gets wet more often than people expect.
Style matters, but I would keep it subordinate to function. Open shelves look pleasant, yet they collect dust and expose beans and filters. Closed storage is more practical for anything that needs to stay fresh. A small framed print, a clock, or a plant that tolerates humidity can add character without getting in the way.
Mistakes that make a coffee corner annoying to use
The biggest mistake is treating the corner like a leftover space instead of a planned one. That usually leads to a machine jammed under a shelf, cords stretched across the counter, and supplies stored wherever they happen to fit.
A few others come up often:
- Putting the machine under a shelf with heavy items above it
- Using unstable extension cords for permanent power
- Buying a machine larger than the routine requires
- Ignoring water access and cleanup needs
- Storing beans in clear jars in direct light
I would also avoid overbuilding. A huge espresso machine looks appealing until it takes over half the counter and needs more maintenance than the household wants to give it.
Space, convenience, and taste: the trade-offs
Small machines save space, but they usually give up some control. Full-size espresso machines can make excellent drinks, but they ask for space, attention, and regular upkeep. Pod machines are convenient, though the ongoing cost and limited control are real trade-offs.
If you want speed and consistency for several cups, a drip brewer or super-automatic machine makes sense. If you care most about flavor and control for one cup at a time, I would lean toward pour-over with a good grinder. The right answer depends less on taste in the abstract and more on what you are willing to clean every day.
Low-budget and small-space ideas
A capable coffee corner does not have to be expensive. A pour-over cone, a compact electric kettle, and a few containers can create a very workable setup. A stovetop Moka pot is another compact option if you want something stronger without a full espresso machine.
For small kitchens, vertical space helps. A narrow floating shelf can hold extra beans or seasonal mugs. A utility cart can turn a tight corner into a mobile station. Magnetic hooks on the side of the cart can hold towels or spoons, and a drawer reclaimed for filters keeps the counter clear.
I would start modestly here. Small kitchens punish unnecessary equipment. The best low-budget setup is usually the one that stays out of the way.
When the layout causes problems
If steam fogs nearby cabinets, add more clearance and use a splash mat beneath the machine. If grounds keep landing on the counter, check grinder settings and portafilter alignment. If coffee tastes flat, look at the grind size, water freshness, and brewing temperature before replacing the machine.
Electrical issues deserve more caution. If a machine trips breakers, test it on a dedicated outlet and bring in an electrician if the problem continues. If cleaning does not fix off-flavors, the machine may need service.
FAQ
How much counter space do I need for a basic coffee corner?
A compact coffee corner can start with an 18-24 inch wide surface for a small brewer and grinder, though the exact space depends on the equipment’s footprint and clearance needs. I would still leave a little extra room for movement and tools.
Should I buy a grinder or use pre-ground coffee?
If you can afford it, a burr grinder is the better choice. Grinding just before brewing usually gives you better freshness and more control. Pre-ground coffee is convenient, but it will not give the same result.
Can I store beans in a canister on the counter?
Yes, if the canister is opaque and airtight and you use the beans fairly quickly. For longer storage, a cool cabinet or pantry is the safer choice.
Do I need filtered water for coffee?
Filtered water can help with taste, especially if your tap water has chlorine or other off-notes. Very hard water also leads to scale buildup faster. If you are unsure about your water, filtration is a reasonable place to start.
How often should I descale an espresso machine?
There is no single schedule that fits every machine. Water hardness and how often you use it both matter. Follow the manufacturer’s guidance, and descale sooner if you notice slower flow, longer heat-up time, or off-flavors.
A practical way to start
Pick the spot first, then measure it. After that, list the tools you use every day, not the ones that only sound useful in theory. I would set the machine, grinder, and bean storage in a temporary layout, make one cup, and see what feels awkward.
That test will usually tell you more than a long shopping list. Once the setup works smoothly, anchor it with a tray or mat so the corner stays organized. A good coffee corner is not elaborate. It is simply arranged in a way that matches the way you already make coffee.

- Rocket R NINE ONE Edizione Speciale: Features and Buying Guide - October 25, 2026
- LUCCA A53 Mini V2 Espresso Machine: Features and Buying Guide - October 25, 2026
- Caffena Coffee Nuova Simonelli Appia Life 2GR Espresso Machine: Features and Buying Guide - October 25, 2026