
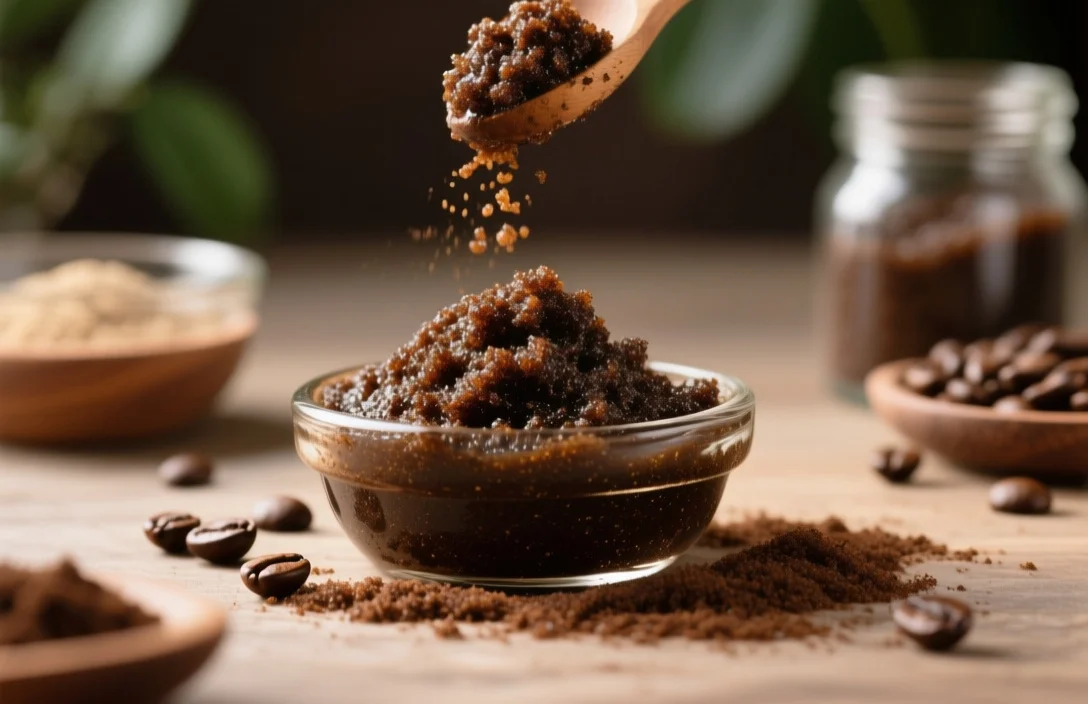
Make a simple coffee scrub recipe at home using spent or fresh coffee grounds, a carrier oil, and a mild binder – ready in minutes. This guide gives exact ingredient ratios, step-by-step method, timing expectations, storage tips, substitutions, and troubleshooting so you can make a usable scrub without guesswork.
What a coffee scrub is and what to expect from it
A coffee scrub is a topical exfoliant made by combining coffee grounds with an oily or granular binder to remove dead skin cells and leave skin feeling smoother. Practical results include mechanical exfoliation from the abrasive grounds and temporary smoothing from the oil; sensory effects such as scent and warmth depend on the roast and added aromatics.
Daily or frequent use is not necessary and can irritate sensitive skin. People with inflamed skin conditions, open wounds, or serious acne should avoid abrasive scrubs until cleared by a clinician. Expect visible dead-skin removal after the first use and gradual softening over multiple uses, but do not treat this recipe as a medical cure for conditions such as eczema, rosacea, or deep scars.
what this recipe delivers and timing
This particular formula aims for a medium-coarse texture that rinses clean, moisturizes mildly, and carries a noticeable coffee aroma. You can mix it and use it immediately; hands-on time is under 10 minutes and rinse-off time is brief.
Expect a single batch to be enough for two to four uses on the body depending on how vigorously you scrub. Skin should feel smoother immediately after rinsing, with residual oiliness disappearing within minutes if you follow the rinse and pat-dry cues below. Avoid leaving residue on porous surfaces such as light-colored shower grout; coffee can stain if allowed to sit.
Ingredients, equipment, and batch yield
This section lists the base recipe and optional add-ins. Read the substitution section before swapping major components.
Core ingredients (makes about 1 cup):
- 1/2 cup fresh or spent coffee grounds (medium-coarse)
- 1/4 cup carrier oil (fractionated coconut oil, sweet almond oil, or jojoba)
- 1/4 cup granulated sugar or fine sea salt (binder for texture and extra polish)
- 1 teaspoon vanilla extract or an essential oil drop (optional; add only if you tolerate fragrance)
Small equipment:
- One medium bowl for mixing
- A small spatula or spoon
- A clean, dry jar with a tight lid for storage
- Measuring cups and spoons
Yield and handling notes:
A single batch produces roughly 1 cup of scrub, enough for the body twice or legs once depending on application thickness. Use a dry scoop when removing scrub from the jar to avoid introducing water, which shortens shelf life. If you prefer a drier scrub, reduce the oil by 25% and increase the dry binder slightly.
Method – numbered steps to make and apply the scrub
Follow these steps exactly for consistent results. Each step begins with a verb.
- Measure the coffee grounds into a bowl. Choose medium-coarse grounds for grip without excessive scratching.
- Add the sugar or salt binder and stir until evenly mixed. Aim for a homogeneous dry blend before wetting.
- Pour in the carrier oil a little at a time while stirring. Stop once the mixture holds together like damp sand and does not drip oil when scooped.
- Mix in fragrance if using, then perform a small patch test behind your wrist to check for irritation.
- Wet skin lightly in the shower and scoop a palmful of scrub. Apply with circular motions, using gentle pressure for sensitive areas and firmer pressure for callused areas like elbows and heels.
- Massage each area for no more than 30-60 seconds to avoid abrasion. Rinse thoroughly with warm water and pat dry with a towel.
- Store the jar in a cool, dry place with the lid closed between uses.
Application tips:
- Use once or twice weekly on the body. Avoid facial use unless you blend a very fine coffee grind with a gentle oil like jojoba.
- For facial applications, dilute the scrub with additional carrier oil and keep massage time under 20 seconds.
- Do not apply to broken or inflamed skin.
Doneness cues and how to tell when your batch is right
A correctly made batch has three clear signals you can check by touch and sight. First, the texture should feel like damp sand: not wet and not powdery. Second, a small scoop pressed in your palm should hold its shape without releasing excess oil. Third, after a quick rinse, your skin should feel smooth but not greasy.
If the mixture sheds oil when stirred, it contains too much carrier oil and will leave a heavy residue on skin and surfaces. Correct by scooping out a tablespoon of oil and adding two to three teaspoons of binder. If the blend crumbles and won’t stick together, add oil by teaspoon increments until it binds. Overly coarse grounds that feel scratchy are a sign you need to mix in more sugar or a finer grind; substitute half the grounds with finely ground coffee or reduce the massage pressure when using the batch.
Visual cues after use matter. A slight sheen on damp skin is normal immediately post-rinse. Persistent buildup that dries into a film indicates excess oil in the formula or inadequate rinsing. If you see staining on your towel or shower tile, rinse those areas promptly and switch to a lighter oil or use less scrub per application next time.
Substitutions and recipe variations (comparison table included)
This section gives practical swaps for grounds, binders, oils, and add-ins and explains the trade-offs for each substitution. The table compares five common variations and when to pick each.
| Name | Key Ingredient / Texture | Best For |
|---|---|---|
| Standard coffee-sugar scrub | Coffee grounds + granulated sugar (medium-coarse) | Balanced exfoliation with mild hydration; most skin types |
| Coffee-salt scrub | Coffee grounds + fine sea salt | Stronger exfoliation and smoothing for rough areas like feet |
| Oil-light coffee scrub | Coffee grounds + less oil + more sugar | People who dislike post-shower greasiness |
| Facial fine-grind scrub | Finely ground coffee + jojoba oil | Gentle facial use for non-sensitive skin |
| Coffee-coconut whipped scrub | Coffee grounds + whipped solid coconut oil | Moisturizing, spreads easily, ideal for dry skin but can clog pores |
Grounds:
- Use medium-coarse grounds for body scrubs to balance grip and comfort. Freshly brewed grounds and spent grounds behave similarly for texture, though spent grounds are often slightly wetter.
- Replace with very fine grounds only for face treatment and reduce physical pressure.
Binders:
- Granulated sugar provides a gentler polish. Sea salt gives more abrasive action and dissolves faster.
- Brown sugar is softer than white sugar and works better on sensitive skin.
Carrier oils:
- Jojoba oil closely resembles skin sebum and is less likely to clog pores.
- Fractionated coconut oil stays liquid and rinses more cleanly than solid coconut oil at room temperature.
- Sweet almond oil is economical and moisturizing but can be problematic for people with nut allergies.
Fragrance and functional add-ins:
- Add a small amount of honey for a humectant effect, but increase storage vigilance because honey raises microbial risk in an oil-containing product.
- Essential oils (lavender, citrus) add scent but test for sensitivity first; use no more than a few drops per batch.
Selection guidance:
Choose a scrub variant based on the target area and skin type. Pick lower oil content and finer particles for faces. Select higher abrasive binders and more oil for feet and elbows. Avoid highly astringent additives on cracked or inflamed skin.
Storage, shelf life, and safety notes
Store your scrub in a cool, dry place with the lid sealed and away from direct sunlight. Avoid introducing water into the jar because moisture promotes microbial growth; use a dry spoon to remove product for each use.
Shelf life for homemade oil-and-ground mixtures varies with the ingredients used and storage conditions. Monitor your jar visually and by smell. Discard the scrub if the scent turns sour, if any mold appears, or if texture changes significantly. Be cautious with additions like honey or fresh citrus juices because they reduce shelf stability and require refrigeration and more frequent use.
Safety points:
- Test the scrub on a small patch behind the ear or on the inside of the forearm; stop use immediately if redness or burning occurs.
- Use reduced pressure and shorter massage time on thin, delicate skin such as the chest, neck, or face.
- Do not use on open wounds or broken skin. Avoid combining vigorous exfoliation with chemical peels or retinoid treatments without professional guidance.
Troubleshooting: common problems and how to fix them
Problem: The scrub leaves an oily film that won’t rinse off.
Fix: Reduce the carrier oil by 20-30% in your next batch and increase binder. Use a mild liquid soap to remove remaining oil from skin and shower surfaces.
Problem: The scrub feels too harsh or causes redness.
Fix: Switch to a finer grind or replace sea salt with sugar. Shorten massage time and target callused areas only. Apply a soothing, fragrance-free moisturizer after rinsing.
Problem: The jar smells off or shows mold.
Fix: Discard immediately. Reassess your preparation routine to ensure utensils and jars are clean and dry. Limit water exposure during use and consider making smaller batches that will be used within a short period.
Problem: Coffee stains on grout or fabric.
Fix: Rinse surfaces promptly with hot water and a mild detergent. For fabric, pretreat with dish soap before laundering. Next time, use a shallow bowl or rinse scrub directly under running water to minimize stray grounds.
Problem: Allergic reaction after adding an essential oil.
Fix: Stop use immediately and rinse the area with water and a gentle cleanser. Consult a clinician if swelling or severe irritation occurs. Keep a list of ingredients you used for any future medical evaluation.
how to adapt the recipe to real routines
Example 1 – Quick morning prep for rough heels:
Mix a small batch using coarse coffee grounds, sea salt, and a higher oil ratio. Apply after a warm bath, scrub firmly on heels for 45 seconds, and rinse. Follow with a thick occlusive moisturizer and cotton socks for overnight repair.
Example 2 – Gentle facial refresh once weekly:
Use finely ground coffee with jojoba oil and a pinch of sugar. Apply with light pressure for 15-20 seconds and rinse with lukewarm water. Pat dry and follow with a lightweight serum.
Example 3 – Post-shave smoothing:
Avoid using coffee scrub directly after shaving sensitive areas. Wait at least 24 hours before exfoliating. Reduce pressure when working near freshly shaved skin to prevent irritation.
Practical storage routine:
Label your jar with the date it was prepared and inspect it before each use. Make single-batch quantities intended to be consumed within a short period instead of large, long-lived jars. Keep backups in the cupboard rather than the shower to reduce moisture exposure.
FAQ
How often can I use a coffee scrub?
Once or twice weekly on the body is a typical guideline. Adjust frequency down if skin becomes red or sensitive, and avoid combining with other exfoliating treatments within the same 48-72 hour window.
Can I use spent coffee grounds from my coffee maker?
Yes. Spent grounds work for texture and fragrance, though they may retain some brewed coffee moisture. Press or dry them briefly on a paper towel before mixing to avoid excess moisture in the jar.
Is it safe to use coffee scrubs on the face?
Face use requires a finer grind and gentler carrier oil such as jojoba. Keep massage short and pressure light. People with very sensitive or acne-prone skin should consult a dermatologist before trying mechanical exfoliation.
Will coffee scrub stain my skin or shower?
Coffee grounds can leave temporary color on wet grout or lighter fabrics if not rinsed promptly. Rinse surfaces immediately after using the scrub and avoid using concentrated piles of grounds directly on porous surfaces.
Can I add honey or yogurt to the scrub?
Yes, but these water-containing ingredients lower shelf-life and increase microbial risk. If you add them, plan to use the batch quickly and store it refrigerated. Discard the mixture at the first sign of spoilage.
How should I dispose of used coffee grounds after rinsing?
Do not pour large volumes down sinks with weak plumbing; instead, collect used grounds in a compost or trash bin. Grounds are excellent for compost but can clog drains if left to accumulate under running water.
This recipe and set of routines help you make a functional, customizable coffee scrub at home with predictable handling and safety practices. Try the base formula once, tweak the oil-to-binder ratio to match how greasy you like your post-shower feel, and write the final ratio on the jar so you can reproduce the same result next time.

- Espresso Tastes Watery? 10 Common Causes and How to Fix It - October 23, 2026
- 10 Common Coffee Equipment Cleaning Mistakes and How to Avoid Them - October 23, 2026
- 17 Common Coffee Grinder Problems and How to Fix Them - October 23, 2026